
Tarte Tatin - Upside-Down Caramel Apple Pie Experience
Tarte Tatin - Upside-Down Caramel Apple Pie Experience
- Serves: 8 People
- Prepare Time: 20 minutes
- Cooking Time: 40 minutes
- Calories: -
- Difficulty: Medium
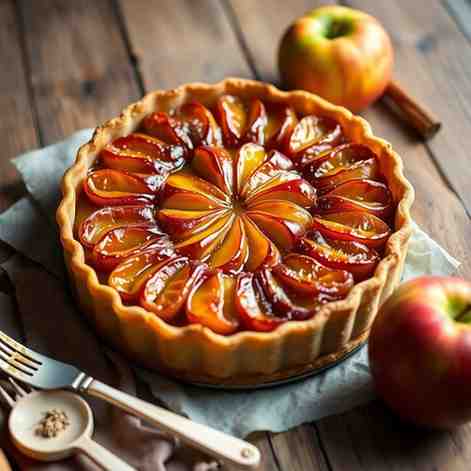
Get ready to transform your kitchen into a French patisserie with our divine Upside-Down Caramelized Apple Tart, famously known as Tarte Tatin! Forget everything you thought you knew about `caramel apple pie` because this isn't your grandma's apple dessert (unless your grandma was French, then maybe it is!). This incredible `fruit tart cake` (but really, it's a tart!) features luscious, bakery-style caramelized apples nestled under a gloriously flaky, golden pastry crust, all flipped out of the skillet for that show-stopping reveal.
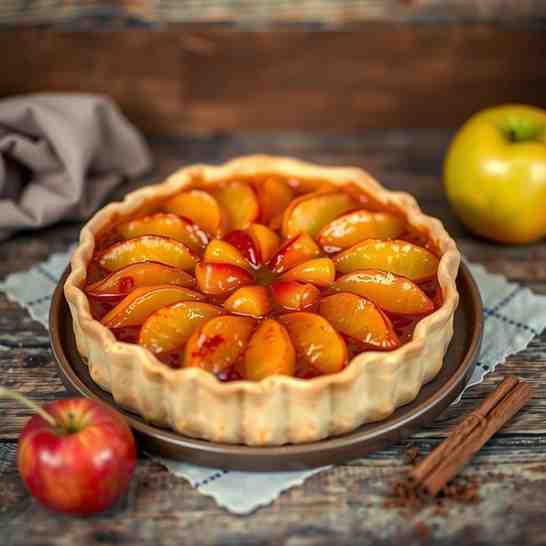
Now, let's clear up one thing right away: while many delicious recipes feature caramelized apples, this is a tart, not a sponge cake. Our Tarte Tatin puts the pastry first, delivering a crisp, buttery base that perfectly complements the soft, sweet apples and deep, rich caramel. It's a true celebration of `fruit pastry desserts`, offering an elegant yet surprisingly achievable baking adventure for everyone. Ready to impress? Let's dive in!
[Jump to Recipe / Print Recipe]
This isn't just another apple dessert; it's an experience designed to delight! Here’s why you’ll fall head over heels for our Upside-Down Caramelized Apple Tart:
Deep Caramel Flavor: We’re talking true, nuanced caramel here, not just melted brown sugar. Our method ensures a rich, complex taste that perfectly coats every apple slice.
Flaky Pastry, Not Soggy: Say goodbye to sad, soggy bottoms! Our technique, including a quick stovetop cook for the apples, guarantees a crisp, buttery pastry that holds its own against the juicy fruit.
Works with Common Grocery-Store Apples: No need for fancy, hard-to-find varieties. We’ll show you how to pick the best apples from your local store for perfect results every time.
Before we start, let's quickly chat about a couple of key players!
Choosing the right apples is crucial for a successful Tarte Tatin. You want apples that are firm and not-too-juicy to prevent a watery tart.
Good choices: Granny Smith (classic tartness), Honeycrisp (firm, sweet-tart), Fuji (crisp, sweet).
Avoid: Red Delicious, Gala, or other very soft, mealy, or overly juicy varieties, as they can break down too much and release too much liquid.
Slice thickness: Aim for slices about 1/4 to 1/3 inch thick. This thickness allows them to soften beautifully without turning to mush and ensures they hold their shape during baking and flipping.
Making caramel can feel intimidating, but we've got you covered with simple cues.
"Grainy is okay at first" vs "crystallized and stuck": When you first start melting the sugar, it might look clumpy or grainy. This is normal! Resist stirring too much. Let the heat do its work. However, if it completely seizes and hardens into a solid, unworkable block, it might be too far gone (see troubleshooting).
What color/smell means it’s ready: You're looking for a beautiful amber to deep copper color. It should smell nutty and rich, not burnt. If it smells like burnt sugar, it probably is, and you’ll need to start over. Don’t push it too dark, or it will taste bitter.
Having the right tools makes all the difference!
10-inch oven-safe skillet (or heavy cake pan): A cast iron skillet is ideal because it conducts and retains heat incredibly well, ensuring even caramelization and baking. If using a cake pan, make sure it’s heavy-bottomed and oven-safe.
Heatproof spatula: Essential for gently swirling caramel and arranging apples.
Pastry brush: Handy for an optional egg wash.
Sharp knife: For precise apple slicing.
Ingredients
Directions
- Prep the apples
- Peel or don't: This is your call! For a smoother texture, peel the apples. For a rustic look and extra fiber, leave the skins on. State your preference clearly.
- Slice thickness target: Core the apples, then slice them evenly about 1/4 to 1/3 inch thick.
- How to keep slices even: A mandoline slicer can help ensure uniform thickness, but a sharp chef's knife and a steady hand work perfectly. Even slices ensure even cooking.
- Make the caramel in the skillet
- Heat level and timing cues: Place the granulated sugar evenly in your 10-inch oven-safe skillet over medium heat. Don't add water!
- Swirl vs stir guidance: Let the sugar melt without stirring. As the edges start to liquefy and turn amber, you can gently swirl the pan to help the melting process. Avoid using a spoon to stir, as this can encourage crystallization.
- Add butter + salt: what it should look like: Once the sugar has melted into a smooth, deep amber caramel (watch it closely, it can burn quickly!), immediately remove from heat. Carefully add the butter cubes and salt. The mixture will bubble vigorously. Stir gently with a heatproof spatula until the butter is fully incorporated and the caramel is smooth. If adding cinnamon, stir it in now.
- Arrange apples + cook off excess moisture
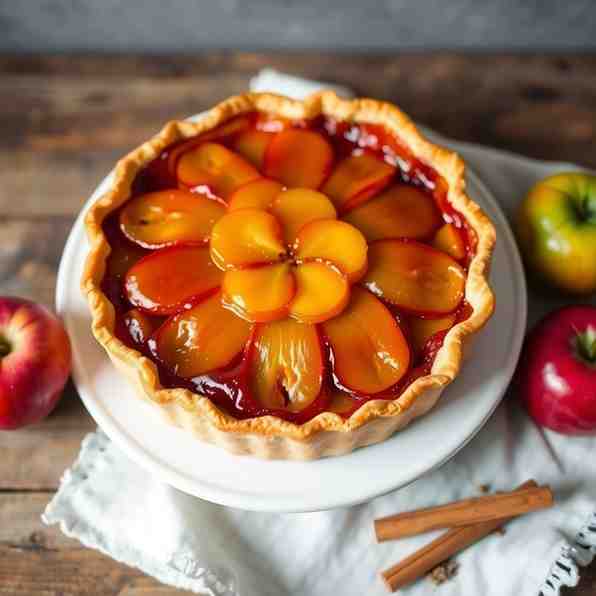
- Tight overlapping pattern: While the caramel is still warm, arrange the apple slices in a tight, overlapping spiral pattern in the skillet, starting from the outside edge and working your way to the center. You want them packed in snugly.
- Quick stovetop cook to soften + reduce juices (key anti-soggy move): Return the skillet to medium-low heat. Cook the apples on the stovetop for about 10-15 minutes, gently pressing down on them occasionally. This step is crucial! It softens the apples slightly and, most importantly, allows excess moisture to cook off, preventing a soggy pastry bottom later. The caramel will bubble around the apples.
- Add the puff pastry
- Roll/trim to fit: On a lightly floured surface, gently unroll your thawed `all butter puff pastry`. If needed, roll it out slightly larger than your skillet (about 11-12 inches in diameter). Use a knife or pastry wheel to trim it into a neat circle.
- Docking slits + tucking edges: Carefully place the puff pastry circle over the cooked apples in the skillet. Press it down gently around the edges, tucking it inside the rim of the skillet, creating a seal. Make a few small slits in the top of the pastry with a knife to allow steam to escape during baking. If desired, brush the top with the egg wash for extra shine.
- Bake
- Oven temp: Preheat your oven to 400°F (200°C).
- Doneness cues: pastry color + bubbling caramel: Bake for 25-30 minutes, or until the puff pastry is deeply golden brown, puffed up, and flaky. You should see the caramel bubbling around the edges of the pastry.
- Flip safely (the moment everyone fears)
- Rest time before flipping: This is key! Once baked, remove the skillet from the oven and let it rest for 5-10 minutes. This allows the caramel to cool slightly and firm up, making it less likely to stick.
- How to protect hands: Place a large, sturdy serving plate (one with a slight rim is best to catch any drips) upside down over the skillet. Using oven mitts or thick kitchen towels to protect your hands, firmly grasp both the skillet handle and the plate.
- What to do if apples stick: In one swift, confident motion, flip the skillet and plate over. Carefully lift the skillet. If any apples stick, don't panic! Gently use a spatula to loosen them and place them back onto the tart. Rearrange any displaced apples to create a beautiful presentation.
Tarte Tatin - Upside-Down Caramel Apple Pie Experience
- Serves: 8 People
- Prepare Time: 20 minutes
- Cooking Time: 40 minutes
- Calories: -
- Difficulty: Medium
Get ready to transform your kitchen into a French patisserie with our divine Upside-Down Caramelized Apple Tart, famously known as Tarte Tatin! Forget everything you thought you knew about `caramel apple pie` because this isn't your grandma's apple dessert (unless your grandma was French, then maybe it is!). This incredible `fruit tart cake` (but really, it's a tart!) features luscious, bakery-style caramelized apples nestled under a gloriously flaky, golden pastry crust, all flipped out of the skillet for that show-stopping reveal.
Now, let's clear up one thing right away: while many delicious recipes feature caramelized apples, this is a tart, not a sponge cake. Our Tarte Tatin puts the pastry first, delivering a crisp, buttery base that perfectly complements the soft, sweet apples and deep, rich caramel. It's a true celebration of `fruit pastry desserts`, offering an elegant yet surprisingly achievable baking adventure for everyone. Ready to impress? Let's dive in!
[Jump to Recipe / Print Recipe]
This isn't just another apple dessert; it's an experience designed to delight! Here’s why you’ll fall head over heels for our Upside-Down Caramelized Apple Tart:
Deep Caramel Flavor: We’re talking true, nuanced caramel here, not just melted brown sugar. Our method ensures a rich, complex taste that perfectly coats every apple slice.
Flaky Pastry, Not Soggy: Say goodbye to sad, soggy bottoms! Our technique, including a quick stovetop cook for the apples, guarantees a crisp, buttery pastry that holds its own against the juicy fruit.
Works with Common Grocery-Store Apples: No need for fancy, hard-to-find varieties. We’ll show you how to pick the best apples from your local store for perfect results every time.
Before we start, let's quickly chat about a couple of key players!
Choosing the right apples is crucial for a successful Tarte Tatin. You want apples that are firm and not-too-juicy to prevent a watery tart.
Good choices: Granny Smith (classic tartness), Honeycrisp (firm, sweet-tart), Fuji (crisp, sweet).
Avoid: Red Delicious, Gala, or other very soft, mealy, or overly juicy varieties, as they can break down too much and release too much liquid.
Slice thickness: Aim for slices about 1/4 to 1/3 inch thick. This thickness allows them to soften beautifully without turning to mush and ensures they hold their shape during baking and flipping.
Making caramel can feel intimidating, but we've got you covered with simple cues.
"Grainy is okay at first" vs "crystallized and stuck": When you first start melting the sugar, it might look clumpy or grainy. This is normal! Resist stirring too much. Let the heat do its work. However, if it completely seizes and hardens into a solid, unworkable block, it might be too far gone (see troubleshooting).
What color/smell means it’s ready: You're looking for a beautiful amber to deep copper color. It should smell nutty and rich, not burnt. If it smells like burnt sugar, it probably is, and you’ll need to start over. Don’t push it too dark, or it will taste bitter.
Having the right tools makes all the difference!
10-inch oven-safe skillet (or heavy cake pan): A cast iron skillet is ideal because it conducts and retains heat incredibly well, ensuring even caramelization and baking. If using a cake pan, make sure it’s heavy-bottomed and oven-safe.
Heatproof spatula: Essential for gently swirling caramel and arranging apples.
Pastry brush: Handy for an optional egg wash.
Sharp knife: For precise apple slicing.
Ingredients
Directions
- Prep the apples
- Peel or don't: This is your call! For a smoother texture, peel the apples. For a rustic look and extra fiber, leave the skins on. State your preference clearly.
- Slice thickness target: Core the apples, then slice them evenly about 1/4 to 1/3 inch thick.
- How to keep slices even: A mandoline slicer can help ensure uniform thickness, but a sharp chef's knife and a steady hand work perfectly. Even slices ensure even cooking.
- Make the caramel in the skillet
- Heat level and timing cues: Place the granulated sugar evenly in your 10-inch oven-safe skillet over medium heat. Don't add water!
- Swirl vs stir guidance: Let the sugar melt without stirring. As the edges start to liquefy and turn amber, you can gently swirl the pan to help the melting process. Avoid using a spoon to stir, as this can encourage crystallization.
- Add butter + salt: what it should look like: Once the sugar has melted into a smooth, deep amber caramel (watch it closely, it can burn quickly!), immediately remove from heat. Carefully add the butter cubes and salt. The mixture will bubble vigorously. Stir gently with a heatproof spatula until the butter is fully incorporated and the caramel is smooth. If adding cinnamon, stir it in now.
- Arrange apples + cook off excess moisture
- Tight overlapping pattern: While the caramel is still warm, arrange the apple slices in a tight, overlapping spiral pattern in the skillet, starting from the outside edge and working your way to the center. You want them packed in snugly.
- Quick stovetop cook to soften + reduce juices (key anti-soggy move): Return the skillet to medium-low heat. Cook the apples on the stovetop for about 10-15 minutes, gently pressing down on them occasionally. This step is crucial! It softens the apples slightly and, most importantly, allows excess moisture to cook off, preventing a soggy pastry bottom later. The caramel will bubble around the apples.
- Add the puff pastry
- Roll/trim to fit: On a lightly floured surface, gently unroll your thawed `all butter puff pastry`. If needed, roll it out slightly larger than your skillet (about 11-12 inches in diameter). Use a knife or pastry wheel to trim it into a neat circle.
- Docking slits + tucking edges: Carefully place the puff pastry circle over the cooked apples in the skillet. Press it down gently around the edges, tucking it inside the rim of the skillet, creating a seal. Make a few small slits in the top of the pastry with a knife to allow steam to escape during baking. If desired, brush the top with the egg wash for extra shine.
- Bake
- Oven temp: Preheat your oven to 400°F (200°C).
- Doneness cues: pastry color + bubbling caramel: Bake for 25-30 minutes, or until the puff pastry is deeply golden brown, puffed up, and flaky. You should see the caramel bubbling around the edges of the pastry.
- Flip safely (the moment everyone fears)
- Rest time before flipping: This is key! Once baked, remove the skillet from the oven and let it rest for 5-10 minutes. This allows the caramel to cool slightly and firm up, making it less likely to stick.
- How to protect hands: Place a large, sturdy serving plate (one with a slight rim is best to catch any drips) upside down over the skillet. Using oven mitts or thick kitchen towels to protect your hands, firmly grasp both the skillet handle and the plate.
- What to do if apples stick: In one swift, confident motion, flip the skillet and plate over. Carefully lift the skillet. If any apples stick, don't panic! Gently use a spatula to loosen them and place them back onto the tart. Rearrange any displaced apples to create a beautiful presentation.
You may also like


Hey there! I’m just someone who seriously loves good food and believes that cooking doesn’t have to be complicated to be amazing. Whether it’s a quick weeknight dinner or a cozy weekend meal, I’m all about sharing easy, tasty recipes that actually work.


