
Traditional Pemmican - Native American Food Recipe
Traditional Pemmican - Native American Food Recipe
- Serves: 8 People
- Prepare Time: 1 hour
- Cooking Time: 12-16 hours
- Calories: -
- Difficulty: Medium
Ever wondered about the ultimate traditional native american food recipes? Look no further than pemmican! This incredible indigenous food recipe isn't just a meal; it's a testament to ingenuity, survival, and a deep connection to the land. For centuries, Native American and First Nations communities, particularly those of the Plains, relied on this high-energy meat snack recipe to sustain them through harsh winters, long journeys, and demanding hunts. It’s a foundational element of native american cuisine recipes and a true traditional food of native american peoples.
In this comprehensive guide, we're diving deep into the art of making pemmican. You'll learn:
What pemmican is and where it comes from, understanding its rich history as a survival food for Indigenous peoples.
Exactly how to make one reliable home-kitchen batch using lean red meat, carefully rendered tallow, and tart berries.
How to safely store, pack, and eat your homemade pemmican for hiking, camping, or emergency preparedness.
While we're exploring this fascinating traditional native american food, it's crucial to acknowledge its roots. Pemmican is an Indigenous food, still made and honored in many communities today. The recipe we share is a modern home-kitchen adaptation, inspired by historical descriptions and contemporary Indigenous culinary experts. We encourage everyone to learn more from Indigenous-run organizations and cookbooks to fully appreciate the depth of this cultural heritage. Get ready to explore one of the most enduring and effective american indian food recipes out there!
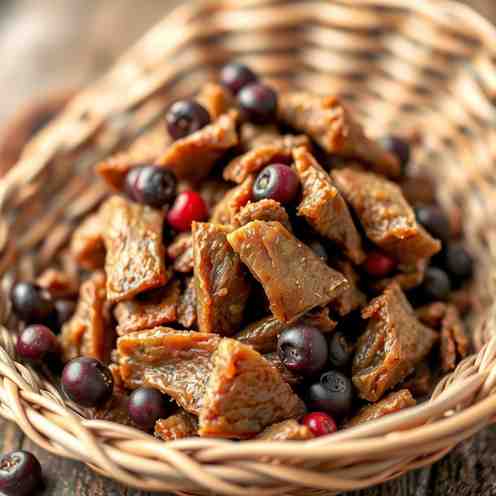
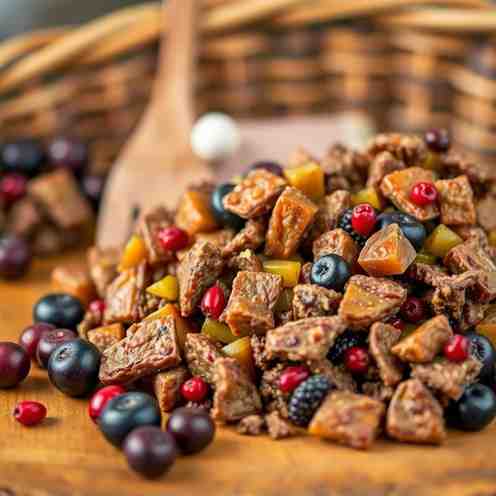
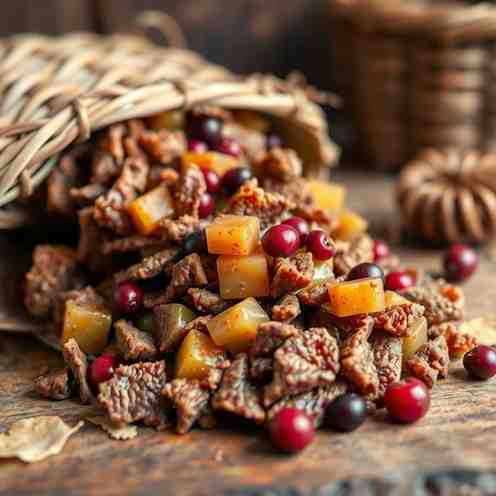
At its heart, pemmican is a super-dense, highly nutritious mixture of dried, powdered lean meat, rendered fat, and often dried berries, all pressed into a compact bar. Think of it as the ultimate original power bar! It's incredibly high-calorie and high-protein, designed for maximum energy and endurance. When made correctly, it boasts an impressive shelf-stability, making it an ideal survival or trail food.
The very word "pemmican" comes from the Cree term pimîhkân, which itself is derived from pimî, meaning "fat" or "grease." Other Indigenous nations have their own names; for example, the Lakota call it wasná, literally translating to “anything ground up.” Pemmican was critically important to Plains First Nations and Métis communities, providing vital sustenance. Its value was so recognized that it became a crucial commodity in the fur trade and supported early European explorers like Mackenzie, Lewis & Clark, and others on their epic journeys across North America.
This is your definitive guide to making one standard, reliable batch of pemmican right in your home kitchen. We'll stick to a classic approach, ensuring a high-quality, shelf-stable product.
Ingredients
Directions
- Slice and Dry the Meat
- Partially freeze your lean meat for 1-2 hours; this makes it much easier to slice thinly.
- Using a sharp knife, slice the partially frozen meat as thinly as possible (about ⅛-inch thick) against the grain. Trim away any remaining visible fat.
- Arrange the sliced meat in a single layer on dehydrator racks or parchment-lined baking sheets, ensuring pieces do not overlap.
- Dry the meat at a low temperature: 145-170°F (63-77°C) in a dehydrator or oven with the door slightly ajar to allow moisture to escape.
- Dry for 8-12 hours, or until the meat is completely brittle and snaps cleanly when bent. It should be "bone-dry" – no chewiness or flexibility.
- Dry the Berries
- Spread your dried tart berries in a single layer on a parchment-lined tray.
- If your berries aren't already bone-dry (many store-bought dried berries are still soft), dry them at a similar low heat (around 145°F / 63°C) until they are completely hard, with no soft or sticky spots. This might take 2-4 hours, depending on their initial dryness.
- Render the Fat
- Cut the beef or bison suet into small, uniform ½-inch cubes.
- Place the suet cubes in a heavy-bottomed pot or Dutch oven over very low heat.
- Gently heat the suet, stirring occasionally, until it completely melts and turns into liquid fat (tallow). This process can take 1-2 hours.
- As the fat renders, solids (cracklings) will form and sink to the bottom. Skim off any floating impurities.
- Crucially, continue to simmer the liquid tallow gently until no more bubbling occurs. This indicates that all the water has boiled off, which is essential for shelf-stability.
- Once rendered and water-free, strain the hot tallow through a fine-mesh sieve lined with cheesecloth into a heatproof bowl. Discard the cracklings (or save for other uses).
- Allow the tallow to cool slightly until it's still liquid but no longer scorching hot (around 120-140°F / 49-60°C).
- Grind Meat and Berries
- Once the dried meat is completely cool and brittle, break it into smaller pieces.
- Working in batches, use a food processor to grind the dried meat into a coarse powder. Alternatively, you can use a clean coffee grinder or a mortar and pestle for a more traditional approach.
- Separately (or together if your equipment handles it well), grind the dried berries into a coarse powder.
- In a large, heavy mixing bowl, combine the powdered meat and berries thoroughly.
- Add Fat and Seasonings
- Slowly pour the warm (not hot!) rendered tallow into the meat-berry mixture, a bit at a time.
- Stir continuously with a sturdy spoon or your hands (wearing gloves) until everything is evenly coated. You're looking for a consistency where the mixture holds together when pressed firmly, like a dense dough. You might not need all the tallow, or you might need a little more, depending on your meat's absorbency.
- Add the salt and any optional seasonings (honey, pepper, herbs). Taste a tiny bit (carefully!) and adjust seasonings as needed.
- Press, Cool, and Portion
- Line a 9x5 inch loaf pan or 8x8 inch square pan with parchment paper, leaving an overhang on the sides for easy lifting.
- Transfer the pemmican mixture into the prepared pan.
- Press the mixture down very firmly with the back of a spoon, a heavy mug, or your hands, ensuring it's compacted into a uniform thickness. The denser, the better.
- Cool the pemmican at room temperature or in the refrigerator until it is completely firm.
- Once firm, use the parchment paper overhang to lift the pemmican block out of the pan.
- Cut it into equal bars or cubes. A good portion size for a high-energy snack is typically around 2 ounces (approx. 56 grams) per bar.
Traditional Pemmican - Native American Food Recipe
- Serves: 8 People
- Prepare Time: 1 hour
- Cooking Time: 12-16 hours
- Calories: -
- Difficulty: Medium
Ever wondered about the ultimate traditional native american food recipes? Look no further than pemmican! This incredible indigenous food recipe isn't just a meal; it's a testament to ingenuity, survival, and a deep connection to the land. For centuries, Native American and First Nations communities, particularly those of the Plains, relied on this high-energy meat snack recipe to sustain them through harsh winters, long journeys, and demanding hunts. It’s a foundational element of native american cuisine recipes and a true traditional food of native american peoples.
In this comprehensive guide, we're diving deep into the art of making pemmican. You'll learn:
What pemmican is and where it comes from, understanding its rich history as a survival food for Indigenous peoples.
Exactly how to make one reliable home-kitchen batch using lean red meat, carefully rendered tallow, and tart berries.
How to safely store, pack, and eat your homemade pemmican for hiking, camping, or emergency preparedness.
While we're exploring this fascinating traditional native american food, it's crucial to acknowledge its roots. Pemmican is an Indigenous food, still made and honored in many communities today. The recipe we share is a modern home-kitchen adaptation, inspired by historical descriptions and contemporary Indigenous culinary experts. We encourage everyone to learn more from Indigenous-run organizations and cookbooks to fully appreciate the depth of this cultural heritage. Get ready to explore one of the most enduring and effective american indian food recipes out there!
At its heart, pemmican is a super-dense, highly nutritious mixture of dried, powdered lean meat, rendered fat, and often dried berries, all pressed into a compact bar. Think of it as the ultimate original power bar! It's incredibly high-calorie and high-protein, designed for maximum energy and endurance. When made correctly, it boasts an impressive shelf-stability, making it an ideal survival or trail food.
The very word "pemmican" comes from the Cree term pimîhkân, which itself is derived from pimî, meaning "fat" or "grease." Other Indigenous nations have their own names; for example, the Lakota call it wasná, literally translating to “anything ground up.” Pemmican was critically important to Plains First Nations and Métis communities, providing vital sustenance. Its value was so recognized that it became a crucial commodity in the fur trade and supported early European explorers like Mackenzie, Lewis & Clark, and others on their epic journeys across North America.
This is your definitive guide to making one standard, reliable batch of pemmican right in your home kitchen. We'll stick to a classic approach, ensuring a high-quality, shelf-stable product.
Ingredients
Directions
- Slice and Dry the Meat
- Partially freeze your lean meat for 1-2 hours; this makes it much easier to slice thinly.
- Using a sharp knife, slice the partially frozen meat as thinly as possible (about ⅛-inch thick) against the grain. Trim away any remaining visible fat.
- Arrange the sliced meat in a single layer on dehydrator racks or parchment-lined baking sheets, ensuring pieces do not overlap.
- Dry the meat at a low temperature: 145-170°F (63-77°C) in a dehydrator or oven with the door slightly ajar to allow moisture to escape.
- Dry for 8-12 hours, or until the meat is completely brittle and snaps cleanly when bent. It should be "bone-dry" – no chewiness or flexibility.
- Dry the Berries
- Spread your dried tart berries in a single layer on a parchment-lined tray.
- If your berries aren't already bone-dry (many store-bought dried berries are still soft), dry them at a similar low heat (around 145°F / 63°C) until they are completely hard, with no soft or sticky spots. This might take 2-4 hours, depending on their initial dryness.
- Render the Fat
- Cut the beef or bison suet into small, uniform ½-inch cubes.
- Place the suet cubes in a heavy-bottomed pot or Dutch oven over very low heat.
- Gently heat the suet, stirring occasionally, until it completely melts and turns into liquid fat (tallow). This process can take 1-2 hours.
- As the fat renders, solids (cracklings) will form and sink to the bottom. Skim off any floating impurities.
- Crucially, continue to simmer the liquid tallow gently until no more bubbling occurs. This indicates that all the water has boiled off, which is essential for shelf-stability.
- Once rendered and water-free, strain the hot tallow through a fine-mesh sieve lined with cheesecloth into a heatproof bowl. Discard the cracklings (or save for other uses).
- Allow the tallow to cool slightly until it's still liquid but no longer scorching hot (around 120-140°F / 49-60°C).
- Grind Meat and Berries
- Once the dried meat is completely cool and brittle, break it into smaller pieces.
- Working in batches, use a food processor to grind the dried meat into a coarse powder. Alternatively, you can use a clean coffee grinder or a mortar and pestle for a more traditional approach.
- Separately (or together if your equipment handles it well), grind the dried berries into a coarse powder.
- In a large, heavy mixing bowl, combine the powdered meat and berries thoroughly.
- Add Fat and Seasonings
- Slowly pour the warm (not hot!) rendered tallow into the meat-berry mixture, a bit at a time.
- Stir continuously with a sturdy spoon or your hands (wearing gloves) until everything is evenly coated. You're looking for a consistency where the mixture holds together when pressed firmly, like a dense dough. You might not need all the tallow, or you might need a little more, depending on your meat's absorbency.
- Add the salt and any optional seasonings (honey, pepper, herbs). Taste a tiny bit (carefully!) and adjust seasonings as needed.
- Press, Cool, and Portion
- Line a 9x5 inch loaf pan or 8x8 inch square pan with parchment paper, leaving an overhang on the sides for easy lifting.
- Transfer the pemmican mixture into the prepared pan.
- Press the mixture down very firmly with the back of a spoon, a heavy mug, or your hands, ensuring it's compacted into a uniform thickness. The denser, the better.
- Cool the pemmican at room temperature or in the refrigerator until it is completely firm.
- Once firm, use the parchment paper overhang to lift the pemmican block out of the pan.
- Cut it into equal bars or cubes. A good portion size for a high-energy snack is typically around 2 ounces (approx. 56 grams) per bar.
You may also like


Hey there! I’m just someone who seriously loves good food and believes that cooking doesn’t have to be complicated to be amazing. Whether it’s a quick weeknight dinner or a cozy weekend meal, I’m all about sharing easy, tasty recipes that actually work.


