Best Cut of Beef for Jerky - Afghan Khoto Recipe
Best Cut of Beef for Jerky - Afghan Khoto Recipe
- Serves: 8 People
- Prepare Time: 30 minutes
- Cooking Time: 3-5 hours
- Calories: -
- Difficulty: Medium
Get ready to embark on a culinary journey to Afghanistan, right from your kitchen! Today, we’re diving into Khoto, a cherished Afghan tradition of dried meat, often referred to as Lahndi or Landi-style jerky. Imagine a deeply savory, garlicky, and subtly tangy dried beef snack, infused with warm spices like coriander and black pepper, and just a hint of mild heat. This isn't your average store-bought jerky; it's a unique dried beef slices experience with a satisfyingly dry-chewy (never crumbly!) texture.
Traditionally, Khoto is made by air-drying meat in cold, harsh climates, but we're bringing you a safe, home-kitchen method to achieve that authentic flavor and texture using your oven. We'll show you exactly how to choose the best cut of beef for jerky, prepare it, and dry it to perfection. Whether you’re a seasoned jerky maker or a beginner looking to try fresh beef jerky at home, this guide will give you the confidence to create a delicious and unique snack.
Flavor: Savory, garlicky, with a warm blend of coriander and black pepper, and a lightly tangy finish.
Texture: Pleasantly dry and chewy, never brittle or crumbly.
Time Commitment: Plan for an overnight marinade (at least 8 hours) followed by a few hours of oven drying.
At its heart, Khoto is Afghanistan's answer to dried meat, a tradition born out of necessity for food preservation in regions with harsh winters. It's similar to other dried meat traditions like Lahndi or Qadeed, where meat is typically salted, seasoned, and then hung to air-dry for weeks or even months. While the traditional method involves specific climate conditions and open-air drying, our recipe offers a controlled, hygienic, and equally delicious way to experience this cultural staple using a regular oven. You'll get all the authentic flavor without the worry!
Ready to make your own homemade beef jerky with an Afghan twist? Let's get started!
[Jump to Recipe](#recipe-card)
Ingredients
Directions
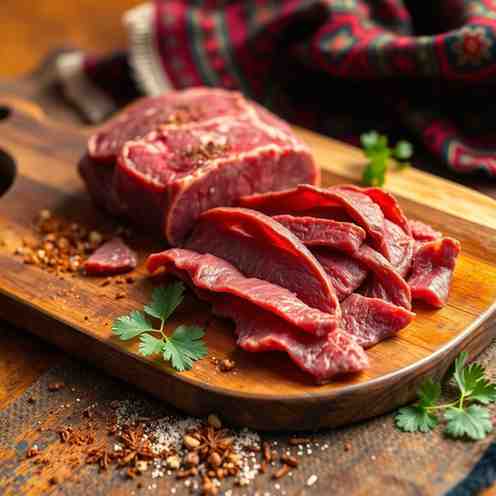
- Prep for Thin SlicingStart by trimming any visible fat or silver skin from your lean round roast. Fat can turn rancid during drying, so get rid of it! For easier, more even slicing, place the beef in the freezer for about 30-60 minutes until it's firm but not frozen solid. This partial freeze helps stabilize the meat.
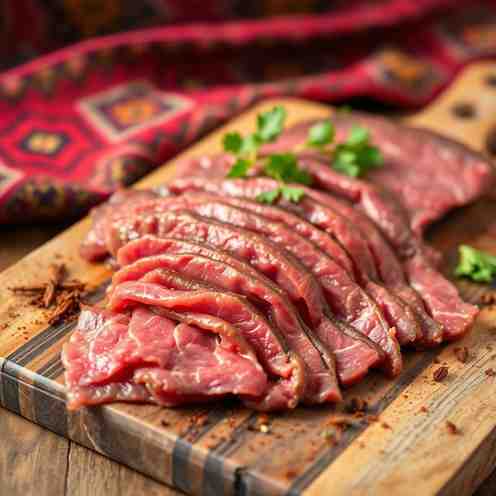
- Slice the BeefRemove the partially frozen beef and slice it against the grain (across the muscle fibers). This results in a more tender, less chewy jerky. Aim for a consistent thickness of about ⅛ to ¼ inch. Thinner slices will dry faster and be crisper, while thicker slices will retain a bit more chew.
- Mix the MarinadeIn a large bowl, whisk together the salt, vinegar or lemon juice, garlic powder, ground coriander, black pepper, and red pepper flakes (and any optional add-ins like hing or soy sauce). Make sure all ingredients are well combined.
- Marinate (Cold Only)Add the sliced beef to the marinade bowl, ensuring each piece is thoroughly coated. You can also use a large, sealable plastic bag. Press out any excess air, seal, and refrigerate for at least 8 hours, or preferably overnight (up to 24 hours). Never marinate meat for jerky on the counter at room temperature; always keep it cold to prevent bacterial growth.
- Drain and Dry the SurfaceOnce marinated, remove the beef from the marinade. You don't need to rinse it. Lay the slices in a single layer on paper towels or a clean kitchen towel and pat them thoroughly dry. This crucial step removes excess moisture from the surface, allowing the meat to dry rather than steam in the oven.
- Heat-Treat + Dry in the OvenPreheat your oven to 275°F (135°C). Arrange the dried beef slices in a single layer on wire racks placed over baking sheets. Ensure there's space between each piece for optimal airflow.
- Quick Heat Step: Bake the jerky at 275°F (135°C) for 10 minutes. This quick burst of heat helps ensure food safety by bringing the meat up to a safe temperature.
- Lower Temp Drying: After 10 minutes, reduce the oven temperature to 170°F (77°C) (or the lowest setting your oven allows, often labeled "warm"). Prop the oven door open slightly with a wooden spoon or heat-safe utensil to allow moisture to escape.
- Dry: Continue drying for 3-5 hours, or until the jerky reaches your desired texture. Start checking for doneness after about 3 hours.
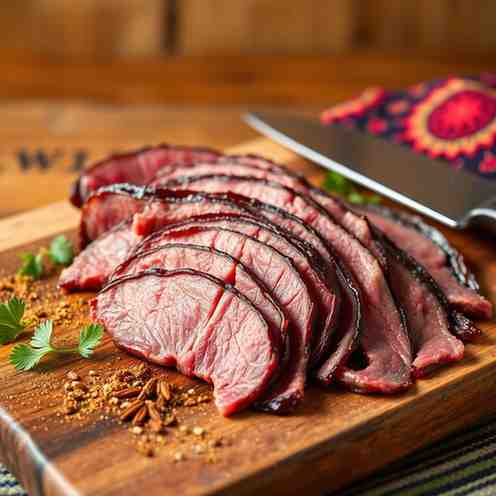
- Test for Doneness (No Guessing)To test for doneness, remove a piece of jerky from the oven and let it cool completely. A properly dried piece of jerky should bend without snapping, but it should crack slightly and show fibrous strands inside. There should be no signs of moisture or stickiness. If it's still too moist or soft, return it to the oven for another 30-60 minutes and re-test.
- Cool + ConditionOnce the jerky is done, turn off the oven and let the jerky cool completely on the wire racks. Once cool, transfer the jerky to an airtight container or a glass jar. For the next 24 hours, "condition" the jerky by shaking the container periodically. This helps distribute any residual moisture evenly among the pieces, preventing surprise mold spots and ensuring consistent texture. If you notice any condensation inside the jar, your jerky might still be too moist and should be returned to the oven for further drying.
Best Cut of Beef for Jerky - Afghan Khoto Recipe
- Serves: 8 People
- Prepare Time: 30 minutes
- Cooking Time: 3-5 hours
- Calories: -
- Difficulty: Medium
Get ready to embark on a culinary journey to Afghanistan, right from your kitchen! Today, we’re diving into Khoto, a cherished Afghan tradition of dried meat, often referred to as Lahndi or Landi-style jerky. Imagine a deeply savory, garlicky, and subtly tangy dried beef snack, infused with warm spices like coriander and black pepper, and just a hint of mild heat. This isn't your average store-bought jerky; it's a unique dried beef slices experience with a satisfyingly dry-chewy (never crumbly!) texture.
Traditionally, Khoto is made by air-drying meat in cold, harsh climates, but we're bringing you a safe, home-kitchen method to achieve that authentic flavor and texture using your oven. We'll show you exactly how to choose the best cut of beef for jerky, prepare it, and dry it to perfection. Whether you’re a seasoned jerky maker or a beginner looking to try fresh beef jerky at home, this guide will give you the confidence to create a delicious and unique snack.
Flavor: Savory, garlicky, with a warm blend of coriander and black pepper, and a lightly tangy finish.
Texture: Pleasantly dry and chewy, never brittle or crumbly.
Time Commitment: Plan for an overnight marinade (at least 8 hours) followed by a few hours of oven drying.
At its heart, Khoto is Afghanistan's answer to dried meat, a tradition born out of necessity for food preservation in regions with harsh winters. It's similar to other dried meat traditions like Lahndi or Qadeed, where meat is typically salted, seasoned, and then hung to air-dry for weeks or even months. While the traditional method involves specific climate conditions and open-air drying, our recipe offers a controlled, hygienic, and equally delicious way to experience this cultural staple using a regular oven. You'll get all the authentic flavor without the worry!
Ready to make your own homemade beef jerky with an Afghan twist? Let's get started!
[Jump to Recipe](#recipe-card)
Ingredients
Directions
- Prep for Thin SlicingStart by trimming any visible fat or silver skin from your lean round roast. Fat can turn rancid during drying, so get rid of it! For easier, more even slicing, place the beef in the freezer for about 30-60 minutes until it's firm but not frozen solid. This partial freeze helps stabilize the meat.
- Slice the BeefRemove the partially frozen beef and slice it against the grain (across the muscle fibers). This results in a more tender, less chewy jerky. Aim for a consistent thickness of about ⅛ to ¼ inch. Thinner slices will dry faster and be crisper, while thicker slices will retain a bit more chew.
- Mix the MarinadeIn a large bowl, whisk together the salt, vinegar or lemon juice, garlic powder, ground coriander, black pepper, and red pepper flakes (and any optional add-ins like hing or soy sauce). Make sure all ingredients are well combined.
- Marinate (Cold Only)Add the sliced beef to the marinade bowl, ensuring each piece is thoroughly coated. You can also use a large, sealable plastic bag. Press out any excess air, seal, and refrigerate for at least 8 hours, or preferably overnight (up to 24 hours). Never marinate meat for jerky on the counter at room temperature; always keep it cold to prevent bacterial growth.
- Drain and Dry the SurfaceOnce marinated, remove the beef from the marinade. You don't need to rinse it. Lay the slices in a single layer on paper towels or a clean kitchen towel and pat them thoroughly dry. This crucial step removes excess moisture from the surface, allowing the meat to dry rather than steam in the oven.
- Heat-Treat + Dry in the OvenPreheat your oven to 275°F (135°C). Arrange the dried beef slices in a single layer on wire racks placed over baking sheets. Ensure there's space between each piece for optimal airflow.
- Quick Heat Step: Bake the jerky at 275°F (135°C) for 10 minutes. This quick burst of heat helps ensure food safety by bringing the meat up to a safe temperature.
- Lower Temp Drying: After 10 minutes, reduce the oven temperature to 170°F (77°C) (or the lowest setting your oven allows, often labeled "warm"). Prop the oven door open slightly with a wooden spoon or heat-safe utensil to allow moisture to escape.
- Dry: Continue drying for 3-5 hours, or until the jerky reaches your desired texture. Start checking for doneness after about 3 hours.
- Test for Doneness (No Guessing)To test for doneness, remove a piece of jerky from the oven and let it cool completely. A properly dried piece of jerky should bend without snapping, but it should crack slightly and show fibrous strands inside. There should be no signs of moisture or stickiness. If it's still too moist or soft, return it to the oven for another 30-60 minutes and re-test.
- Cool + ConditionOnce the jerky is done, turn off the oven and let the jerky cool completely on the wire racks. Once cool, transfer the jerky to an airtight container or a glass jar. For the next 24 hours, "condition" the jerky by shaking the container periodically. This helps distribute any residual moisture evenly among the pieces, preventing surprise mold spots and ensuring consistent texture. If you notice any condensation inside the jar, your jerky might still be too moist and should be returned to the oven for further drying.
You may also like


Hey there! I’m just someone who seriously loves good food and believes that cooking doesn’t have to be complicated to be amazing. Whether it’s a quick weeknight dinner or a cozy weekend meal, I’m all about sharing easy, tasty recipes that actually work.