Homemade Kosovo Pita Bread - Easy Recipe
Homemade Kosovo Pita Bread - Easy Recipe
- Serves: 8 People
- Prepare Time: 25 minutes
- Cooking Time: 20 minutes
- Calories: -
- Difficulty: Easy
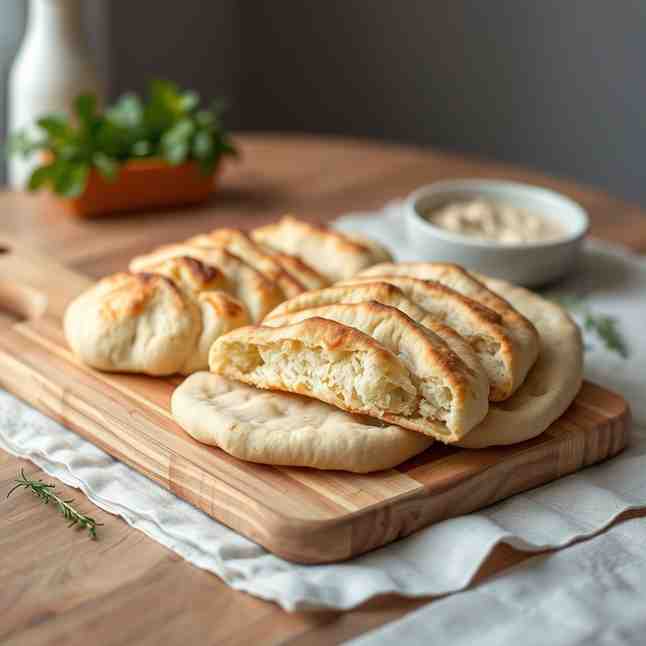
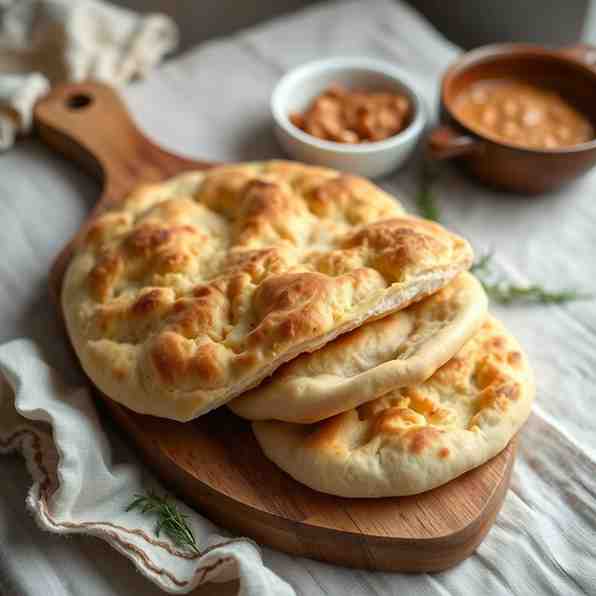
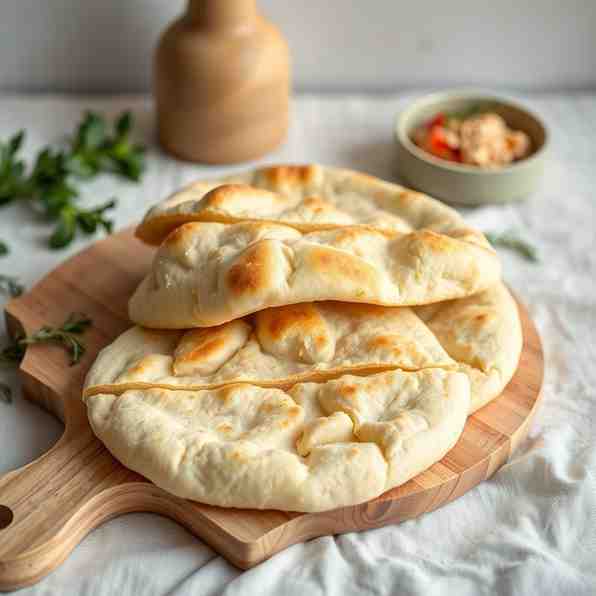
Craving a truly authentic, home baked bread recipe that's both simple to make and incredibly rewarding? Look no further than Kosovo Pitalke (Pitajkë)! This traditional flatbread from the Prizren region of Kosovo is a culinary staple, known for its soft, pillowy texture and incredible versatility. Similar to a pita or somun-style bread, our recipe guides you through creating beautiful, pocket-friendly breads right in your own kitchen. Whether you're a seasoned baker looking for new international food recipes or a beginner eager to learn bread making dough from scratch, this recipe is designed for reliable results in a standard US home oven. Get ready to enjoy warm, homemade pita, perfect for stuffing, dipping, or simply savoring on its own!
Ingredients
Directions
- Wake Up the Yeast In a large bowl, combine your warm water and sugar. Sprinkle the active dry yeast over the top and give it a gentle stir. Let it sit for 5-10 minutes. You'll know it's "frothy" when a foamy layer appears on the surface, indicating the yeast is alive and active. If nothing happens, your water might have been too cold or too hot, or your yeast might be old. Start again with fresh yeast!
- Mix + Knead the Dough
- Once your yeast is frothy, add the salt and oil to the bowl. Gradually add the flour, mixing with a wooden spoon or your hands until a shaggy dough forms.
- By Hand: Turn the dough out onto a lightly floured surface. Knead for 8-10 minutes until the dough is soft, smooth, and slightly tacky (it shouldn't stick aggressively to your hands).
- With a Stand Mixer: Use the dough hook attachment. Mix on low speed for 6-8 minutes until the dough pulls away from the sides of the bowl and is soft, smooth, and slightly tacky.
- Adjusting: If the dough is too sticky, add flour a teaspoon at a time. If it's too dry, add water a teaspoon at a time. The goal is a supple, elastic dough.
- First Rise Lightly grease a clean bowl with a little oil. Place the dough in the bowl, turning it once to coat. Cover the bowl tightly with plastic wrap or a clean kitchen towel. Let it rise in a warm, draft-free place for 60-90 minutes, or until it has doubled in size. You'll know it's ready when you gently poke it with a floured finger, and the indentation remains.
- Divide + Shape Gently punch down the risen dough to release the air. Turn it out onto a lightly floured surface. Divide the dough into 8-10 equal pieces. For best puffing, aim for pieces around 70-80 grams each. Roll each piece into a smooth ball.
- Using a rolling pin, flatten each ball into a round disc, about 6-7 inches (15-18 cm) in diameter and about 1/8 to 1/4 inch thick. Try to keep them as even as possible for consistent puffing.
- Rest After Shaping Arrange the shaped pita rounds on lightly flfloured parchment paper or baking sheets. Cover them loosely with a clean kitchen towel. Let them rest for another 15-20 minutes. This crucial rest allows the gluten to relax, which is key for the pita to puff up beautifully instead of tearing in the oven.
- Preheat Your Baking Surface While the pita rests, preheat your oven to its highest setting (usually 500-550°F / 260-290°C) with your pizza steel, stone, cast iron skillet, or inverted baking sheet inside. Let it preheat for at least 30-45 minutes (even up to an hour for a stone/steel) to ensure it's truly scorching hot. This intense heat is essential for instant puffing.
- Bake (The One Method)
- Carefully transfer one or two pita rounds directly onto the preheated baking surface. If using parchment, you can slide the parchment right onto the hot surface, then gently pull it out after a minute.
- Spritz (Optional): Immediately after placing the pita in the oven, you can quickly spritz the inside of the oven with water from your spray bottle to create steam. Close the oven door quickly to trap the steam.
- Bake Time: Bake for 2-4 minutes, or until the pita puffs up like a balloon and has light golden-brown spots. It should be cooked through but still soft. Don't overbake, or it will become dry and crispy.
- Fast Load/Unload: Work quickly to minimize heat loss from the oven.
- Cool + Keep Soft As soon as the pita is baked, transfer it to a plate and immediately cover it with a clean kitchen towel. Stack subsequent baked pitas on top, keeping them covered. This "towel stack method" traps steam, keeping the pita soft and pliable. Once slightly cooled, you can gently slice them open to reveal the pocket.
Homemade Kosovo Pita Bread - Easy Recipe
- Serves: 8 People
- Prepare Time: 25 minutes
- Cooking Time: 20 minutes
- Calories: -
- Difficulty: Easy
Craving a truly authentic, home baked bread recipe that's both simple to make and incredibly rewarding? Look no further than Kosovo Pitalke (Pitajkë)! This traditional flatbread from the Prizren region of Kosovo is a culinary staple, known for its soft, pillowy texture and incredible versatility. Similar to a pita or somun-style bread, our recipe guides you through creating beautiful, pocket-friendly breads right in your own kitchen. Whether you're a seasoned baker looking for new international food recipes or a beginner eager to learn bread making dough from scratch, this recipe is designed for reliable results in a standard US home oven. Get ready to enjoy warm, homemade pita, perfect for stuffing, dipping, or simply savoring on its own!
Ingredients
Directions
- Wake Up the Yeast In a large bowl, combine your warm water and sugar. Sprinkle the active dry yeast over the top and give it a gentle stir. Let it sit for 5-10 minutes. You'll know it's "frothy" when a foamy layer appears on the surface, indicating the yeast is alive and active. If nothing happens, your water might have been too cold or too hot, or your yeast might be old. Start again with fresh yeast!
- Mix + Knead the Dough
- Once your yeast is frothy, add the salt and oil to the bowl. Gradually add the flour, mixing with a wooden spoon or your hands until a shaggy dough forms.
- By Hand: Turn the dough out onto a lightly floured surface. Knead for 8-10 minutes until the dough is soft, smooth, and slightly tacky (it shouldn't stick aggressively to your hands).
- With a Stand Mixer: Use the dough hook attachment. Mix on low speed for 6-8 minutes until the dough pulls away from the sides of the bowl and is soft, smooth, and slightly tacky.
- Adjusting: If the dough is too sticky, add flour a teaspoon at a time. If it's too dry, add water a teaspoon at a time. The goal is a supple, elastic dough.
- First Rise Lightly grease a clean bowl with a little oil. Place the dough in the bowl, turning it once to coat. Cover the bowl tightly with plastic wrap or a clean kitchen towel. Let it rise in a warm, draft-free place for 60-90 minutes, or until it has doubled in size. You'll know it's ready when you gently poke it with a floured finger, and the indentation remains.
- Divide + Shape Gently punch down the risen dough to release the air. Turn it out onto a lightly floured surface. Divide the dough into 8-10 equal pieces. For best puffing, aim for pieces around 70-80 grams each. Roll each piece into a smooth ball.
- Using a rolling pin, flatten each ball into a round disc, about 6-7 inches (15-18 cm) in diameter and about 1/8 to 1/4 inch thick. Try to keep them as even as possible for consistent puffing.
- Rest After Shaping Arrange the shaped pita rounds on lightly flfloured parchment paper or baking sheets. Cover them loosely with a clean kitchen towel. Let them rest for another 15-20 minutes. This crucial rest allows the gluten to relax, which is key for the pita to puff up beautifully instead of tearing in the oven.
- Preheat Your Baking Surface While the pita rests, preheat your oven to its highest setting (usually 500-550°F / 260-290°C) with your pizza steel, stone, cast iron skillet, or inverted baking sheet inside. Let it preheat for at least 30-45 minutes (even up to an hour for a stone/steel) to ensure it's truly scorching hot. This intense heat is essential for instant puffing.
- Bake (The One Method)
- Carefully transfer one or two pita rounds directly onto the preheated baking surface. If using parchment, you can slide the parchment right onto the hot surface, then gently pull it out after a minute.
- Spritz (Optional): Immediately after placing the pita in the oven, you can quickly spritz the inside of the oven with water from your spray bottle to create steam. Close the oven door quickly to trap the steam.
- Bake Time: Bake for 2-4 minutes, or until the pita puffs up like a balloon and has light golden-brown spots. It should be cooked through but still soft. Don't overbake, or it will become dry and crispy.
- Fast Load/Unload: Work quickly to minimize heat loss from the oven.
- Cool + Keep Soft As soon as the pita is baked, transfer it to a plate and immediately cover it with a clean kitchen towel. Stack subsequent baked pitas on top, keeping them covered. This "towel stack method" traps steam, keeping the pita soft and pliable. Once slightly cooled, you can gently slice them open to reveal the pocket.
You may also like


Hey there! I’m just someone who seriously loves good food and believes that cooking doesn’t have to be complicated to be amazing. Whether it’s a quick weeknight dinner or a cozy weekend meal, I’m all about sharing easy, tasty recipes that actually work.