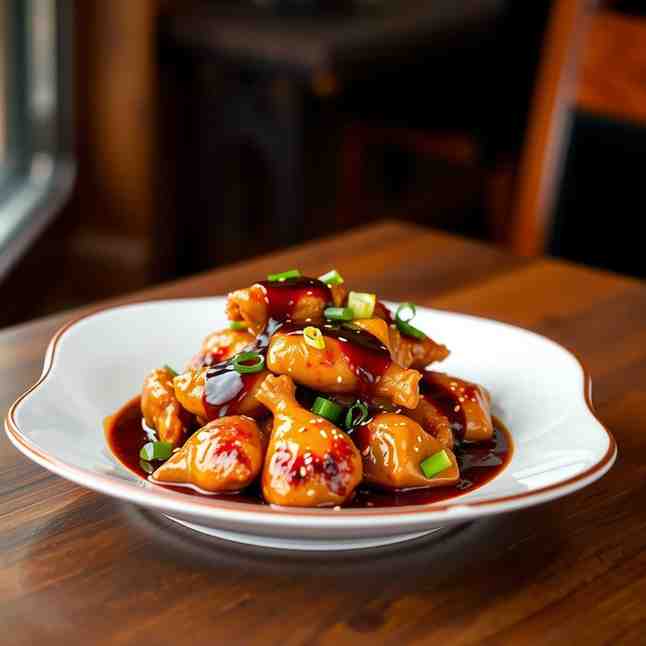
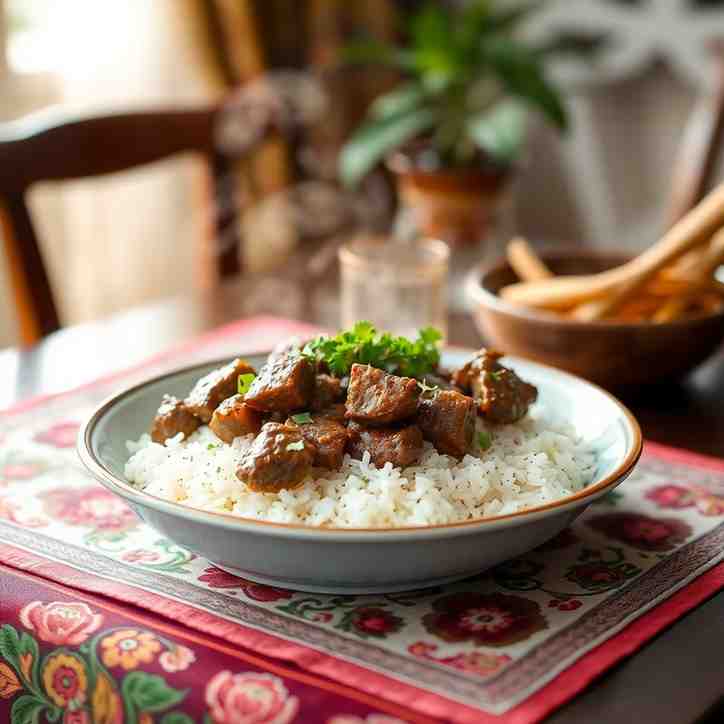
Hong Kong Soy Sauce Chicken - Chinese Sauce for Chicken
Hong Kong Soy Sauce Chicken - Chinese Sauce for Chicken
- Serves: 4 People
- Prepare Time: 20 minutes
- Cooking Time: 40 minutes
- Calories: -
- Difficulty: Medium
Craving that tender, flavorful chicken you find in traditional Cantonese BBQ shops? Our Authentic Hong Kong Soy Sauce Chicken (豉油雞) recipe brings that delicious experience right to your kitchen! This isn't just any chinese sauce for chicken; it's a culinary journey of savory-sweet notes, warm spices like star anise, and a delightful ginger-forward aroma that perfectly infuses juicy chicken. It’s an incredibly rewarding dish that, once mastered, will become a staple for easy weeknight dinners or impressive gatherings. Perfect for both beginners and experienced bakers looking to explore chinese dishes to cook at home, this recipe promises a tasty sauce for chicken that pairs wonderfully with rice.
Jump to Recipe
Prep Time: 20 minutes
Cook Time: 40 minutes
Total Time: 60 minutes
Servings: 4-6 people
Flavor Profile: Savory-sweet, warm spice, ginger-forward
Best Chicken Cuts: Bone-in, skin-on thighs or leg quarters
Ingredients
Directions
- Equipment You'll Need:
- A wide pot or Dutch oven (large enough to hold chicken in a single layer)
- Tongs
- Instant-read thermometer
- Optional: Large bowl for an ice bath
- Prep the Chicken for Perfection
- Pat your chicken pieces thoroughly dry with paper towels. This crucial step helps the skin stay intact and prevents it from tearing during cooking, giving you that coveted smooth finish.
- For an extra flavor boost and slightly tighter skin, you can optionally give the chicken a quick salt rest (sprinkle lightly with salt and let sit for 15 minutes before patting dry again).
- Build Your Aromatic Soy Braising Liquid
- In your wide pot or Dutch oven, add a tablespoon of neutral oil (like vegetable or canola) over medium heat.
- Gently fry the sliced ginger, chopped scallions, and star anise (plus optional bay leaf/cinnamon stick) for 2-3 minutes until fragrant. You want to awaken their aromas, not brown them.
- Pour in the light soy sauce, dark soy sauce, Shaoxing wine (if using), sugar, and water. Stir until the sugar dissolves.
- Bring the liquid to a boil, then immediately reduce the heat to a bare simmer. The liquid should be gently bubbling, not vigorously boiling.
- Cook Gently, Flip Once, Then Steep
- Carefully place the chicken pieces into the simmering liquid, skin-side down, ensuring they are in a single layer. Add more water if needed to mostly cover the chicken.
- Simmer gently for 15-20 minutes, maintaining a very low bubble.
- Using tongs, gently flip each chicken piece over to skin-side up. Continue to simmer for another 10-15 minutes, or until an instant-read thermometer inserted into the thickest part of the thigh (avoiding bone) reads 165°F (74°C).
- Once cooked through, turn off the heat.
- This is key! Let the chicken steep in the warm braising liquid for another 10-15 minutes. This brief steeping period allows the chicken to absorb more flavor and achieve a deeper, more even color without overcooking.
- Optional (But Recommended) Skin-Tightening Step
- For that perfectly tight, shiny skin seen in professional shops, you have a couple of options:
- Ice Bath Dip: Carefully transfer the cooked chicken pieces to a large bowl of ice water for 30-60 seconds. This shock helps contract the skin. Immediately remove and pat dry.
- Brief Cool-Down: Alternatively, simply remove the chicken from the braising liquid and let it rest on a wire rack for 5-10 minutes. The goal is tight, glistening skin, not to make the chicken cold.
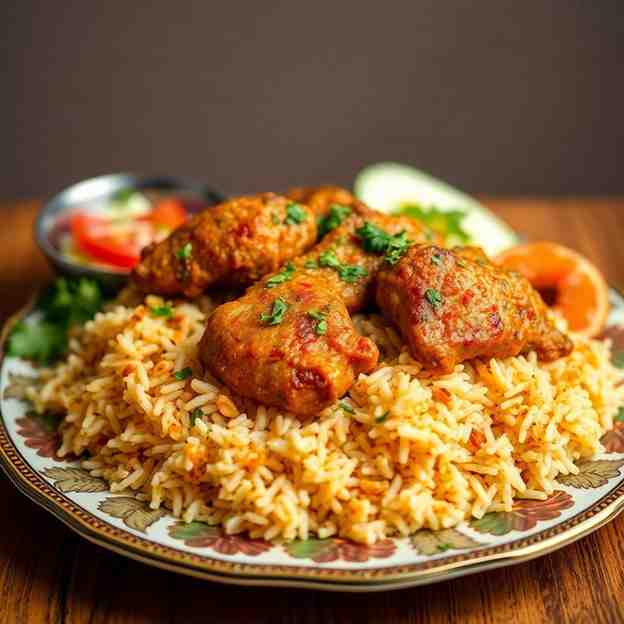
- Slice and Serve Like a Cantonese Shop
- Once the chicken has rested (and cooled slightly if using the ice bath), place it on a cutting board.
- Using a sharp knife, slice the chicken cleanly into serving pieces. For bone-in cuts, you can separate the drumstick from the thigh, or carefully slice around the bone. The trick is to slice decisively to avoid shredding the skin.
- Arrange the sliced chicken on a serving platter and spoon a little of the delicious braising sauce over the top.
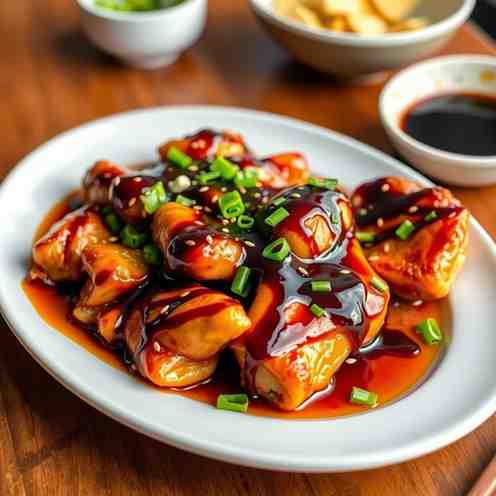
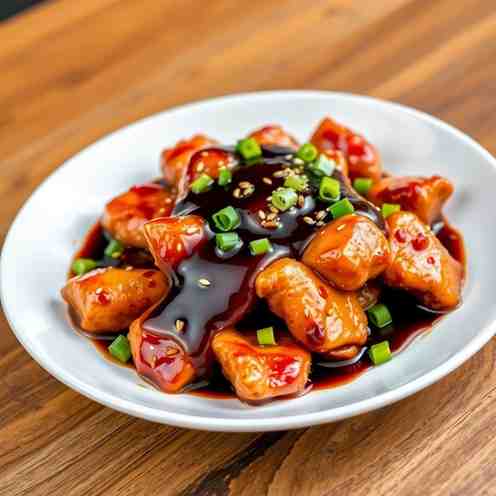
- Make the Glossy Finishing Sauce
- While the chicken rests, retrieve about 1-1.5 cups of the braising liquid from the pot.
- Bring this portion to a simmer in a small saucepan.
- In a separate small bowl, whisk together the cornstarch and cold water to create a smooth slurry.
- Slowly pour the slurry into the simmering sauce, whisking constantly until it thickens to a glossy, pourable consistency. You want it thick enough to coat a spoon, but not gummy or overly thick. Start with half the slurry and add more if needed.
- Serve this glossy sauce alongside or drizzled over your chicken. Garnish with fresh sliced scallions if desired.
Hong Kong Soy Sauce Chicken - Chinese Sauce for Chicken
- Serves: 4 People
- Prepare Time: 20 minutes
- Cooking Time: 40 minutes
- Calories: -
- Difficulty: Medium
Craving that tender, flavorful chicken you find in traditional Cantonese BBQ shops? Our Authentic Hong Kong Soy Sauce Chicken (豉油雞) recipe brings that delicious experience right to your kitchen! This isn't just any chinese sauce for chicken; it's a culinary journey of savory-sweet notes, warm spices like star anise, and a delightful ginger-forward aroma that perfectly infuses juicy chicken. It’s an incredibly rewarding dish that, once mastered, will become a staple for easy weeknight dinners or impressive gatherings. Perfect for both beginners and experienced bakers looking to explore chinese dishes to cook at home, this recipe promises a tasty sauce for chicken that pairs wonderfully with rice.
Jump to Recipe
Prep Time: 20 minutes
Cook Time: 40 minutes
Total Time: 60 minutes
Servings: 4-6 people
Flavor Profile: Savory-sweet, warm spice, ginger-forward
Best Chicken Cuts: Bone-in, skin-on thighs or leg quarters
Ingredients
Directions
- Equipment You'll Need:
- A wide pot or Dutch oven (large enough to hold chicken in a single layer)
- Tongs
- Instant-read thermometer
- Optional: Large bowl for an ice bath
- Prep the Chicken for Perfection
- Pat your chicken pieces thoroughly dry with paper towels. This crucial step helps the skin stay intact and prevents it from tearing during cooking, giving you that coveted smooth finish.
- For an extra flavor boost and slightly tighter skin, you can optionally give the chicken a quick salt rest (sprinkle lightly with salt and let sit for 15 minutes before patting dry again).
- Build Your Aromatic Soy Braising Liquid
- In your wide pot or Dutch oven, add a tablespoon of neutral oil (like vegetable or canola) over medium heat.
- Gently fry the sliced ginger, chopped scallions, and star anise (plus optional bay leaf/cinnamon stick) for 2-3 minutes until fragrant. You want to awaken their aromas, not brown them.
- Pour in the light soy sauce, dark soy sauce, Shaoxing wine (if using), sugar, and water. Stir until the sugar dissolves.
- Bring the liquid to a boil, then immediately reduce the heat to a bare simmer. The liquid should be gently bubbling, not vigorously boiling.
- Cook Gently, Flip Once, Then Steep
- Carefully place the chicken pieces into the simmering liquid, skin-side down, ensuring they are in a single layer. Add more water if needed to mostly cover the chicken.
- Simmer gently for 15-20 minutes, maintaining a very low bubble.
- Using tongs, gently flip each chicken piece over to skin-side up. Continue to simmer for another 10-15 minutes, or until an instant-read thermometer inserted into the thickest part of the thigh (avoiding bone) reads 165°F (74°C).
- Once cooked through, turn off the heat.
- This is key! Let the chicken steep in the warm braising liquid for another 10-15 minutes. This brief steeping period allows the chicken to absorb more flavor and achieve a deeper, more even color without overcooking.
- Optional (But Recommended) Skin-Tightening Step
- For that perfectly tight, shiny skin seen in professional shops, you have a couple of options:
- Ice Bath Dip: Carefully transfer the cooked chicken pieces to a large bowl of ice water for 30-60 seconds. This shock helps contract the skin. Immediately remove and pat dry.
- Brief Cool-Down: Alternatively, simply remove the chicken from the braising liquid and let it rest on a wire rack for 5-10 minutes. The goal is tight, glistening skin, not to make the chicken cold.
- Slice and Serve Like a Cantonese Shop
- Once the chicken has rested (and cooled slightly if using the ice bath), place it on a cutting board.
- Using a sharp knife, slice the chicken cleanly into serving pieces. For bone-in cuts, you can separate the drumstick from the thigh, or carefully slice around the bone. The trick is to slice decisively to avoid shredding the skin.
- Arrange the sliced chicken on a serving platter and spoon a little of the delicious braising sauce over the top.
- Make the Glossy Finishing Sauce
- While the chicken rests, retrieve about 1-1.5 cups of the braising liquid from the pot.
- Bring this portion to a simmer in a small saucepan.
- In a separate small bowl, whisk together the cornstarch and cold water to create a smooth slurry.
- Slowly pour the slurry into the simmering sauce, whisking constantly until it thickens to a glossy, pourable consistency. You want it thick enough to coat a spoon, but not gummy or overly thick. Start with half the slurry and add more if needed.
- Serve this glossy sauce alongside or drizzled over your chicken. Garnish with fresh sliced scallions if desired.
You may also like


Hey there! I’m just someone who seriously loves good food and believes that cooking doesn’t have to be complicated to be amazing. Whether it’s a quick weeknight dinner or a cozy weekend meal, I’m all about sharing easy, tasty recipes that actually work.