Afghan Naan Easy Homemade Bread Recipe
Afghan Naan Easy Homemade Bread Recipe


- Serves: 2 People
- Prepare Time: 1 hour 30 m
- Cooking Time: 15 minutes
- Calories: 250
- Difficulty: Medium
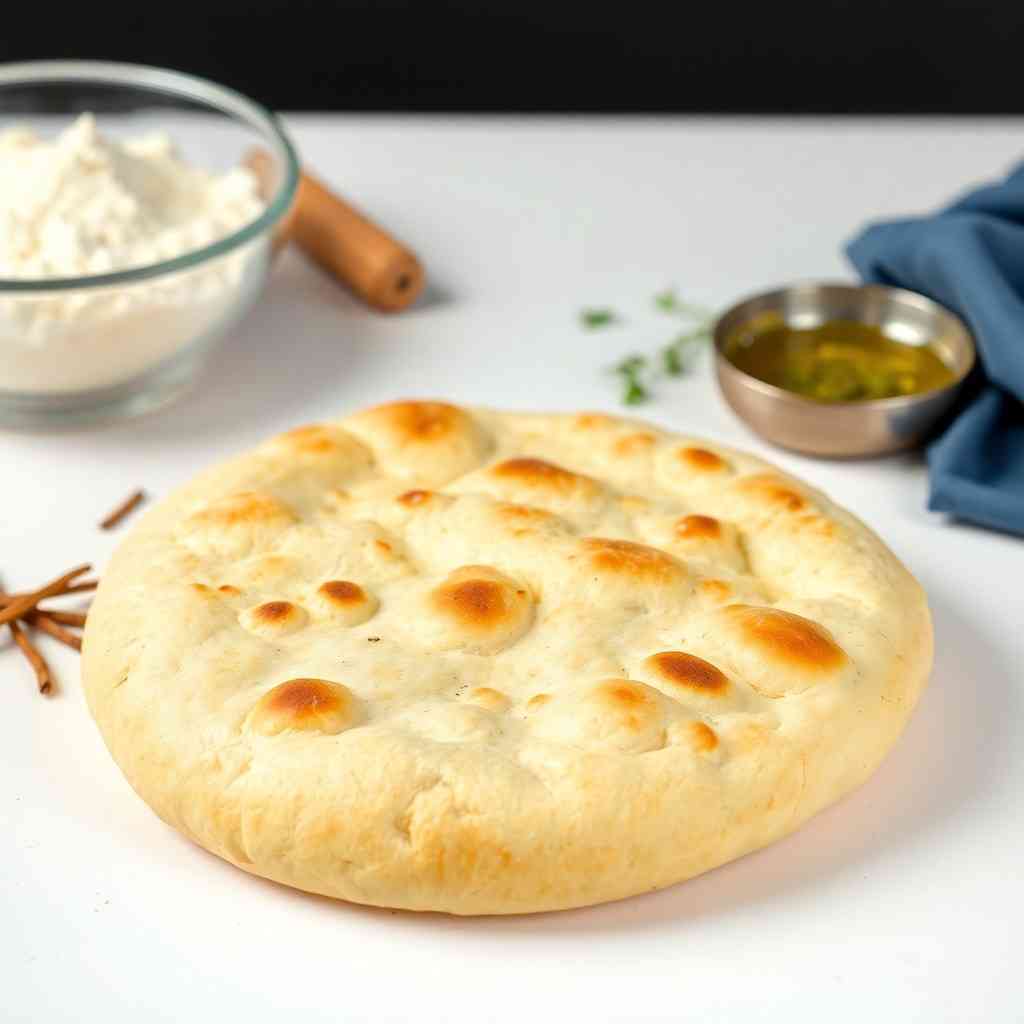
Ever dreamt of biting into a warm, pillowy slice of authentic Afghan naan without needing a tandoor oven? You’re in the right place! This isn't your average grocery-store flatbread; we're talking about those beautiful, long oval loaves, often glistening with a yogurt glaze and studded with distinctive black nigella seeds, just like you’d find in an Afghan nanwayee (bakery).
This traditional naan recipe brings you the true flavors of Afghan bread with a surprisingly simple method, perfectly adapted for your regular home oven. Forget complex equipment or tricky techniques – our goal is to show you how to create a superior, more comprehensive article designed to outrank the competition. We'll walk you through making a delightfully soft, slightly chewy loaf that’s miles beyond anything pre-packaged. Whether you're a beginner or an experienced baker, get ready to dive into the joy of home baked bread recipe with this easy-to-follow guide for making incredible Afghan flatbread right in your kitchen. No tandoor needed, just a hot oven and a baking stone or tray!
This recipe focuses on creating the classic Afghan naan, perfect for your home oven. We'll cover everything you need for the dough, plus the signature topping.
Making Afghan naan at home is a rewarding process. Follow these steps for a perfect, pillowy loaf every time.
Ingredients
Directions
Equipment & Home-Oven Setup:
- Before you begin, gather your tools: a large mixing bowl (or stand mixer with a dough hook), a dough scraper, a kitchen scale (highly recommended for accuracy), a baking stone or heavy-duty baking sheet (like a cast iron pizza pan), parchment paper, and a spray bottle or a small oven-safe pan for creating steam.
- For baking, position an oven rack in the middle or upper-middle position. Place your baking stone or heavy sheet pan on this rack. Preheat your oven to its highest setting, typically 475-500°F (245-260°C), for at least 45-60 minutes. This long preheat is crucial for getting the stone/pan super hot, mimicking a tandoor. For steam, if using a pan of water, place it on the lowest rack during preheat.
Activate (or Mix) the Yeast
- If using Instant Yeast: In your large mixing bowl, combine the flour(s), instant yeast, sugar, and salt. Whisk briefly to combine.
- If using Active Dry Yeast: In a small bowl, combine the warm water and sugar. Sprinkle the active dry yeast over the top. Let it sit for 5-10 minutes until foamy. If it doesn't foam, your yeast might be expired, and you should start with a fresh packet
Mix & Hydrate the Dough
- For Instant Yeast: Add the warm water, yogurt, and 2 tablespoons of oil/ghee to the dry ingredients. Stir with a spoon or your hands until a shaggy, slightly sticky dough forms.
- For Active Dry Yeast: Once your yeast is foamy, add it along with the yogurt and 2 tablespoons of oil/ghee to your flour mixture. Stir until a shaggy dough forms.
- Hydration Note: The dough should be slightly sticky but not overly wet. If it feels too dry, add water one teaspoon at a time. If too wet, add flour one teaspoon at a time. Let the flour absorb the liquids before adding more.
Knead & First Rise
- Hand Kneading: Turn the dough out onto a lightly floured surface. Knead for 8-10 minutes. Use a push-and-pull motion, folding the dough over itself until it becomes smooth, elastic, and slightly tacky, but no longer gluey. An optional windowpane test: stretch a small piece of dough; if it stretches thin enough to see light through without tearing, it's ready.
- Stand Mixer: Attach the dough hook. Mix on low speed for 2 minutes until combined, then increase to medium-low and knead for 6-8 minutes until the dough is smooth, elastic, and pulls away from the sides of the bowl.
- First Rise: Lightly oil a clean bowl. Transfer the kneaded dough to the bowl, turning it once to coat. Cover the bowl tightly with plastic wrap or a clean kitchen towel. Let it rise in a warm, draft-free place for 60-90 minutes, or until it has visibly doubled in size.
Shaping & Baking Long Afghan Naan (Home-Oven Method)
Prep for Shaping- While the dough is finishing its rise, ensure your oven is preheated with the baking stone/tray inside (as described in "Equipment & Home-Oven Setup").
- In a small bowl, whisk together the 2 tablespoons of plain yogurt and 1 tablespoon of milk/water for the glaze.
- Have your nigella seeds ready. Lightly flour a clean work surface or prepare two sheets of parchment paper.
- Gently punch down the risen dough to release the air. Turn it out onto your lightly floured surface.
- Divide the dough into two equal pieces.
- Work with one piece at a time. Gently stretch or roll each piece into a long oval shape, approximately 12-15 inches (30-38 cm) long and 5-6 inches (12-15 cm) wide. Don't worry about perfection; rustic is authentic!
- Using your fingertips or the back of a knife, gently press indentations or lines across the surface of each loaf. These characteristic lines help the bread cook evenly and give it its traditional look. Be careful not to cut all the way through the dough.
Glaze, Seed & Load the Oven
- Carefully brush each shaped loaf with the yogurt glaze, covering the entire top surface.
- Generously sprinkle nigella seeds over the glazed dough. Gently press them in slightly so they adhere.
- Transfer to Oven:
- If using parchment: Carefully slide the parchment paper with one loaf onto a pizza peel or the back of a baking sheet.
- If baking directly on the stone/pan: Gently lift the loaf and place it onto the peel.
- Open the hot oven and quickly but carefully slide the loaf (on parchment or directly from the peel) onto the preheated baking stone or sheet.
- Steam Method (Optional but Recommended): Immediately after loading the bread, if you're using a spray bottle, quickly spritz the inside walls of the oven with water (avoid spraying the light bulb!). If you have a pan of hot water on the lower rack, this will already be creating steam. Close the oven door promptly.
Bake to Perfect Color
- Bake for 8-12 minutes, or until the naan is deeply golden brown on top and bottom, and has a slightly matte surface. If your oven has hot spots, you might rotate the pan halfway through baking for even browning.
- The bread should sound hollow when tapped on the bottom.
- Once baked, carefully remove the naan from the oven. Immediately brush the hot bread with melted butter or ghee for added flavor and softness.
- Wrap the freshly baked naan loosely in a clean kitchen towel. This traps steam and keeps the bread soft and pliable as it cools slightly.
- Repeat with the second loaf. Serve warm and enjoy!
Afghan Naan Easy Homemade Bread Recipe

- Serves: 2 People
- Prepare Time: 1 hour 30 m
- Cooking Time: 15 minutes
- Calories: 250
- Difficulty: Medium
Ever dreamt of biting into a warm, pillowy slice of authentic Afghan naan without needing a tandoor oven? You’re in the right place! This isn't your average grocery-store flatbread; we're talking about those beautiful, long oval loaves, often glistening with a yogurt glaze and studded with distinctive black nigella seeds, just like you’d find in an Afghan nanwayee (bakery).
This traditional naan recipe brings you the true flavors of Afghan bread with a surprisingly simple method, perfectly adapted for your regular home oven. Forget complex equipment or tricky techniques – our goal is to show you how to create a superior, more comprehensive article designed to outrank the competition. We'll walk you through making a delightfully soft, slightly chewy loaf that’s miles beyond anything pre-packaged. Whether you're a beginner or an experienced baker, get ready to dive into the joy of home baked bread recipe with this easy-to-follow guide for making incredible Afghan flatbread right in your kitchen. No tandoor needed, just a hot oven and a baking stone or tray!
This recipe focuses on creating the classic Afghan naan, perfect for your home oven. We'll cover everything you need for the dough, plus the signature topping.
Making Afghan naan at home is a rewarding process. Follow these steps for a perfect, pillowy loaf every time.
Ingredients
Directions
Equipment & Home-Oven Setup:
- Before you begin, gather your tools: a large mixing bowl (or stand mixer with a dough hook), a dough scraper, a kitchen scale (highly recommended for accuracy), a baking stone or heavy-duty baking sheet (like a cast iron pizza pan), parchment paper, and a spray bottle or a small oven-safe pan for creating steam.
- For baking, position an oven rack in the middle or upper-middle position. Place your baking stone or heavy sheet pan on this rack. Preheat your oven to its highest setting, typically 475-500°F (245-260°C), for at least 45-60 minutes. This long preheat is crucial for getting the stone/pan super hot, mimicking a tandoor. For steam, if using a pan of water, place it on the lowest rack during preheat.
Activate (or Mix) the Yeast
- If using Instant Yeast: In your large mixing bowl, combine the flour(s), instant yeast, sugar, and salt. Whisk briefly to combine.
- If using Active Dry Yeast: In a small bowl, combine the warm water and sugar. Sprinkle the active dry yeast over the top. Let it sit for 5-10 minutes until foamy. If it doesn't foam, your yeast might be expired, and you should start with a fresh packet
Mix & Hydrate the Dough
- For Instant Yeast: Add the warm water, yogurt, and 2 tablespoons of oil/ghee to the dry ingredients. Stir with a spoon or your hands until a shaggy, slightly sticky dough forms.
- For Active Dry Yeast: Once your yeast is foamy, add it along with the yogurt and 2 tablespoons of oil/ghee to your flour mixture. Stir until a shaggy dough forms.
- Hydration Note: The dough should be slightly sticky but not overly wet. If it feels too dry, add water one teaspoon at a time. If too wet, add flour one teaspoon at a time. Let the flour absorb the liquids before adding more.
Knead & First Rise
- Hand Kneading: Turn the dough out onto a lightly floured surface. Knead for 8-10 minutes. Use a push-and-pull motion, folding the dough over itself until it becomes smooth, elastic, and slightly tacky, but no longer gluey. An optional windowpane test: stretch a small piece of dough; if it stretches thin enough to see light through without tearing, it's ready.
- Stand Mixer: Attach the dough hook. Mix on low speed for 2 minutes until combined, then increase to medium-low and knead for 6-8 minutes until the dough is smooth, elastic, and pulls away from the sides of the bowl.
- First Rise: Lightly oil a clean bowl. Transfer the kneaded dough to the bowl, turning it once to coat. Cover the bowl tightly with plastic wrap or a clean kitchen towel. Let it rise in a warm, draft-free place for 60-90 minutes, or until it has visibly doubled in size.
Shaping & Baking Long Afghan Naan (Home-Oven Method)
Prep for Shaping- While the dough is finishing its rise, ensure your oven is preheated with the baking stone/tray inside (as described in "Equipment & Home-Oven Setup").
- In a small bowl, whisk together the 2 tablespoons of plain yogurt and 1 tablespoon of milk/water for the glaze.
- Have your nigella seeds ready. Lightly flour a clean work surface or prepare two sheets of parchment paper.
- Gently punch down the risen dough to release the air. Turn it out onto your lightly floured surface.
- Divide the dough into two equal pieces.
- Work with one piece at a time. Gently stretch or roll each piece into a long oval shape, approximately 12-15 inches (30-38 cm) long and 5-6 inches (12-15 cm) wide. Don't worry about perfection; rustic is authentic!
- Using your fingertips or the back of a knife, gently press indentations or lines across the surface of each loaf. These characteristic lines help the bread cook evenly and give it its traditional look. Be careful not to cut all the way through the dough.
Glaze, Seed & Load the Oven
- Carefully brush each shaped loaf with the yogurt glaze, covering the entire top surface.
- Generously sprinkle nigella seeds over the glazed dough. Gently press them in slightly so they adhere.
- Transfer to Oven:
- If using parchment: Carefully slide the parchment paper with one loaf onto a pizza peel or the back of a baking sheet.
- If baking directly on the stone/pan: Gently lift the loaf and place it onto the peel.
- Open the hot oven and quickly but carefully slide the loaf (on parchment or directly from the peel) onto the preheated baking stone or sheet.
- Steam Method (Optional but Recommended): Immediately after loading the bread, if you're using a spray bottle, quickly spritz the inside walls of the oven with water (avoid spraying the light bulb!). If you have a pan of hot water on the lower rack, this will already be creating steam. Close the oven door promptly.
Bake to Perfect Color
- Bake for 8-12 minutes, or until the naan is deeply golden brown on top and bottom, and has a slightly matte surface. If your oven has hot spots, you might rotate the pan halfway through baking for even browning.
- The bread should sound hollow when tapped on the bottom.
- Once baked, carefully remove the naan from the oven. Immediately brush the hot bread with melted butter or ghee for added flavor and softness.
- Wrap the freshly baked naan loosely in a clean kitchen towel. This traps steam and keeps the bread soft and pliable as it cools slightly.
- Repeat with the second loaf. Serve warm and enjoy!
The following nutritional values are per serving (one piece of cake) Calories ~200-250 kcal Carbohydrates ~35-45g Protein ~7-9g Fat ~3-5g Making Afghan Naan from scratch is incredibly rewarding, but a few clever tools can make the process even smoother and faster. Here are our top picks: Problem: Kneading dough by hand can be time-consuming and tiring, especially if you're new to bread making or want a consistent result without the arm workout. Problem: Measuring flour and water by volume (cups) can be inaccurate due to packing differences, leading to dough that's too wet or too dry, requiring constant adjustments. Problem: A regular baking sheet might not retain enough heat to give your naan that quick, intense burst of heat needed to puff up beautifully and develop a crisp crust. Click any ingredient for detailed nutritional information:Recipe Nutritional Values
Additional Information
Recipe Success Tips
Ingredient Substitutions & Variations
Make-Ahead & Storage Instructions
Frequently Asked Questions
Recommended Kitchen Tools
Stand Mixer with Dough Hook
Agitate: Inconsistent kneading can lead to dense, tough bread, or dough that doesn't rise properly, leaving you frustrated after all your effort.
Solution: A stand mixer takes all the hard work out of kneading. Just attach the dough hook, let it do its magic for 8-10 minutes, and you'll have perfectly smooth, elastic dough ready for its first rise, saving you time and energy.Digital Kitchen Scale
Agitate: This inconsistency can throw off your entire recipe, making it harder to get that perfect Afghan naan texture and potentially wasting ingredients.
Solution: A digital kitchen scale measures ingredients by weight (grams), which is far more precise. This ensures your dough has the exact hydration it needs every single time, making the recipe foolproof and saving you from fiddling with extra flour or water.Baking Stone or Heavy Baking Steel
Agitate: Without intense heat, your naan might bake unevenly, stay pale, or dry out before it gets that characteristic texture, missing out on the authentic experience.
Solution: A preheated baking stone or steel creates a super-hot surface that mimics a tandoor's intense heat, ensuring your naan cooks rapidly and evenly, achieving that perfect puff and golden-brown finish every time.Calories per Ingredient
Resources & References
You may also like


Hey there! I’m just someone who seriously loves good food and believes that cooking doesn’t have to be complicated to be amazing. Whether it’s a quick weeknight dinner or a cozy weekend meal, I’m all about sharing easy, tasty recipes that actually work.