Argentinian Pastelitos criollos Flaky Quince-Filled
Argentinian Pastelitos criollos Flaky Quince-Filled
- Serves: 20 People
- Prepare Time: 90 minutes
- Cooking Time: 25 minutes
- Calories: -
- Difficulty: Medium
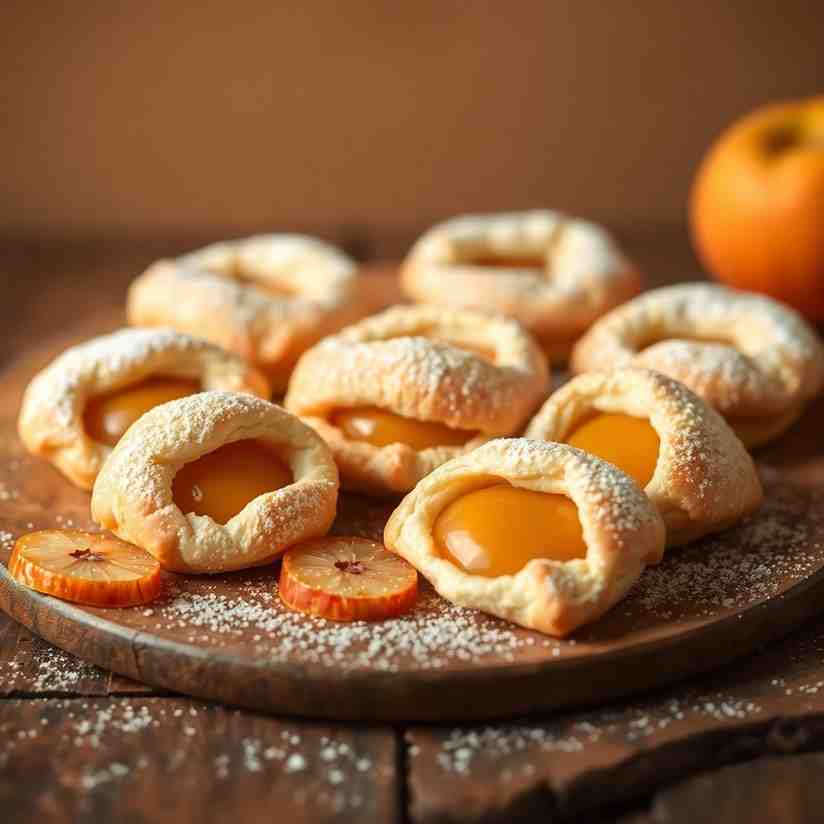
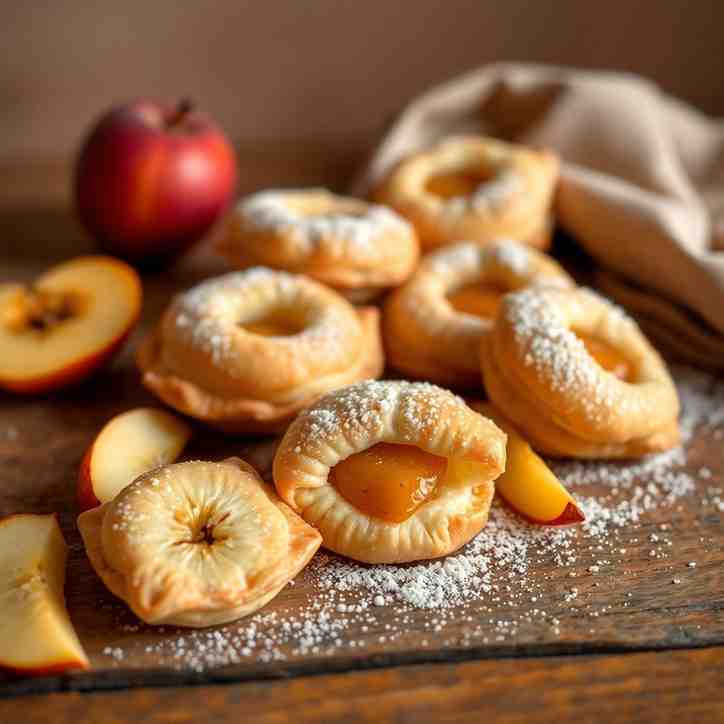
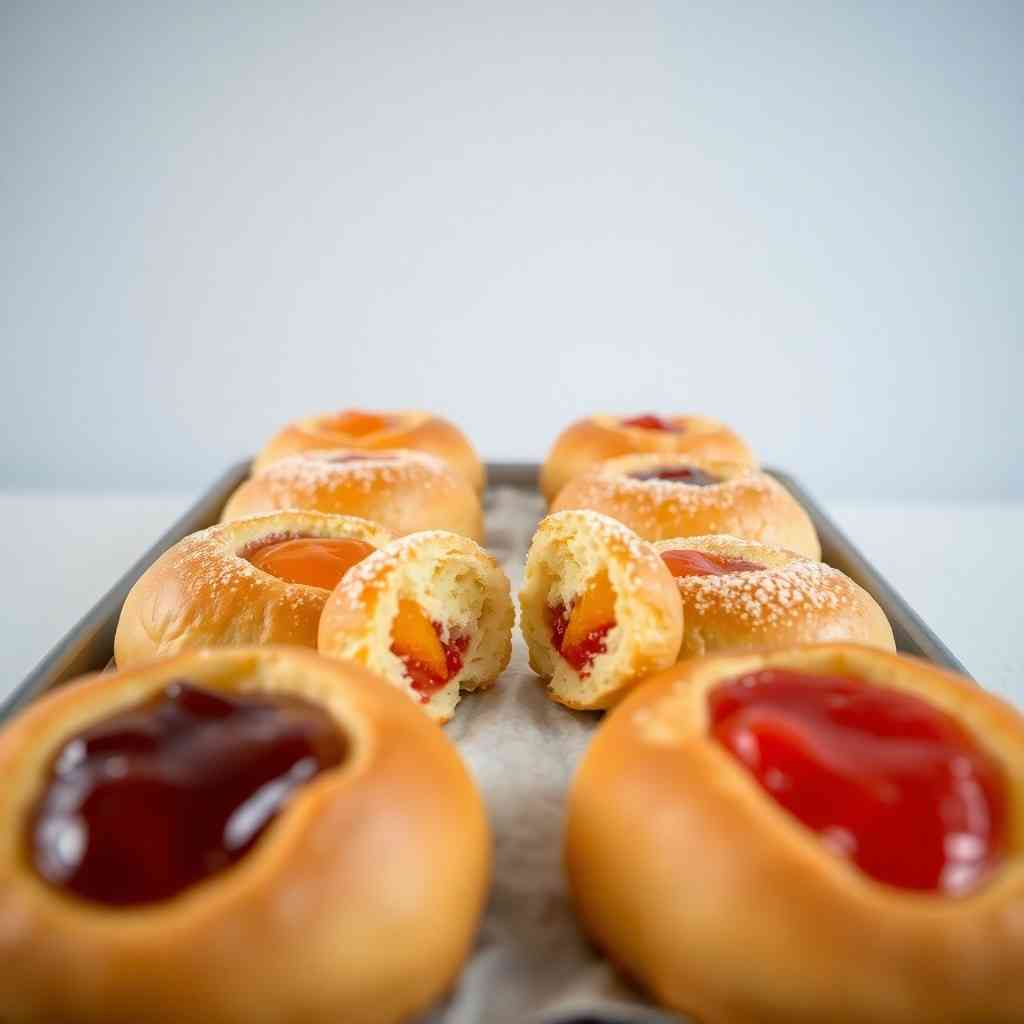
Get ready for a sweet journey to Argentina! We're diving into the world of Argentinian Pastelitos, also known as Pastelitos Criollos. These aren't just any pastries; they're a crispy, layered, and syrup-glazed symphony of flavor, traditionally enjoyed as a fried delight, not simply baked cookies. Imagine delicate, flower-shaped pastries, each bite revealing a luscious quince paste filling, all wrapped in a wonderfully flaky puff pastry dough.
If the thought of making laminated dough sounds intimidating, don't worry! If you can roll dough and fry doughnuts, you can absolutely make these traditional Argentinian Pastelitos at home. This guide will walk you through every step, ensuring you achieve that perfect crispiness and authentic taste. Forget those Americanized versions; this is the real deal, ready to celebrate any occasion, especially Argentina's May 25th national holiday. Let's get baking (and frying)!
Ingredients
Directions
- Make the Base Dough: In a large bowl, whisk together the all-purpose flour and salt. Add the cold, cubed butter and cut it into the flour mixture using your fingertips or a pastry blender until it resembles coarse meal with some pea-sized pieces of butter remaining. Gradually add the cold water (and optional vinegar/lemon juice), mixing until the dough just comes together. Be careful not to overmix. Gently shape the dough into a rough rectangle, wrap it tightly in plastic, and chill in the refrigerator for at least 30 minutes. This allows the gluten to relax and the butter to firm up.
- Laminate for Crispy Layers: Lightly flour your work surface. Roll the chilled dough into a large rectangle, about 1/4-inch thick. Brush the entire surface with a thin, even layer of the cooled melted butter, then lightly dust with a little flour. Fold the dough into thirds, like a letter (bring one short end to the center, then fold the other short end over it). Rotate the dough 90 degrees. Gently roll it out again into a rectangle, brush with butter, dust with flour, and fold into thirds. Repeat this process 2-3 more times, chilling the dough for 20-30 minutes between each fold if it becomes too warm or sticky. The dough should feel pliable but firm, and you should start to see thin layers. Cover the dough with a towel or plastic wrap between steps to prevent drying.
- Roll and Cut the Squares: Once laminated, roll the dough into a large, thin rectangle or square, aiming for about 1/8-inch (3-4mm) thickness. Trim the edges neatly to create even sides, which helps the pastelitos puff uniformly. Using a ruler and a sharp knife or pastry wheel, cut the dough into even squares, approximately 2 to 2.5 inches (5-6 cm) per side. As you work, keep any unused dough covered with a damp towel or plastic wrap to prevent it from drying out.
- Prep and Portion the Filling: Cut the quince paste into small cubes or batons, ensuring they are sized to fit comfortably in the center of your dough squares with enough margin around the edges for sealing. To prevent leaks, ensure the filling is centered and not overfilled. You can briefly chill the cut quince paste pieces so they remain firm during shaping.
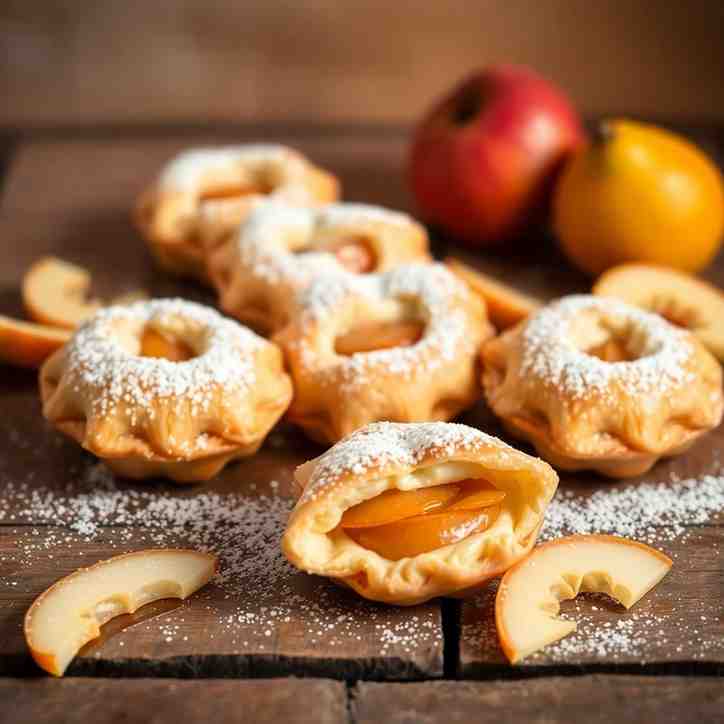
- Assemble and Shape the “Flower”:Lay half of your dough squares on your work surface. Place one piece of quince paste in the center of each. Lightly brush the edges of these squares with a little water (this acts as glue). Top each with a second dough square, aligning the corners. Gently press down around the filling, working from the center outwards, to seal the edges and carefully press out any trapped air. This is crucial to prevent blowouts during frying. To create the classic "flower" shape, use a sharp knife or pastry wheel to cut two diagonal slits from each corner towards the center, stopping just short of the filling. Then, gently pinch the opposing corners of the cut dough towards the center of the pastry, creating a four-petal flower effect. Ensure the pinched points are sealed well.
- Rest Before Frying:Arrange the shaped pastelitos on a baking sheet lined with parchment paper. Place them in the refrigerator to rest for at least 20-30 minutes. This allows the butter in the dough to firm up again, which is essential for preventing blowouts and promoting beautiful, distinct layers when fried.
- Fry the Pastelitos:Fill a heavy pot or Dutch oven with about 2-3 inches of neutral oil (like vegetable or canola oil). Heat the oil over medium heat to a moderate temperature of around 325°F (165°C). Use a thermometer for accuracy. If you don't have one, test with a small piece of dough; it should gently bubble around the edges. Carefully place a few pastelitos into the hot oil at a time, without overcrowding the pot. They should gently puff and begin to open their layers without browning too quickly. Fry for 2-3 minutes per side until they are lightly golden. Remove them from the oil and set aside on a wire rack. Now, raise the oil temperature slightly to 350-365°F (175-185°C). Return the pastelitos to the hotter oil for a quick second fry (about 30 seconds to 1 minute per side) until they achieve a deep golden color and become extra crispy. This double-fry method ensures both thorough cooking and maximum crispiness.
- Make and Apply the Syrup:While the pastelitos are frying or resting, combine the sugar and water in a small saucepan. Heat over medium heat, stirring until the sugar dissolves. Bring to a gentle simmer and cook for 2-3 minutes until it thickens slightly into a simple syrup. Remove from heat and stir in the vanilla extract (and optional honey). Immediately brush the hot syrup generously over the freshly fried pastelitos while they are still warm, or briefly dip them. Let any excess syrup drip off on a wire rack.
- Serve:Allow the pastelitos to cool just enough for the syrup to set, but serve them while they are still warm for the best experience. They are perfect with mate, coffee, or hot chocolate, and are a cherished treat for breakfast, merienda (afternoon snack), or any national holiday gathering, especially May 25th!
Argentinian Pastelitos criollos Flaky Quince-Filled
- Serves: 20 People
- Prepare Time: 90 minutes
- Cooking Time: 25 minutes
- Calories: -
- Difficulty: Medium
Get ready for a sweet journey to Argentina! We're diving into the world of Argentinian Pastelitos, also known as Pastelitos Criollos. These aren't just any pastries; they're a crispy, layered, and syrup-glazed symphony of flavor, traditionally enjoyed as a fried delight, not simply baked cookies. Imagine delicate, flower-shaped pastries, each bite revealing a luscious quince paste filling, all wrapped in a wonderfully flaky puff pastry dough.
If the thought of making laminated dough sounds intimidating, don't worry! If you can roll dough and fry doughnuts, you can absolutely make these traditional Argentinian Pastelitos at home. This guide will walk you through every step, ensuring you achieve that perfect crispiness and authentic taste. Forget those Americanized versions; this is the real deal, ready to celebrate any occasion, especially Argentina's May 25th national holiday. Let's get baking (and frying)!
Ingredients
Directions
- Make the Base Dough: In a large bowl, whisk together the all-purpose flour and salt. Add the cold, cubed butter and cut it into the flour mixture using your fingertips or a pastry blender until it resembles coarse meal with some pea-sized pieces of butter remaining. Gradually add the cold water (and optional vinegar/lemon juice), mixing until the dough just comes together. Be careful not to overmix. Gently shape the dough into a rough rectangle, wrap it tightly in plastic, and chill in the refrigerator for at least 30 minutes. This allows the gluten to relax and the butter to firm up.
- Laminate for Crispy Layers: Lightly flour your work surface. Roll the chilled dough into a large rectangle, about 1/4-inch thick. Brush the entire surface with a thin, even layer of the cooled melted butter, then lightly dust with a little flour. Fold the dough into thirds, like a letter (bring one short end to the center, then fold the other short end over it). Rotate the dough 90 degrees. Gently roll it out again into a rectangle, brush with butter, dust with flour, and fold into thirds. Repeat this process 2-3 more times, chilling the dough for 20-30 minutes between each fold if it becomes too warm or sticky. The dough should feel pliable but firm, and you should start to see thin layers. Cover the dough with a towel or plastic wrap between steps to prevent drying.
- Roll and Cut the Squares: Once laminated, roll the dough into a large, thin rectangle or square, aiming for about 1/8-inch (3-4mm) thickness. Trim the edges neatly to create even sides, which helps the pastelitos puff uniformly. Using a ruler and a sharp knife or pastry wheel, cut the dough into even squares, approximately 2 to 2.5 inches (5-6 cm) per side. As you work, keep any unused dough covered with a damp towel or plastic wrap to prevent it from drying out.
- Prep and Portion the Filling: Cut the quince paste into small cubes or batons, ensuring they are sized to fit comfortably in the center of your dough squares with enough margin around the edges for sealing. To prevent leaks, ensure the filling is centered and not overfilled. You can briefly chill the cut quince paste pieces so they remain firm during shaping.
- Assemble and Shape the “Flower”:Lay half of your dough squares on your work surface. Place one piece of quince paste in the center of each. Lightly brush the edges of these squares with a little water (this acts as glue). Top each with a second dough square, aligning the corners. Gently press down around the filling, working from the center outwards, to seal the edges and carefully press out any trapped air. This is crucial to prevent blowouts during frying. To create the classic "flower" shape, use a sharp knife or pastry wheel to cut two diagonal slits from each corner towards the center, stopping just short of the filling. Then, gently pinch the opposing corners of the cut dough towards the center of the pastry, creating a four-petal flower effect. Ensure the pinched points are sealed well.
- Rest Before Frying:Arrange the shaped pastelitos on a baking sheet lined with parchment paper. Place them in the refrigerator to rest for at least 20-30 minutes. This allows the butter in the dough to firm up again, which is essential for preventing blowouts and promoting beautiful, distinct layers when fried.
- Fry the Pastelitos:Fill a heavy pot or Dutch oven with about 2-3 inches of neutral oil (like vegetable or canola oil). Heat the oil over medium heat to a moderate temperature of around 325°F (165°C). Use a thermometer for accuracy. If you don't have one, test with a small piece of dough; it should gently bubble around the edges. Carefully place a few pastelitos into the hot oil at a time, without overcrowding the pot. They should gently puff and begin to open their layers without browning too quickly. Fry for 2-3 minutes per side until they are lightly golden. Remove them from the oil and set aside on a wire rack. Now, raise the oil temperature slightly to 350-365°F (175-185°C). Return the pastelitos to the hotter oil for a quick second fry (about 30 seconds to 1 minute per side) until they achieve a deep golden color and become extra crispy. This double-fry method ensures both thorough cooking and maximum crispiness.
- Make and Apply the Syrup:While the pastelitos are frying or resting, combine the sugar and water in a small saucepan. Heat over medium heat, stirring until the sugar dissolves. Bring to a gentle simmer and cook for 2-3 minutes until it thickens slightly into a simple syrup. Remove from heat and stir in the vanilla extract (and optional honey). Immediately brush the hot syrup generously over the freshly fried pastelitos while they are still warm, or briefly dip them. Let any excess syrup drip off on a wire rack.
- Serve:Allow the pastelitos to cool just enough for the syrup to set, but serve them while they are still warm for the best experience. They are perfect with mate, coffee, or hot chocolate, and are a cherished treat for breakfast, merienda (afternoon snack), or any national holiday gathering, especially May 25th!
The following nutritional values are per serving (one piece of cake) Calories ~220-280 kcal Carbohydrates ~30-40g Protein ~3-5g Fat ~10-15g Tools and ingredients that can help you cook more easily and consistently. Problem: Crafting traditional laminated dough from scratch is a labor of love, requiring multiple folds, precise technique, and extensive chilling times. Problem: Guessing the correct oil temperature for frying your pastelitos is a common pitfall that can ruin your efforts. Problem: Achieving uniformly sized pastelitos is crucial not only for aesthetic appeal but also for even frying and consistent results. Click any ingredient for detailed nutritional information:Recipe Nutritional Values
Additional Information
Recipe Success Tips
Ingredient Substitutions & Variations
Pro Tips & Troubleshooting
Make-Ahead & Storage Instructions
Frequently Asked Questions
Recommended Kitchen Tools
Time-Saving Tools & Ingredients
Agitate: While incredibly rewarding, the extensive prep can deter even seasoned bakers on a busy day, adding hours to your total cooking time and demanding significant patience.
Solution: Opting for quality store-bought puff pastry sheets can drastically cut down on prep time. Look for all-butter versions for the best flavor and flakiness, allowing you to jump straight to shaping and frying without sacrificing much on texture. Deep-Fry ThermometerTime-Saving Tools & Ingredients
Agitate: Oil that's too cool results in greasy, dense pastries that never truly crisp up, while oil that's too hot can burn the outside before the inside cooks through, leading to a disappointing texture and flavor.
Solution: A reliable deep-fry thermometer takes the guesswork out of frying. It ensures your oil stays at the perfect temperature throughout the process, guaranteeing beautifully puffed, golden, and crispy pastelitos every single time. Pastry Wheel or Sharp Ruler and KnifeTime-Saving Tools & Ingredients
Agitate: Unevenly cut dough squares can lead to some pastries cooking faster than others, or looking inconsistent and less professional on your serving platter, which can be frustrating after all your hard work.
Solution: A pastry wheel makes quick work of cutting neat, straight lines with minimal effort. Alternatively, a simple ruler combined with a sharp knife can help you precisely measure and cut your dough into perfect squares, ensuring every pastelito is a masterpiece.Calories per Ingredient
Resources & References
You may also like


Hey there! I’m just someone who seriously loves good food and believes that cooking doesn’t have to be complicated to be amazing. Whether it’s a quick weeknight dinner or a cozy weekend meal, I’m all about sharing easy, tasty recipes that actually work.