
Buchteln Recipe Easy Jam-Filled Austrian Sweet Buns
Buchteln Recipe Easy Jam-Filled Austrian Sweet Buns

- Serves: 12 People
- Prepare Time: 50 minutes
- Cooking Time: 30 minutes
- Calories: -
- Difficulty: Medium
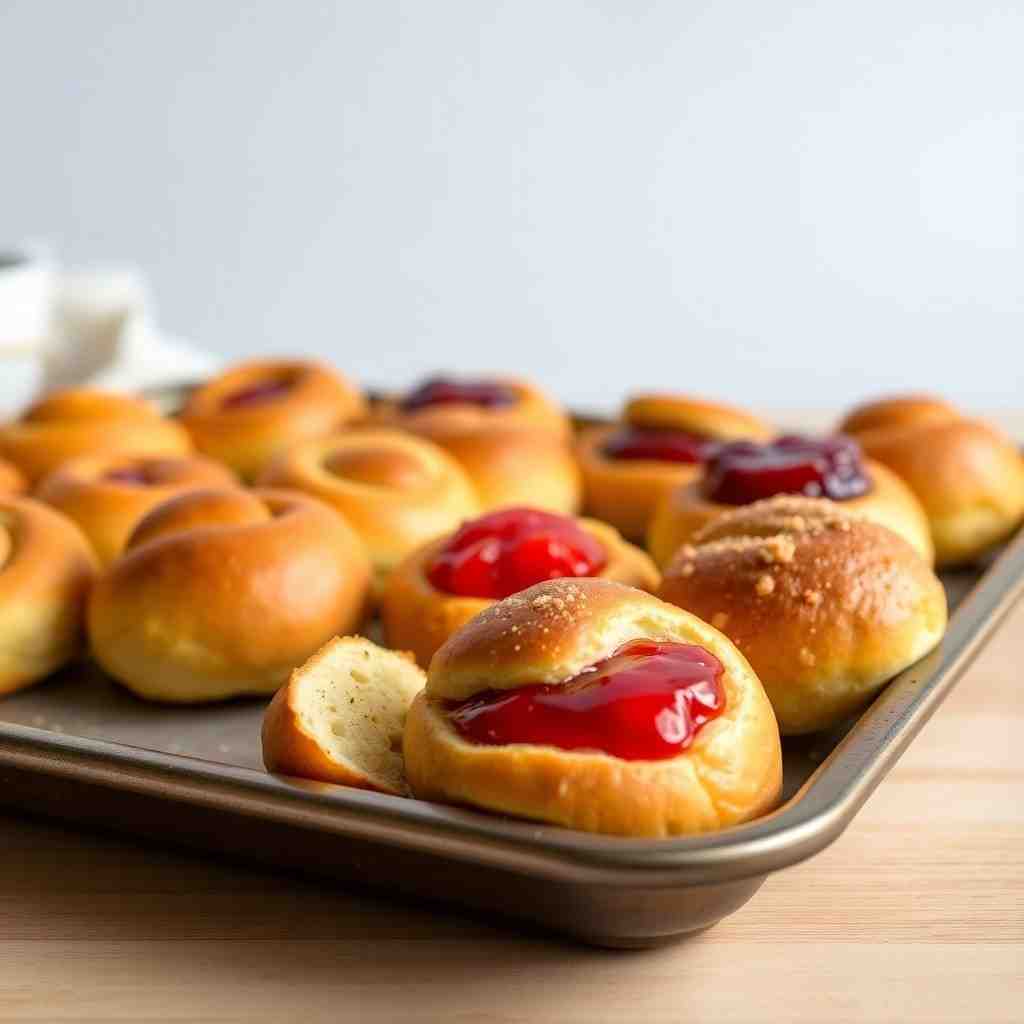
Get ready to fall in love with Buchteln, those incredibly soft, pillowy, and utterly delicious Austrian sweet yeast buns! Imagine biting into a warm, fluffy roll, pulled apart from its neighbors, revealing a sweet burst of apricot jam. Dusted generously with powdered sugar, these delightful treats are a staple in Austrian and Central European kitchens, often enjoyed warm with a side of creamy vanilla sauce. While their roots trace back to Bohemia, Buchteln have found a cherished home in Vienna and beyond, making them a must-try for any sweet-toothed adventurer.
You'll adore this buchteln recipe because it offers one clear, easy-to-follow method, perfect even if you're tackling an enriched dough for the first time. We use pantry-friendly US ingredients, with precise gram measurements for the best results. Plus, we've included helpful make-ahead and freezer-friendly instructions so you can enjoy these delightful buns whenever a craving strikes!
Ingredients
Directions
- Activate the YeastWarm the milk in a small saucepan or microwave until it reaches 105-115°F (40-46°C). It should feel warm, not hot, to the touch. Pour the warm milk into a large mixing bowl (or the bowl of a stand mixer). Whisk in 1 teaspoon of the granulated sugar and the active dry yeast. Let the mixture sit for 5-10 minutes until it becomes foamy. This indicates your yeast is active and ready to work! If it doesn't foam, your yeast might be old or the milk too hot/cold; start again with fresh yeast.
- Mix and Knead the DoughIn a separate bowl, whisk together the all-purpose flour, remaining granulated sugar, and salt. Once your yeast is foamy, add the eggs, melted (and cooled!) butter, and vanilla extract to the yeast mixture. Gradually add the dry ingredients to the wet ingredients.
- By hand: Mix with a sturdy spoon or rubber spatula until a shaggy dough forms, then turn it out onto a lightly floured surface and knead for 10-15 minutes.
- Stand mixer: Use the dough hook attachment and mix on low speed for 8-10 minutes.
- First RiseForm the kneaded dough into a smooth ball. Lightly grease a large bowl with a little oil or butter, place the dough ball inside, and turn it once to coat. Cover the bowl loosely with plastic wrap or a clean kitchen towel. Let it rise in a warm, draft-free place for 1 to 1.5 hours, or until it has doubled in size. If your kitchen is cool, a quick trick is to preheat your oven to its lowest setting (around 170°F/75°C) for 5 minutes, then turn it off. Place the covered dough inside the warm (but off!) oven to proof.
- Divide and Pre-Shape Once risen, gently punch down the dough to release the air. Turn the dough out onto a lightly floured work surface. For consistent buns, weigh the entire dough and then divide it into 12 equal pieces (each piece should be roughly 65-70 grams). Gently pre-shape each piece into a tight ball by cupping it with your hand and rolling it against the counter. This helps build surface tension for a better rise.
- Fill and Seal the Buns Working with one dough ball at a time, flatten it into a 3-4 inch (7-10 cm) disk, leaving the center slightly thicker than the edges. This thicker center helps contain the jam. Place just 1 teaspoon of smooth apricot jam in the center of each disk. Be careful not to overfill, as this is the primary cause of leaky buns! Bring the edges of the dough up and over the jam, pinching them firmly together to create a tight seal. Flip the bun seam-side down and gently re-round it with your hands.
- Mini Troubleshooting: If jam gets on the edges, wipe it off before sealing, as it can prevent the dough from sticking. If a seam won't stay closed, try pinching a tiny bit of dough from another part of the bun to reinforce the seal, or gently moisten the dry edges with a tiny bit of water.
- Bake Towards the end of the second rise, preheat your oven to 375°F (190°C). Position an oven rack in the center. Bake the Buchteln for 25-30 minutes, or until they are deeply golden brown on top. The buns should also be baked through at the base, with no raw dough visible between them when gently lifted. You can also check for an internal temperature of 200-205°F (93-96°C) for perfect doneness
- Cool, Finish, and Serve Once baked, remove the Buchteln from the oven and let them rest in the pan for 10-15 minutes. This allows the crumb to set and the jam to cool slightly, preventing scalding. Brush the tops with the remaining 1 tablespoon of melted butter. Dust generously with powdered sugar just before serving. Pull them apart and enjoy warm as a cozy dessert, a delightful snack, or even a sweet main course, Austrian style! Optionally, serve them with a warm vanilla sauce (find a fantastic vanilla sauce recipe on our site!).
Buchteln Recipe Easy Jam-Filled Austrian Sweet Buns

- Serves: 12 People
- Prepare Time: 50 minutes
- Cooking Time: 30 minutes
- Calories: -
- Difficulty: Medium
Get ready to fall in love with Buchteln, those incredibly soft, pillowy, and utterly delicious Austrian sweet yeast buns! Imagine biting into a warm, fluffy roll, pulled apart from its neighbors, revealing a sweet burst of apricot jam. Dusted generously with powdered sugar, these delightful treats are a staple in Austrian and Central European kitchens, often enjoyed warm with a side of creamy vanilla sauce. While their roots trace back to Bohemia, Buchteln have found a cherished home in Vienna and beyond, making them a must-try for any sweet-toothed adventurer.
You'll adore this buchteln recipe because it offers one clear, easy-to-follow method, perfect even if you're tackling an enriched dough for the first time. We use pantry-friendly US ingredients, with precise gram measurements for the best results. Plus, we've included helpful make-ahead and freezer-friendly instructions so you can enjoy these delightful buns whenever a craving strikes!
Ingredients
Directions
- Activate the YeastWarm the milk in a small saucepan or microwave until it reaches 105-115°F (40-46°C). It should feel warm, not hot, to the touch. Pour the warm milk into a large mixing bowl (or the bowl of a stand mixer). Whisk in 1 teaspoon of the granulated sugar and the active dry yeast. Let the mixture sit for 5-10 minutes until it becomes foamy. This indicates your yeast is active and ready to work! If it doesn't foam, your yeast might be old or the milk too hot/cold; start again with fresh yeast.
- Mix and Knead the DoughIn a separate bowl, whisk together the all-purpose flour, remaining granulated sugar, and salt. Once your yeast is foamy, add the eggs, melted (and cooled!) butter, and vanilla extract to the yeast mixture. Gradually add the dry ingredients to the wet ingredients.
- By hand: Mix with a sturdy spoon or rubber spatula until a shaggy dough forms, then turn it out onto a lightly floured surface and knead for 10-15 minutes.
- Stand mixer: Use the dough hook attachment and mix on low speed for 8-10 minutes.
- First RiseForm the kneaded dough into a smooth ball. Lightly grease a large bowl with a little oil or butter, place the dough ball inside, and turn it once to coat. Cover the bowl loosely with plastic wrap or a clean kitchen towel. Let it rise in a warm, draft-free place for 1 to 1.5 hours, or until it has doubled in size. If your kitchen is cool, a quick trick is to preheat your oven to its lowest setting (around 170°F/75°C) for 5 minutes, then turn it off. Place the covered dough inside the warm (but off!) oven to proof.
- Divide and Pre-Shape Once risen, gently punch down the dough to release the air. Turn the dough out onto a lightly floured work surface. For consistent buns, weigh the entire dough and then divide it into 12 equal pieces (each piece should be roughly 65-70 grams). Gently pre-shape each piece into a tight ball by cupping it with your hand and rolling it against the counter. This helps build surface tension for a better rise.
- Fill and Seal the Buns Working with one dough ball at a time, flatten it into a 3-4 inch (7-10 cm) disk, leaving the center slightly thicker than the edges. This thicker center helps contain the jam. Place just 1 teaspoon of smooth apricot jam in the center of each disk. Be careful not to overfill, as this is the primary cause of leaky buns! Bring the edges of the dough up and over the jam, pinching them firmly together to create a tight seal. Flip the bun seam-side down and gently re-round it with your hands.
- Mini Troubleshooting: If jam gets on the edges, wipe it off before sealing, as it can prevent the dough from sticking. If a seam won't stay closed, try pinching a tiny bit of dough from another part of the bun to reinforce the seal, or gently moisten the dry edges with a tiny bit of water.
- Bake Towards the end of the second rise, preheat your oven to 375°F (190°C). Position an oven rack in the center. Bake the Buchteln for 25-30 minutes, or until they are deeply golden brown on top. The buns should also be baked through at the base, with no raw dough visible between them when gently lifted. You can also check for an internal temperature of 200-205°F (93-96°C) for perfect doneness
- Cool, Finish, and Serve Once baked, remove the Buchteln from the oven and let them rest in the pan for 10-15 minutes. This allows the crumb to set and the jam to cool slightly, preventing scalding. Brush the tops with the remaining 1 tablespoon of melted butter. Dust generously with powdered sugar just before serving. Pull them apart and enjoy warm as a cozy dessert, a delightful snack, or even a sweet main course, Austrian style! Optionally, serve them with a warm vanilla sauce (find a fantastic vanilla sauce recipe on our site!).
The following nutritional values are per serving (one piece of cake) Calories ~300-350 kcal Carbohydrates ~45-50g Protein ~7-8g Fat ~12-15g Looking to make your Buchteln baking even smoother? While you don't need fancy gadgets, a few key tools can really speed up the process and ensure perfect results every time. These are our top picks: Problem: Kneading an enriched dough like Buchteln by hand can be a serious workout, taking a good 10-15 minutes of continuous effort. Problem: Measuring flour by volume (cups) can be notoriously inaccurate, with variations depending on how you scoop and level. Problem: Brushing melted butter onto individual buns, especially once they're snuggled together in the baking dish, can be a bit awkward with a spoon or paper towel. Click any ingredient for detailed nutritional information:Recipe Nutritional Values
Additional Information
Recipe Success Tips
Ingredient Substitutions & Variations
Cultural Variations
Buchteln are best enjoyed warm and fresh, but you can definitely plan ahead!
Frequently Asked Questions
Recommended Kitchen Tools
Stand Mixer with Dough Hook
Agitate: This can be tiring, messy, and it's tough to know if you've developed the gluten enough to get that perfect, stretchy "windowpane" without overworking it.
Solution: A stand mixer with a dough hook is your best friend here! It does all the hard work for you, consistently kneading the dough to the ideal texture, saving your arms and ensuring a beautifully smooth, elastic dough ready for its first rise.Digital Kitchen Scale
Agitate: This inconsistency can throw off your dough's hydration, leading to buns that are too dense from too much flour or too sticky to handle from too little.
Solution: A digital kitchen scale measures ingredients in grams, providing pinpoint accuracy for flour, sugar, and even liquids. This ensures your dough has the perfect consistency every single time, making it easier to work with and guaranteeing those wonderfully soft, pillowy Buchteln.Pastry Brush
Agitate: Uneven buttering can lead to dry spots on your buns or cause them to stick together too much, making it hard to pull them apart cleanly.
Solution: A simple pastry brush makes quick work of evenly coating your Buchteln with melted butter. This ensures a beautiful golden-brown crust, helps them rise properly, and prevents sticking, keeping that signature pull-apart texture intact.Calories per Ingredient
Resources & References
You may also like




Hey there! I’m just someone who seriously loves good food and believes that cooking doesn’t have to be complicated to be amazing. Whether it’s a quick weeknight dinner or a cozy weekend meal, I’m all about sharing easy, tasty recipes that actually work.