
Armenian Bastegh Make Fruit Leather with Corn Syrup
Armenian Bastegh Make Fruit Leather with Corn Syrup


- Serves: 16 People
- Prepare Time: 30 minutes
- Cooking Time: 20 minutes
- Calories: -
- Difficulty: Medium
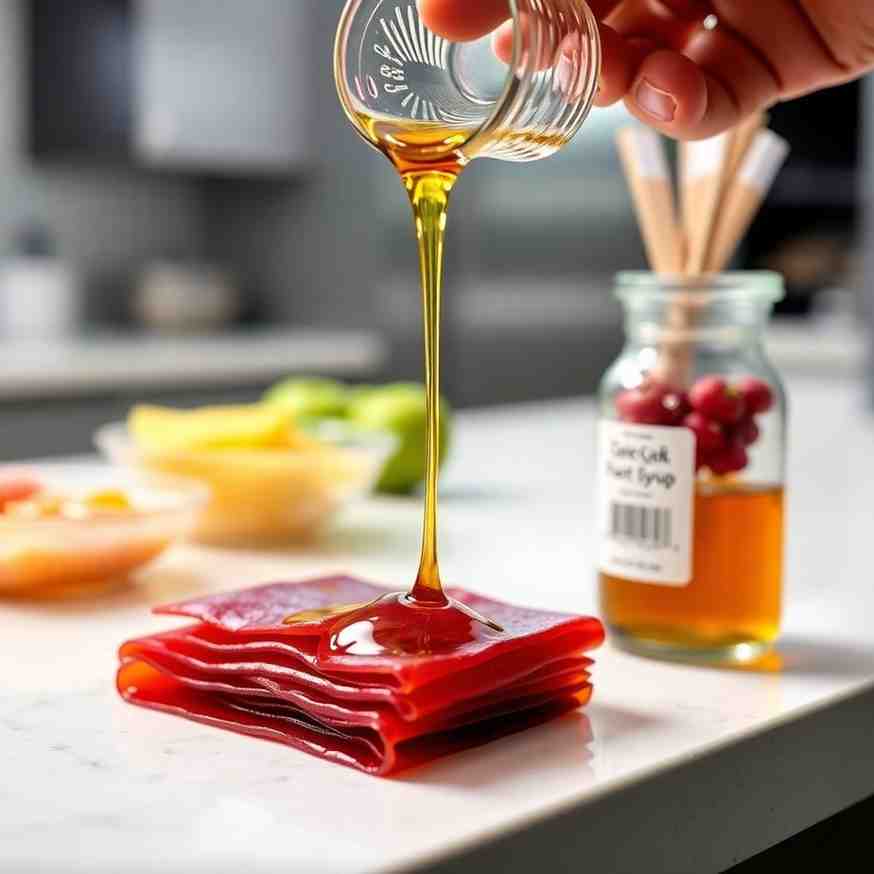
Ever wished for a homemade, old-school Armenian cousin of Fruit Roll-Ups? Well, get ready to meet Armenian Bastegh! This delightful Armenian food is a traditional grape-based fruit leather that’s been cherished for generations. Picture a sweet-tart, chewy treat, often dried on muslin and enjoyed with walnuts – it’s a taste of history in every bite. While some recipes might include corn syrup for that extra shine and chew, our guide will show you how to make it perfectly, whether you choose to add it or not.
This isn't just another one of those sweet recipes with multiple confusing versions. We're offering one clear, tested recipe that works beautifully in any US home kitchen, making it approachable for both beginners and experienced bakers. We'll cover everything you need to know: from the detailed recipe steps to its surprising health benefits, where to buy ingredients, and the fascinating cultural story behind this beloved dessert. Forget about complex desserts recipes; Armenian Bastegh is a journey into simple, delicious tradition you’ll absolutely love!
Flavor & Texture: Sweet-tart, wonderfully chewy, and bendable fruit leather with a subtle, aromatic hint of mahlab.
Best For: Perfect for everyday snacks, lunchbox treats, festive holiday sweets, or as a unique addition to any Armenian dessert platter.
Ingredients
Directions
- Prep the Cloth or Trays: If using unbleached muslin, wash and dry it thoroughly, then secure it over baking sheets or a clean, flat surface. If you're using silicone dehydrator sheets or parchment paper, lightly oil or line your trays.
- Mix the Starch Base: In a medium bowl, whisk together the flour, cornstarch, and cold water until you have a completely lump-free slurry. For extra smoothness, you can strain it through a fine-mesh sieve.
- Heat the Grape Juice: Pour the 100% grape juice into a large, heavy-bottomed pot. If you're using corn syrup, add it now. Bring the mixture to a gentle boil over medium heat. Once simmering, stir in the granulated sugar. Taste the juice and adjust the sugar to your liking, keeping in mind that the flavors will concentrate as the bastegh dries.
- Combine and Cook Until Thick: Slowly and gradually whisk the hot grape juice mixture into your starch slurry. Make sure to keep whisking constantly to prevent lumps. Once combined, pour the entire mixture back into the heavy-bottomed pot. Cook over low heat, stirring continuously with a whisk or spatula. You're looking for a consistency similar to thick pudding, with bubbles slowly popping on the surface. Be careful not to scorch the bottom – keep stirring!
- Flavor with Mahlab: Once the mixture has thickened, remove it from the heat and stir in the soaked and drained ground mahlab. Give it another quick taste and make any final sweetness adjustments. Remember, it will taste a bit less sweet once dried.
- Spread the Mixture Evenly: Carefully pour the hot bastegh mixture onto your prepared muslin or lined trays. Spread it out evenly to about ⅛ inch thick. A visual comparison: think of a slightly thicker fruit roll-up. Use a spatula or the back of a spoon to smooth the surface, ensuring there are no thin spots, as these tend to crack first.
- Dry the Bastegh:
- Option A: Dehydrator (Recommended): Place your trays in the dehydrator. Set the temperature to a low, fruit-leather setting (typically 120-135°F / 50-57°C). Dry for approximately 12-24 hours, rotating the trays periodically for even drying.
- Option B: Oven, Lowest Setting: Preheat your oven to its absolute lowest setting (usually 150-170°F / 65-75°C). Prop the oven door slightly ajar with a wooden spoon to allow moisture to escape. Dry for about 18-36 hours, checking frequently and rotating trays.
- Note on Traditional Sun-Drying: Historically, Armenians sun-dried bastegh on muslin in very dry climates. While authentic, we recommend using a dehydrator or oven for food safety and consistent results in a home kitchen.
- Test for Doneness: Your bastegh is ready when it feels dry to the touch, with no wet or sticky spots. It should peel away cleanly from the muslin or liner and be flexible enough to bend without cracking.
- Peel, Dust, and Cut: If your bastegh is sticking to the muslin, a traditional trick is to lightly spray the back of the muslin with a fine mist of water; this helps it release. Once peeled, lightly dust the sticky side with cornstarch or powdered sugar to prevent sticking. Cut the leather into strips, rectangles, or any desired shapes, then roll or fold them.
- Store Safely: Allow the cut pieces to air dry for another hour or two to ensure any remaining surface moisture is gone. Then, wrap individual pieces in parchment paper or wax paper and pack them into airtight containers or glass jars. Store at room temperature in a cool, dry pantry for up to 2-3 weeks, or refrigerate for longer storage (up to 1-2 months). Look for any signs of spoilage like mold or off smells before consuming.
Armenian Bastegh Make Fruit Leather with Corn Syrup
- Serves: 16 People
- Prepare Time: 30 minutes
- Cooking Time: 20 minutes
- Calories: -
- Difficulty: Medium
Ever wished for a homemade, old-school Armenian cousin of Fruit Roll-Ups? Well, get ready to meet Armenian Bastegh! This delightful Armenian food is a traditional grape-based fruit leather that’s been cherished for generations. Picture a sweet-tart, chewy treat, often dried on muslin and enjoyed with walnuts – it’s a taste of history in every bite. While some recipes might include corn syrup for that extra shine and chew, our guide will show you how to make it perfectly, whether you choose to add it or not.
This isn't just another one of those sweet recipes with multiple confusing versions. We're offering one clear, tested recipe that works beautifully in any US home kitchen, making it approachable for both beginners and experienced bakers. We'll cover everything you need to know: from the detailed recipe steps to its surprising health benefits, where to buy ingredients, and the fascinating cultural story behind this beloved dessert. Forget about complex desserts recipes; Armenian Bastegh is a journey into simple, delicious tradition you’ll absolutely love!
Flavor & Texture: Sweet-tart, wonderfully chewy, and bendable fruit leather with a subtle, aromatic hint of mahlab.
Best For: Perfect for everyday snacks, lunchbox treats, festive holiday sweets, or as a unique addition to any Armenian dessert platter.
Ingredients
Directions
- Prep the Cloth or Trays: If using unbleached muslin, wash and dry it thoroughly, then secure it over baking sheets or a clean, flat surface. If you're using silicone dehydrator sheets or parchment paper, lightly oil or line your trays.
- Mix the Starch Base: In a medium bowl, whisk together the flour, cornstarch, and cold water until you have a completely lump-free slurry. For extra smoothness, you can strain it through a fine-mesh sieve.
- Heat the Grape Juice: Pour the 100% grape juice into a large, heavy-bottomed pot. If you're using corn syrup, add it now. Bring the mixture to a gentle boil over medium heat. Once simmering, stir in the granulated sugar. Taste the juice and adjust the sugar to your liking, keeping in mind that the flavors will concentrate as the bastegh dries.
- Combine and Cook Until Thick: Slowly and gradually whisk the hot grape juice mixture into your starch slurry. Make sure to keep whisking constantly to prevent lumps. Once combined, pour the entire mixture back into the heavy-bottomed pot. Cook over low heat, stirring continuously with a whisk or spatula. You're looking for a consistency similar to thick pudding, with bubbles slowly popping on the surface. Be careful not to scorch the bottom – keep stirring!
- Flavor with Mahlab: Once the mixture has thickened, remove it from the heat and stir in the soaked and drained ground mahlab. Give it another quick taste and make any final sweetness adjustments. Remember, it will taste a bit less sweet once dried.
- Spread the Mixture Evenly: Carefully pour the hot bastegh mixture onto your prepared muslin or lined trays. Spread it out evenly to about ⅛ inch thick. A visual comparison: think of a slightly thicker fruit roll-up. Use a spatula or the back of a spoon to smooth the surface, ensuring there are no thin spots, as these tend to crack first.
- Dry the Bastegh:
- Option A: Dehydrator (Recommended): Place your trays in the dehydrator. Set the temperature to a low, fruit-leather setting (typically 120-135°F / 50-57°C). Dry for approximately 12-24 hours, rotating the trays periodically for even drying.
- Option B: Oven, Lowest Setting: Preheat your oven to its absolute lowest setting (usually 150-170°F / 65-75°C). Prop the oven door slightly ajar with a wooden spoon to allow moisture to escape. Dry for about 18-36 hours, checking frequently and rotating trays.
- Note on Traditional Sun-Drying: Historically, Armenians sun-dried bastegh on muslin in very dry climates. While authentic, we recommend using a dehydrator or oven for food safety and consistent results in a home kitchen.
- Test for Doneness: Your bastegh is ready when it feels dry to the touch, with no wet or sticky spots. It should peel away cleanly from the muslin or liner and be flexible enough to bend without cracking.
- Peel, Dust, and Cut: If your bastegh is sticking to the muslin, a traditional trick is to lightly spray the back of the muslin with a fine mist of water; this helps it release. Once peeled, lightly dust the sticky side with cornstarch or powdered sugar to prevent sticking. Cut the leather into strips, rectangles, or any desired shapes, then roll or fold them.
- Store Safely: Allow the cut pieces to air dry for another hour or two to ensure any remaining surface moisture is gone. Then, wrap individual pieces in parchment paper or wax paper and pack them into airtight containers or glass jars. Store at room temperature in a cool, dry pantry for up to 2-3 weeks, or refrigerate for longer storage (up to 1-2 months). Look for any signs of spoilage like mold or off smells before consuming.
The following nutritional values are per serving (one piece of cake) Calories ~120-150 kcal per serving Carbohydrates ~30-38g per serving Protein ~1g per serving Fat <1g per serving Making traditional Armenian Bastegh can feel like a big project, but with a few smart tools and ingredient choices, you can streamline the process and make it much more manageable in your home kitchen. Here are our top recommendations: Problem: Traditional sun-drying requires specific weather conditions and can be slow, inconsistent, or even invite pests. Oven drying can tie up your oven for hours and might not offer the precise low temperatures needed. Problem: Muslin cloth is traditional, but it can be tricky to work with. The bastegh mixture can sometimes stick stubbornly, and peeling it off perfectly requires a bit of a knack (like the water-spray trick). Parchment paper can wrinkle or tear, leading to uneven drying and sticking. Problem: Mahlab, a key aromatic in Armenian baking, traditionally comes as whole cherry pits, which require grinding. This adds an extra step and specialized equipment (like a spice grinder) that not everyone has on hand. Click any ingredient for detailed nutritional information:Recipe Nutritional Values
Additional Information
Recipe Success Tips
Troubleshooting & Pro Tips
Ingredient Substitutions & Variations
Make-Ahead & Storage Instructions
Frequently Asked Questions
Recommended Kitchen Tools
A Dehydrator for Consistent Drying
Agitate: Imagine spending all that effort on your delicious bastegh mixture, only for it to dry unevenly, crack, or remain sticky in spots because of fluctuating temperatures or humidity. It's frustrating when your hard work doesn't pay off!
Solution: A dedicated food dehydrator provides a controlled, low-temperature environment that ensures your bastegh dries perfectly and consistently every time. You can set it and forget it, knowing your fruit leather will achieve that ideal chewy-yet-flexible texture without constant monitoring.Silicone Dehydrator Sheets or Baking Mats
Agitate: There's nothing worse than carefully spreading your bastegh, letting it dry for hours, and then struggling to peel it off the surface, losing precious pieces or ending up with a torn, messy product.
Solution: High-quality silicone dehydrator sheets or baking mats offer a naturally non-stick surface that makes peeling your finished bastegh an absolute breeze. They're reusable, durable, and ensure your fruit leather comes off cleanly, preserving its perfect shape and texture.Pre-Ground Mahlab
Agitate: You're excited to infuse your bastegh with that unique, fragrant mahlab aroma, but then you realize you have to grind the tiny seeds yourself, potentially making a mess or delaying your recipe. It can feel like an unnecessary hurdle when you're in the flow of cooking.
Solution: Opting for pre-ground mahlab saves you time and effort. It's readily available in most Middle Eastern or Armenian grocery stores, or online. This way, you can easily measure and add this distinctive spice, ensuring your bastegh has that authentic flavor without any extra fuss.Calories per Ingredient
Resources & References
You may also like


Hey there! I’m just someone who seriously loves good food and believes that cooking doesn’t have to be complicated to be amazing. Whether it’s a quick weeknight dinner or a cozy weekend meal, I’m all about sharing easy, tasty recipes that actually work.


