
Flaky Chocolate Filled Croissants Recipe | Bake at Home
Flaky Chocolate Filled Croissants Recipe | Bake at Home

- Serves: 12 People
- Prepare Time: 2 hours (ac
- Cooking Time: 20-25 minut
- Calories: -
- Difficulty: Easy
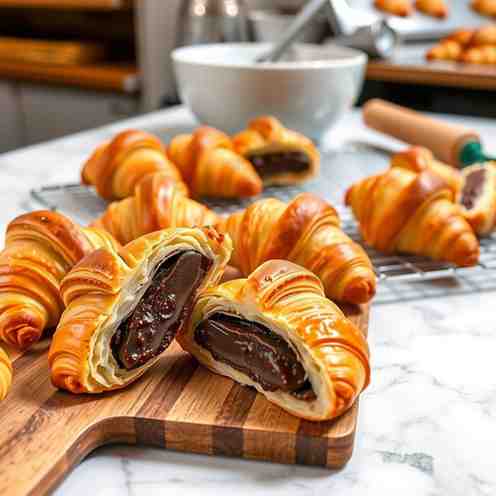
Ever dreamt of biting into a warm, buttery, chocolate filled croissant with perfect flaky layers and a rich, melt-in-your-mouth chocolate center, just like you’d find in a Parisian bakery? Good news, aspiring baker! Making authentic French Pain au Chocolat from scratch at home isn't just a dream – it's totally doable, and we’re here to guide you every step of the way. This isn't just any croissant and chocolate recipe; it's your definitive guide to creating bakery-quality indulgence right in your own kitchen.
Before we dive into the delicious details, let's clear up a common misconception: what exactly is Pain au Chocolat? Literally translating to "bread with chocolate," it's a classic French pastry, distinct from a regular chocolate stuffed croissant in its shape and the way the chocolate is encased. While many call them "chocolate croissants," true Pain au Chocolat are typically rectangular, enclosing two batons of dark chocolate, rather than the crescent shape of a plain croissant. And yes, in some parts of France, particularly the Southwest, you might hear them lovingly referred to as "chocolatine" – a friendly rivalry in the world of French baking! Ready to master the best croissant recipe for these delightful treats? You're in for a flaky, buttery journey!
Ingredients
Directions
- Day 1 Evening: Prepare the Dough
- Make the Dough (Détrempe)
- In the bowl of a stand mixer (or a large bowl if mixing by hand), combine the flour, sugar, instant yeast, and salt. Whisk briefly to combine.
- Add the cold milk, cold water, and softened butter.
- Using the dough hook attachment, mix on low speed for 2-3 minutes until a shaggy dough forms. Increase speed to medium-low and knead for another 5-7 minutes until the dough is smooth, elastic, and pulls away from the sides of the bowl. It should feel soft and slightly tacky, but not sticky.
- Lightly flatten the dough into a 1-inch thick rectangle, wrap it tightly in plastic wrap, and refrigerate for at least 8 hours, or preferably overnight. This long chill is crucial for developing flavor and relaxing the gluten.
- Day 2 Morning: Butter Block & Lamination
- Make the Butter Block
- Take your cold, high-fat butter. Place it between two sheets of parchment paper.
- Using a rolling pin, gently pound the butter until it starts to soften and become pliable, but not melted.
- Roll the butter into an 8x8 inch square. If it cracks, gently press it back together. The goal is an even, consistent block of butter that is flexible enough to roll without breaking. Keep it cold, but not rock hard.
- Lock in the Butter
- On a lightly floured surface, roll your chilled dough into a 16x8 inch rectangle. Make sure your edges are as clean and straight as possible.
- Place the butter block squarely in the center of one half of the dough rectangle, leaving a 1-inch border on three sides and the other half of the dough uncovered.
- Fold the uncovered half of the dough over the butter block, carefully aligning the edges. Pinch all three open edges firmly together to completely seal the butter inside. This is your "lock-in."
- Gently press the dough down with your rolling pin, then roll it out into a 16x8 inch rectangle again. This first roll-out helps distribute the butter.
- Visual Checkpoint: At this stage, you should see a relatively even layer of butter peeking through the dough if you gently press on it, with no major air pockets.
- Lamination Turns (with rest times)
- Turn #1 (Single Fold):
- With the short side of the rectangle facing you, fold the bottom third of the dough up towards the center.
- Fold the top third of the dough down over the bottom third, like a letter. You now have three layers of dough and two layers of butter.
- Wrap the dough tightly in plastic wrap and refrigerate for 30-45 minutes. This rest is vital to relax the gluten and prevent the butter from melting.
- Turn #2 (Single Fold):
- Remove the dough from the fridge. Place it on a lightly floured surface with the open seam (the folded edge) facing to your right.
- Roll the dough out again into a 16x8 inch rectangle.
- Repeat the single fold: fold the bottom third up, then the top third down.
- Wrap tightly and refrigerate for another 30-45 minutes.
- Turn #3 (Final Roll):
- Remove the dough, place it with the open seam to your right.
- Roll the dough one last time into a large rectangle, about 20x10 inches and approximately ⅛ inch thick. Aim for even thickness throughout.
- If your kitchen is warm: If your butter is getting too soft or starting to leak, pop the dough back into the fridge for 10-15 minutes between rolls or folds. Don't rush it! Cold dough is your friend.
- Day 2 Afternoon: Shape, Proof & Bake
- Cut and Shape Pain au Chocolat (the classic rectangle)
- Trim the edges of your large dough rectangle to create clean, straight sides.
- Cut the dough into 12 rectangles, each approximately 3.5 inches wide by 5 inches long. A ruler and a sharp knife or pizza wheel will help with precision.
- Place one chocolate baton about ½ inch from one of the short ends of a dough rectangle.
- Roll the dough over the baton once. Place a second chocolate baton about ½ inch from the end of that first roll.
- Continue rolling the dough tightly over both batons until you reach the end. Ensure the seam is on the bottom to prevent unraveling during proofing and baking.
- Repeat with the remaining dough rectangles and chocolate batons.
- Proof (without melting the butter)
- Arrange the shaped pain au chocolat on baking sheets lined with parchment paper, leaving plenty of space between them (they will expand).
- Create an ideal proofing environment: a warm, humid, draft-free spot. This could be your oven with just the light on (turned off), or a proofer if you have one. The ideal temperature is around 75-80°F (24-27°C). Avoid anything too hot, as it will melt the butter.
- Proof for 2-3 hours.
- Visual Cues: The pain au chocolat should nearly double in size, look visibly puffy, and the layers should be distinct and separated.
- "Wobble Test": Gently jiggle one pastry. It should wobble delicately, indicating it's light and airy inside. If it feels dense, it needs more proofing.
- Egg Wash and Bake
- Preheat your oven to 400°F (200°C).
- In a small bowl, whisk together the egg and milk/water for the egg wash.
- Gently brush the tops and sides of the proofed pain au chocolat with the egg wash, being careful not to deflate them.
- Bake for 10 minutes at 400°F (200°C), then reduce the oven temperature to 375°F (190°C) and bake for another 10-15 minutes, or until deep golden brown.
- When to rotate pans: If baking multiple trays, rotate them halfway through baking (after the initial 10 minutes) for even browning. "Deep golden" means a rich, caramel-like color, not just pale yellow.
- Cool and Serve
- Transfer the baked pain au chocolat to a wire rack immediately.
- Let them cool for at least 15-20 minutes. This short cooling period is essential! It allows the butter within the layers to set, ensuring those beautiful, crisp, flaky layers you worked so hard for. Serving them too hot can result in a slightly doughy interior. Enjoy!
Flaky Chocolate Filled Croissants Recipe | Bake at Home

- Serves: 12 People
- Prepare Time: 2 hours (ac
- Cooking Time: 20-25 minut
- Calories: -
- Difficulty: Easy
Ever dreamt of biting into a warm, buttery, chocolate filled croissant with perfect flaky layers and a rich, melt-in-your-mouth chocolate center, just like you’d find in a Parisian bakery? Good news, aspiring baker! Making authentic French Pain au Chocolat from scratch at home isn't just a dream – it's totally doable, and we’re here to guide you every step of the way. This isn't just any croissant and chocolate recipe; it's your definitive guide to creating bakery-quality indulgence right in your own kitchen.
Before we dive into the delicious details, let's clear up a common misconception: what exactly is Pain au Chocolat? Literally translating to "bread with chocolate," it's a classic French pastry, distinct from a regular chocolate stuffed croissant in its shape and the way the chocolate is encased. While many call them "chocolate croissants," true Pain au Chocolat are typically rectangular, enclosing two batons of dark chocolate, rather than the crescent shape of a plain croissant. And yes, in some parts of France, particularly the Southwest, you might hear them lovingly referred to as "chocolatine" – a friendly rivalry in the world of French baking! Ready to master the best croissant recipe for these delightful treats? You're in for a flaky, buttery journey!
Ingredients
Directions
- Day 1 Evening: Prepare the Dough
- Make the Dough (Détrempe)
- In the bowl of a stand mixer (or a large bowl if mixing by hand), combine the flour, sugar, instant yeast, and salt. Whisk briefly to combine.
- Add the cold milk, cold water, and softened butter.
- Using the dough hook attachment, mix on low speed for 2-3 minutes until a shaggy dough forms. Increase speed to medium-low and knead for another 5-7 minutes until the dough is smooth, elastic, and pulls away from the sides of the bowl. It should feel soft and slightly tacky, but not sticky.
- Lightly flatten the dough into a 1-inch thick rectangle, wrap it tightly in plastic wrap, and refrigerate for at least 8 hours, or preferably overnight. This long chill is crucial for developing flavor and relaxing the gluten.
- Day 2 Morning: Butter Block & Lamination
- Make the Butter Block
- Take your cold, high-fat butter. Place it between two sheets of parchment paper.
- Using a rolling pin, gently pound the butter until it starts to soften and become pliable, but not melted.
- Roll the butter into an 8x8 inch square. If it cracks, gently press it back together. The goal is an even, consistent block of butter that is flexible enough to roll without breaking. Keep it cold, but not rock hard.
- Lock in the Butter
- On a lightly floured surface, roll your chilled dough into a 16x8 inch rectangle. Make sure your edges are as clean and straight as possible.
- Place the butter block squarely in the center of one half of the dough rectangle, leaving a 1-inch border on three sides and the other half of the dough uncovered.
- Fold the uncovered half of the dough over the butter block, carefully aligning the edges. Pinch all three open edges firmly together to completely seal the butter inside. This is your "lock-in."
- Gently press the dough down with your rolling pin, then roll it out into a 16x8 inch rectangle again. This first roll-out helps distribute the butter.
- Visual Checkpoint: At this stage, you should see a relatively even layer of butter peeking through the dough if you gently press on it, with no major air pockets.
- Lamination Turns (with rest times)
- Turn #1 (Single Fold):
- With the short side of the rectangle facing you, fold the bottom third of the dough up towards the center.
- Fold the top third of the dough down over the bottom third, like a letter. You now have three layers of dough and two layers of butter.
- Wrap the dough tightly in plastic wrap and refrigerate for 30-45 minutes. This rest is vital to relax the gluten and prevent the butter from melting.
- Turn #2 (Single Fold):
- Remove the dough from the fridge. Place it on a lightly floured surface with the open seam (the folded edge) facing to your right.
- Roll the dough out again into a 16x8 inch rectangle.
- Repeat the single fold: fold the bottom third up, then the top third down.
- Wrap tightly and refrigerate for another 30-45 minutes.
- Turn #3 (Final Roll):
- Remove the dough, place it with the open seam to your right.
- Roll the dough one last time into a large rectangle, about 20x10 inches and approximately ⅛ inch thick. Aim for even thickness throughout.
- If your kitchen is warm: If your butter is getting too soft or starting to leak, pop the dough back into the fridge for 10-15 minutes between rolls or folds. Don't rush it! Cold dough is your friend.
- Day 2 Afternoon: Shape, Proof & Bake
- Cut and Shape Pain au Chocolat (the classic rectangle)
- Trim the edges of your large dough rectangle to create clean, straight sides.
- Cut the dough into 12 rectangles, each approximately 3.5 inches wide by 5 inches long. A ruler and a sharp knife or pizza wheel will help with precision.
- Place one chocolate baton about ½ inch from one of the short ends of a dough rectangle.
- Roll the dough over the baton once. Place a second chocolate baton about ½ inch from the end of that first roll.
- Continue rolling the dough tightly over both batons until you reach the end. Ensure the seam is on the bottom to prevent unraveling during proofing and baking.
- Repeat with the remaining dough rectangles and chocolate batons.
- Proof (without melting the butter)
- Arrange the shaped pain au chocolat on baking sheets lined with parchment paper, leaving plenty of space between them (they will expand).
- Create an ideal proofing environment: a warm, humid, draft-free spot. This could be your oven with just the light on (turned off), or a proofer if you have one. The ideal temperature is around 75-80°F (24-27°C). Avoid anything too hot, as it will melt the butter.
- Proof for 2-3 hours.
- Visual Cues: The pain au chocolat should nearly double in size, look visibly puffy, and the layers should be distinct and separated.
- "Wobble Test": Gently jiggle one pastry. It should wobble delicately, indicating it's light and airy inside. If it feels dense, it needs more proofing.
- Egg Wash and Bake
- Preheat your oven to 400°F (200°C).
- In a small bowl, whisk together the egg and milk/water for the egg wash.
- Gently brush the tops and sides of the proofed pain au chocolat with the egg wash, being careful not to deflate them.
- Bake for 10 minutes at 400°F (200°C), then reduce the oven temperature to 375°F (190°C) and bake for another 10-15 minutes, or until deep golden brown.
- When to rotate pans: If baking multiple trays, rotate them halfway through baking (after the initial 10 minutes) for even browning. "Deep golden" means a rich, caramel-like color, not just pale yellow.
- Cool and Serve
- Transfer the baked pain au chocolat to a wire rack immediately.
- Let them cool for at least 15-20 minutes. This short cooling period is essential! It allows the butter within the layers to set, ensuring those beautiful, crisp, flaky layers you worked so hard for. Serving them too hot can result in a slightly doughy interior. Enjoy!
You may also like


Hey there! I’m just someone who seriously loves good food and believes that cooking doesn’t have to be complicated to be amazing. Whether it’s a quick weeknight dinner or a cozy weekend meal, I’m all about sharing easy, tasty recipes that actually work.


