
Bake Noon Barbari - Persian Flatbread Recipe
Bake Noon Barbari - Persian Flatbread Recipe

- Serves: 2 People
- Prepare Time: 30 minutes
- Cooking Time: 20-25 minut
- Calories: -
- Difficulty: Medium
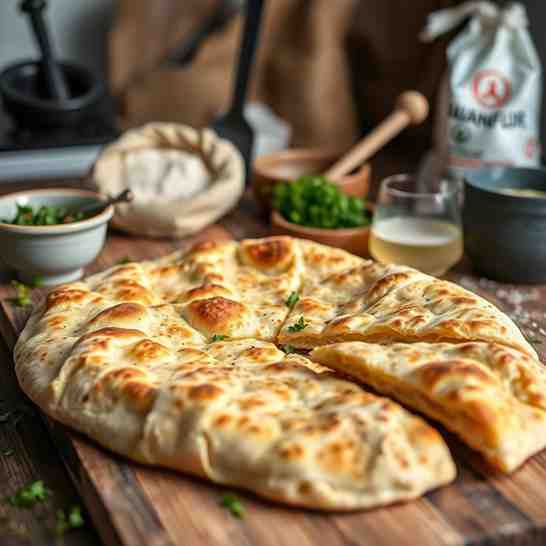
Get ready to transform your kitchen into a bustling Iranian bakery! If you've ever dreamt of sinking your teeth into warm, fresh-baked bread with a crisp exterior and a soft, chewy interior, then you're in the right place. Our definitive guide to Noon Barbari (Persian Flatbread) brings the heart of Iranian food recipes right to your American home kitchen. This isn't just any bread; it's a breakfast icon, a staple of Persian cuisine recipes known for its distinctive long grooves, shiny golden crust, and a generous sprinkle of sesame and nigella seeds. Forget complicated techniques; we’re breaking down how to make this delicious fresh baked bread from scratch, ensuring you master those classic grooves and achieve that perfect texture on your very first try. Let's dive into making this delightful bread & breakfast essential!
Ingredients
Directions
- Timeline at a Glance:
- Mix the Dough: 15 minutes
- First Rise: 60-90 minutes
- Make the Roomal Glaze: 5 minutes
- Divide + Pre-shape: 5 minutes
- Shape + Proof: 20-30 minutes
- Bake: 10-12 minutes per loaf
- Mix the Dough
- In a large bowl (or the bowl of a stand mixer fitted with a dough hook), combine the bread flour, yeast, sugar, and salt. Whisk briefly to combine.
- Add the lukewarm water and olive oil. Mix with a wooden spoon or on low speed with the stand mixer until a shaggy dough forms.
- Increase the mixer speed to medium-low (or turn the dough out onto a lightly floured surface) and knead for 8-10 minutes.
- What you should see: The dough will be quite sticky initially – this is completely normal and desired for a soft, chewy bread! It will gradually become smoother and more elastic, pulling away from the sides of the bowl slightly but remaining soft and tacky. Don't add too much extra flour.
- First Rise
- Lightly grease a clean large bowl with a little olive oil. Transfer the dough to the bowl, turning it once to coat. Cover the bowl tightly with plastic wrap or a damp kitchen towel.
- Let the dough rise in a warm, draft-free place for 60-90 minutes, or until doubled in size.
- What you should see: The dough will look puffy and significantly larger. When gently poked with a floured finger, the indentation should remain.
- Make the Roomal Glaze
- While the dough is rising, prepare the roomal glaze. In a small saucepan, whisk together the flour and water until smooth. Place over medium heat and cook, stirring constantly, for 2-3 minutes until the mixture thickens to the consistency of a thin pancake batter or cream.
- Remove from heat and stir in the baking soda. It might fizz slightly. Let it cool completely.
- What you should see: A smooth, slightly glossy, pourable glaze. It should not be lumpy or overly thick like a paste.
- Divide + Pre-shape
- Once the dough has doubled, gently turn it out onto a lightly floured surface. Avoid deflating it too much.
- Using a bench scraper or sharp knife, divide the dough into two equal portions.
- Gently shape each portion into a loose oval or rectangle. Don't worry about perfection here, just a basic shape.
- What you should see: Two soft, slightly sticky dough pieces that are easy to handle gently.
- Shape the Oval and Make the Grooves
- Line two separate baking sheets with parchment paper. If using a pizza stone or inverted sheet pan, you'll transfer the parchment later.
- Working with one piece of dough at a time, gently stretch and pat it into a long, oval shape, roughly 12-14 inches long and 6-8 inches wide. Try to maintain an even thickness.
- Lightly flour your fingertips. Using three fingers (index, middle, ring), press firmly into the dough to create 4-5 deep, parallel grooves running lengthwise down the bread. Make sure the grooves are deep enough so they don't disappear during proofing and baking.
- Carefully transfer the shaped dough on its parchment paper to your prepared baking surface (or directly onto the sheet pan if using). Repeat with the second dough piece.
- What you should see: A distinct oval shape with clearly defined, deep grooves. The dough should stretch without tearing.
- Glaze + Seed Topping
- Brush each shaped loaf generously with the cooled roomal glaze, ensuring an even coating over the entire surface, including inside the grooves.
- Immediately sprinkle generously with sesame seeds and nigella seeds. Don't be shy – you want a good covering!
- What you should see: A shiny, wet surface covered with a good amount of seeds, ready for proofing.
- Transfer to the Oven (the part people mess up)
- Cover the loaves loosely with plastic wrap or a light kitchen towel and let them proof for 20-30 minutes in a warm spot.
- Preheat your oven to 450°F (230°C) with your pizza stone or inverted baking sheet inside for at least 30 minutes. This high heat and preheated surface are crucial for a crisp crust.
- Once proofed, carefully slide the parchment paper with the loaf onto the preheated pizza stone or inverted baking sheet. If your dough is sticking to the parchment, use a wide spatula to gently lift and separate before transferring.
- What you should see: The loaves will have puffed up slightly during proofing. The transfer should be swift and confident to avoid disturbing the dough.
- Bake (high heat + rotate)
- Bake for 10-12 minutes. After 5-6 minutes, rotate the bread 180 degrees for even browning.
- What you should see: The bread will puff up, turn a beautiful golden-brown, and the seeds will be toasted. The bottom should be golden and sound hollow when tapped. If it looks pale, give it another minute or two.
- Cool and Serve
- Once baked, carefully transfer the Barbari loaves to a wire rack to cool for at least 10-15 minutes before slicing.
- What you should see: A beautifully browned, crisp-edged loaf with a shiny crust and visible grooves. Cooling allows the internal crumb to set properly, preventing a gummy texture.
Bake Noon Barbari - Persian Flatbread Recipe
- Serves: 2 People
- Prepare Time: 30 minutes
- Cooking Time: 20-25 minut
- Calories: -
- Difficulty: Medium
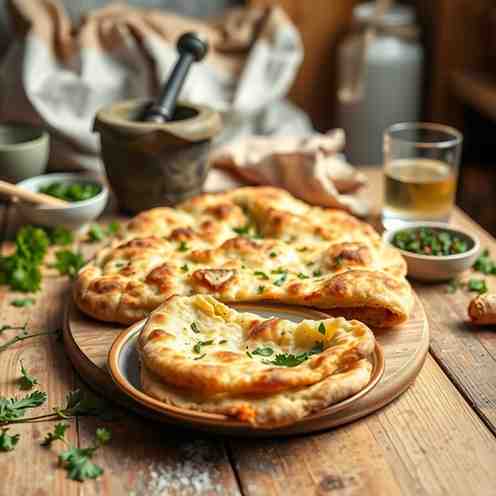
Get ready to transform your kitchen into a bustling Iranian bakery! If you've ever dreamt of sinking your teeth into warm, fresh-baked bread with a crisp exterior and a soft, chewy interior, then you're in the right place. Our definitive guide to Noon Barbari (Persian Flatbread) brings the heart of Iranian food recipes right to your American home kitchen. This isn't just any bread; it's a breakfast icon, a staple of Persian cuisine recipes known for its distinctive long grooves, shiny golden crust, and a generous sprinkle of sesame and nigella seeds. Forget complicated techniques; we’re breaking down how to make this delicious fresh baked bread from scratch, ensuring you master those classic grooves and achieve that perfect texture on your very first try. Let's dive into making this delightful bread & breakfast essential!
Ingredients
Directions
- Timeline at a Glance:
- Mix the Dough: 15 minutes
- First Rise: 60-90 minutes
- Make the Roomal Glaze: 5 minutes
- Divide + Pre-shape: 5 minutes
- Shape + Proof: 20-30 minutes
- Bake: 10-12 minutes per loaf
- Mix the Dough
- In a large bowl (or the bowl of a stand mixer fitted with a dough hook), combine the bread flour, yeast, sugar, and salt. Whisk briefly to combine.
- Add the lukewarm water and olive oil. Mix with a wooden spoon or on low speed with the stand mixer until a shaggy dough forms.
- Increase the mixer speed to medium-low (or turn the dough out onto a lightly floured surface) and knead for 8-10 minutes.
- What you should see: The dough will be quite sticky initially – this is completely normal and desired for a soft, chewy bread! It will gradually become smoother and more elastic, pulling away from the sides of the bowl slightly but remaining soft and tacky. Don't add too much extra flour.
- First Rise
- Lightly grease a clean large bowl with a little olive oil. Transfer the dough to the bowl, turning it once to coat. Cover the bowl tightly with plastic wrap or a damp kitchen towel.
- Let the dough rise in a warm, draft-free place for 60-90 minutes, or until doubled in size.
- What you should see: The dough will look puffy and significantly larger. When gently poked with a floured finger, the indentation should remain.
- Make the Roomal Glaze
- While the dough is rising, prepare the roomal glaze. In a small saucepan, whisk together the flour and water until smooth. Place over medium heat and cook, stirring constantly, for 2-3 minutes until the mixture thickens to the consistency of a thin pancake batter or cream.
- Remove from heat and stir in the baking soda. It might fizz slightly. Let it cool completely.
- What you should see: A smooth, slightly glossy, pourable glaze. It should not be lumpy or overly thick like a paste.
- Divide + Pre-shape
- Once the dough has doubled, gently turn it out onto a lightly floured surface. Avoid deflating it too much.
- Using a bench scraper or sharp knife, divide the dough into two equal portions.
- Gently shape each portion into a loose oval or rectangle. Don't worry about perfection here, just a basic shape.
- What you should see: Two soft, slightly sticky dough pieces that are easy to handle gently.
- Shape the Oval and Make the Grooves
- Line two separate baking sheets with parchment paper. If using a pizza stone or inverted sheet pan, you'll transfer the parchment later.
- Working with one piece of dough at a time, gently stretch and pat it into a long, oval shape, roughly 12-14 inches long and 6-8 inches wide. Try to maintain an even thickness.
- Lightly flour your fingertips. Using three fingers (index, middle, ring), press firmly into the dough to create 4-5 deep, parallel grooves running lengthwise down the bread. Make sure the grooves are deep enough so they don't disappear during proofing and baking.
- Carefully transfer the shaped dough on its parchment paper to your prepared baking surface (or directly onto the sheet pan if using). Repeat with the second dough piece.
- What you should see: A distinct oval shape with clearly defined, deep grooves. The dough should stretch without tearing.
- Glaze + Seed Topping
- Brush each shaped loaf generously with the cooled roomal glaze, ensuring an even coating over the entire surface, including inside the grooves.
- Immediately sprinkle generously with sesame seeds and nigella seeds. Don't be shy – you want a good covering!
- What you should see: A shiny, wet surface covered with a good amount of seeds, ready for proofing.
- Transfer to the Oven (the part people mess up)
- Cover the loaves loosely with plastic wrap or a light kitchen towel and let them proof for 20-30 minutes in a warm spot.
- Preheat your oven to 450°F (230°C) with your pizza stone or inverted baking sheet inside for at least 30 minutes. This high heat and preheated surface are crucial for a crisp crust.
- Once proofed, carefully slide the parchment paper with the loaf onto the preheated pizza stone or inverted baking sheet. If your dough is sticking to the parchment, use a wide spatula to gently lift and separate before transferring.
- What you should see: The loaves will have puffed up slightly during proofing. The transfer should be swift and confident to avoid disturbing the dough.
- Bake (high heat + rotate)
- Bake for 10-12 minutes. After 5-6 minutes, rotate the bread 180 degrees for even browning.
- What you should see: The bread will puff up, turn a beautiful golden-brown, and the seeds will be toasted. The bottom should be golden and sound hollow when tapped. If it looks pale, give it another minute or two.
- Cool and Serve
- Once baked, carefully transfer the Barbari loaves to a wire rack to cool for at least 10-15 minutes before slicing.
- What you should see: A beautifully browned, crisp-edged loaf with a shiny crust and visible grooves. Cooling allows the internal crumb to set properly, preventing a gummy texture.
You may also like


Hey there! I’m just someone who seriously loves good food and believes that cooking doesn’t have to be complicated to be amazing. Whether it’s a quick weeknight dinner or a cozy weekend meal, I’m all about sharing easy, tasty recipes that actually work.


