
Best Pork Roast - Juicy Loin & Pan Gravy Recipe
Best Pork Roast - Juicy Loin & Pan Gravy Recipe
- Serves: 6 People
- Prepare Time: 20 minutes
- Cooking Time: 75-90 minut
- Calories: -
- Difficulty: Medium
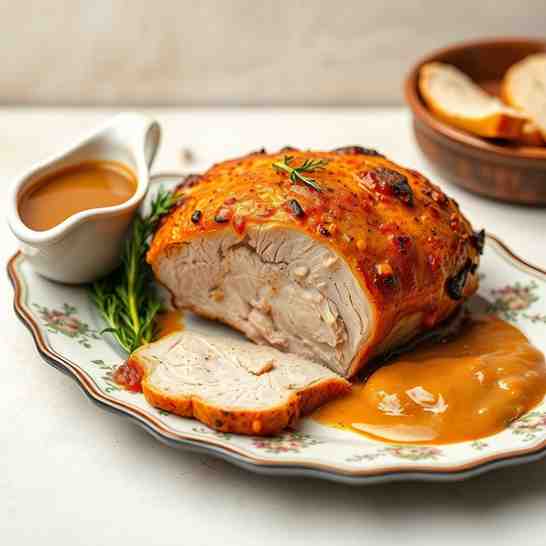
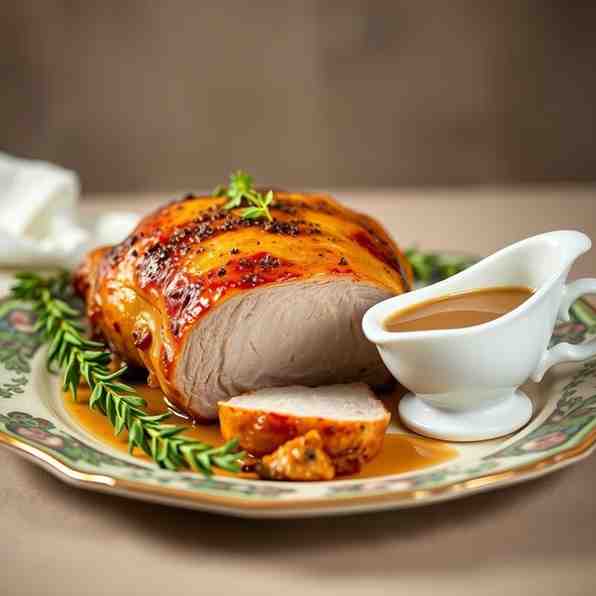
Welcome to your pork roast paradise! If you've been searching for the best pork roast recipe that guarantees a juicy, tender result every single time, you've found it. This recipe focuses on a succulent boneless pork loin roast, celebrated for its lean yet incredibly flavorful meat. The secret to its tenderness? Cooking it to the perfect internal temperature and giving it a crucial rest. And what's a fantastic roast without an equally amazing gravy? Our pan gravy, made right in the roasting pan from those delicious drippings, is savory, slightly herby, and the ideal companion. Whether you're planning a cozy Sunday dinner, a festive holiday feast, or simply looking for a delicious meal prep option, this pork loin roast will quickly become a family favorite. We'll guide you through every step, emphasizing the USDA-recommended 145°F internal temperature plus a short rest, ensuring your roast stays tender, never dry. Get ready to cook the best way to cook pork!
Before we dive into the deliciousness, let’s make sure you’re set up for success!
Choose the Right Cut for Roasting:
For this recipe, we're using a pork loin roast. This is a boneless, lean cut that, when cooked correctly to 145°F, stays incredibly juicy and is perfect for slicing. It's often confused with pork tenderloin, which is much smaller and cooks much faster, or pork shoulder, which is fattier and typically cooked low-and-slow for shredding (think pulled pork).
What you'll need: A 3–4 lb boneless center-cut pork loin roast, ideally with a fat cap still on. This fat cap renders down, adding flavor and moisture.
Ask your butcher: Request a 3–4 lb boneless center-cut pork loin roast, ensuring it has a fat cap and an even shape. If it's a very long loin, they might offer to tie it for you, which helps it cook evenly.
Equipment Checklist:
A sturdy roasting pan with a rack (or you can create a DIY rack using thick-cut carrots and onions).
An instant-read thermometer or a probe thermometer (this is your absolute best friend for juicy pork!).
A large, oven-safe skillet (if you plan to sear the roast before roasting).
A small saucepan or the same roasting pan (if it's stovetop-safe) for making the gravy.
Pork Roast Temperature & Food Safety at a Glance:
The safe internal temperature for a pork loin roast is 145°F, followed by at least a 3-minute rest. This is per USDA guidelines and ensures a safe, tender, and juicy roast.
Insert your thermometer into the thickest part of the roast, avoiding bone (if present) or fat pockets.
Don't be alarmed by a light blush of pink in the center at 145°F; it's perfectly safe and a sign of a perfectly cooked, moist roast!
Ingredients
Directions
- Season & (Optional) Dry-Brine the Pork Pat your pork loin roast thoroughly dry with paper towels. If desired, lightly score the fat cap in a crosshatch pattern (don't cut into the meat) – this helps the fat render and creates a beautiful crust. In a small bowl, combine the Kosher salt, black pepper, dried thyme, dried rosemary, garlic powder (or minced fresh garlic), and optional brown sugar. Rub this mixture generously all over the pork roast, including the ends. For extra flavor and an even juicier roast, you can dry-brine it: place the seasoned roast on a rack set over a baking sheet, uncovered, in the refrigerator for a few hours or even overnight. This allows the salt to penetrate deeply and helps dry out the surface for a better sear.
- Bring to Room Temp & Preheat the Oven About 30–45 minutes before you plan to cook, take the seasoned pork roast out of the refrigerator to allow it to come closer to room temperature. This promotes more even cooking. Preheat your oven to 375°F (190°C). If using a roasting rack, lightly oil it. If you're using a bed of vegetables like onions and carrots as a natural rack, lightly oil them instead.
- Sear for a Golden Crust (Optional but Recommended) Heat the olive oil (or neutral oil) in a large, oven-safe skillet over medium-high heat until shimmering. Carefully place the pork roast in the hot skillet, fat cap down first if it has one. Sear for 2-3 minutes per side, until deeply golden brown and a beautiful crust forms. This step adds incredible flavor and color to your roast. If you skip searing, no worries – just move straight to the roasting step.
- Roast to Juicy Perfection Transfer the seared roast to your prepared roasting pan with a rack (or onto your bed of vegetables), fat cap up. Place it in the preheated 375°F oven. As a general guideline, a 3–4 lb boneless pork loin roast will take approximately 20–25 minutes per pound at this temperature. However, the most important tool here is your instant-read thermometer! Begin checking the internal temperature at around 45-60 minutes. Insert the thermometer into the thickest part of the roast, making sure it doesn't touch any bone or go through to the other side. Remove the roast from the oven when the thickest part reaches between 140°F and 145°F. Remember, it will continue to cook as it rests.
- Rest the Roast This step is non-negotiable for a juicy roast! Once removed from the oven, transfer the pork loin to a cutting board. You can tent it loosely with foil or leave it uncovered. Let it rest for a minimum of 10–15 minutes. This resting period allows for "carryover cooking" – the internal temperature will rise a few more degrees to reach a safe 145°F+ – and, more importantly, it allows the juices to redistribute throughout the meat. If you slice it too soon, all those delicious juices will run out, leaving you with a dry roast.
- Make the Pan Gravy from the Drippings While the roast is resting, let's make that amazing gravy! Carefully pour off any excess fat from the roasting pan, leaving about 2 tablespoons of fat and all those delicious browned bits (fond) stuck to the bottom. If your roasting pan isn't stovetop-safe, carefully scrape the drippings and fond into a medium saucepan. Place the pan over medium heat. Whisk in the flour (or cornstarch slurry for GF) and cook for 1-2 minutes, stirring constantly, to create a roux. If using, pour in the white wine or apple cider and scrape up all the browned bits from the bottom of the pan with a wooden spoon or whisk. Cook for another minute until slightly reduced. Gradually whisk in the chicken or pork broth, stirring constantly to prevent lumps. Bring the gravy to a simmer and cook, whisking occasionally, until it thickens to your desired consistency (usually 5-7 minutes). Stir in the optional Dijon mustard, butter, and fresh herbs. Season with salt and pepper to taste. If your gravy is too thin, simmer it longer. If it's too thick, whisk in a little more broth.
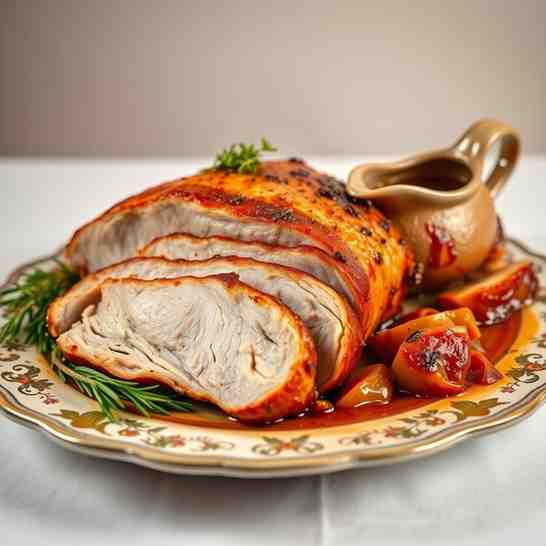
- Slice & Serve Once rested, slice the pork loin roast against the grain into ½-inch thick slices. Arrange the slices on a serving platter. Spoon the warm, savory pan gravy generously over the slices, or serve it on the side. Garnish with a sprinkle of fresh herbs. This best pork roast pairs wonderfully with classic sides like creamy mashed potatoes, simple buttered green beans, or roasted carrots. Enjoy your pork lover's paradise!
Best Pork Roast - Juicy Loin & Pan Gravy Recipe
- Serves: 6 People
- Prepare Time: 20 minutes
- Cooking Time: 75-90 minut
- Calories: -
- Difficulty: Medium
Welcome to your pork roast paradise! If you've been searching for the best pork roast recipe that guarantees a juicy, tender result every single time, you've found it. This recipe focuses on a succulent boneless pork loin roast, celebrated for its lean yet incredibly flavorful meat. The secret to its tenderness? Cooking it to the perfect internal temperature and giving it a crucial rest. And what's a fantastic roast without an equally amazing gravy? Our pan gravy, made right in the roasting pan from those delicious drippings, is savory, slightly herby, and the ideal companion. Whether you're planning a cozy Sunday dinner, a festive holiday feast, or simply looking for a delicious meal prep option, this pork loin roast will quickly become a family favorite. We'll guide you through every step, emphasizing the USDA-recommended 145°F internal temperature plus a short rest, ensuring your roast stays tender, never dry. Get ready to cook the best way to cook pork!
Before we dive into the deliciousness, let’s make sure you’re set up for success!
Choose the Right Cut for Roasting:
For this recipe, we're using a pork loin roast. This is a boneless, lean cut that, when cooked correctly to 145°F, stays incredibly juicy and is perfect for slicing. It's often confused with pork tenderloin, which is much smaller and cooks much faster, or pork shoulder, which is fattier and typically cooked low-and-slow for shredding (think pulled pork).
What you'll need: A 3–4 lb boneless center-cut pork loin roast, ideally with a fat cap still on. This fat cap renders down, adding flavor and moisture.
Ask your butcher: Request a 3–4 lb boneless center-cut pork loin roast, ensuring it has a fat cap and an even shape. If it's a very long loin, they might offer to tie it for you, which helps it cook evenly.
Equipment Checklist:
A sturdy roasting pan with a rack (or you can create a DIY rack using thick-cut carrots and onions).
An instant-read thermometer or a probe thermometer (this is your absolute best friend for juicy pork!).
A large, oven-safe skillet (if you plan to sear the roast before roasting).
A small saucepan or the same roasting pan (if it's stovetop-safe) for making the gravy.
Pork Roast Temperature & Food Safety at a Glance:
The safe internal temperature for a pork loin roast is 145°F, followed by at least a 3-minute rest. This is per USDA guidelines and ensures a safe, tender, and juicy roast.
Insert your thermometer into the thickest part of the roast, avoiding bone (if present) or fat pockets.
Don't be alarmed by a light blush of pink in the center at 145°F; it's perfectly safe and a sign of a perfectly cooked, moist roast!
Ingredients
Directions
- Season & (Optional) Dry-Brine the Pork Pat your pork loin roast thoroughly dry with paper towels. If desired, lightly score the fat cap in a crosshatch pattern (don't cut into the meat) – this helps the fat render and creates a beautiful crust. In a small bowl, combine the Kosher salt, black pepper, dried thyme, dried rosemary, garlic powder (or minced fresh garlic), and optional brown sugar. Rub this mixture generously all over the pork roast, including the ends. For extra flavor and an even juicier roast, you can dry-brine it: place the seasoned roast on a rack set over a baking sheet, uncovered, in the refrigerator for a few hours or even overnight. This allows the salt to penetrate deeply and helps dry out the surface for a better sear.
- Bring to Room Temp & Preheat the Oven About 30–45 minutes before you plan to cook, take the seasoned pork roast out of the refrigerator to allow it to come closer to room temperature. This promotes more even cooking. Preheat your oven to 375°F (190°C). If using a roasting rack, lightly oil it. If you're using a bed of vegetables like onions and carrots as a natural rack, lightly oil them instead.
- Sear for a Golden Crust (Optional but Recommended) Heat the olive oil (or neutral oil) in a large, oven-safe skillet over medium-high heat until shimmering. Carefully place the pork roast in the hot skillet, fat cap down first if it has one. Sear for 2-3 minutes per side, until deeply golden brown and a beautiful crust forms. This step adds incredible flavor and color to your roast. If you skip searing, no worries – just move straight to the roasting step.
- Roast to Juicy Perfection Transfer the seared roast to your prepared roasting pan with a rack (or onto your bed of vegetables), fat cap up. Place it in the preheated 375°F oven. As a general guideline, a 3–4 lb boneless pork loin roast will take approximately 20–25 minutes per pound at this temperature. However, the most important tool here is your instant-read thermometer! Begin checking the internal temperature at around 45-60 minutes. Insert the thermometer into the thickest part of the roast, making sure it doesn't touch any bone or go through to the other side. Remove the roast from the oven when the thickest part reaches between 140°F and 145°F. Remember, it will continue to cook as it rests.
- Rest the Roast This step is non-negotiable for a juicy roast! Once removed from the oven, transfer the pork loin to a cutting board. You can tent it loosely with foil or leave it uncovered. Let it rest for a minimum of 10–15 minutes. This resting period allows for "carryover cooking" – the internal temperature will rise a few more degrees to reach a safe 145°F+ – and, more importantly, it allows the juices to redistribute throughout the meat. If you slice it too soon, all those delicious juices will run out, leaving you with a dry roast.
- Make the Pan Gravy from the Drippings While the roast is resting, let's make that amazing gravy! Carefully pour off any excess fat from the roasting pan, leaving about 2 tablespoons of fat and all those delicious browned bits (fond) stuck to the bottom. If your roasting pan isn't stovetop-safe, carefully scrape the drippings and fond into a medium saucepan. Place the pan over medium heat. Whisk in the flour (or cornstarch slurry for GF) and cook for 1-2 minutes, stirring constantly, to create a roux. If using, pour in the white wine or apple cider and scrape up all the browned bits from the bottom of the pan with a wooden spoon or whisk. Cook for another minute until slightly reduced. Gradually whisk in the chicken or pork broth, stirring constantly to prevent lumps. Bring the gravy to a simmer and cook, whisking occasionally, until it thickens to your desired consistency (usually 5-7 minutes). Stir in the optional Dijon mustard, butter, and fresh herbs. Season with salt and pepper to taste. If your gravy is too thin, simmer it longer. If it's too thick, whisk in a little more broth.
- Slice & Serve Once rested, slice the pork loin roast against the grain into ½-inch thick slices. Arrange the slices on a serving platter. Spoon the warm, savory pan gravy generously over the slices, or serve it on the side. Garnish with a sprinkle of fresh herbs. This best pork roast pairs wonderfully with classic sides like creamy mashed potatoes, simple buttered green beans, or roasted carrots. Enjoy your pork lover's paradise!
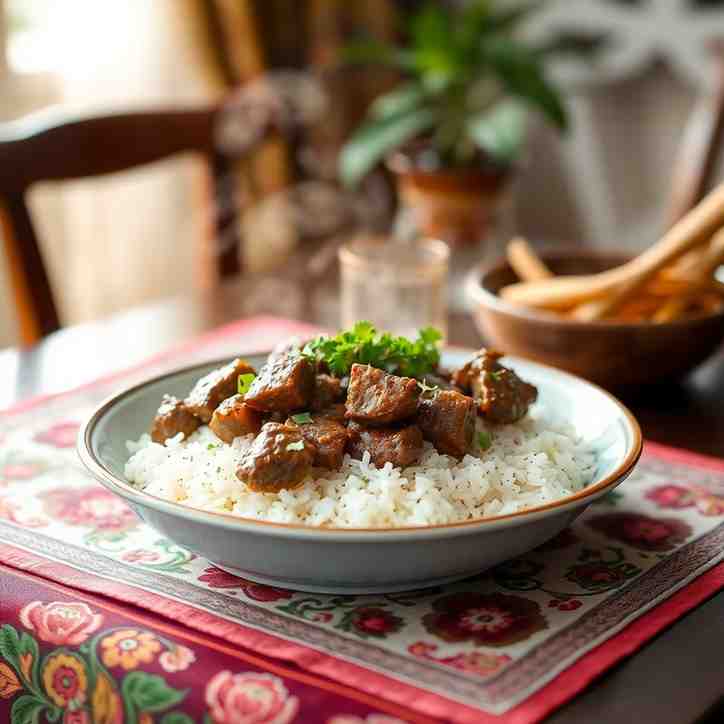
You may also like


Hey there! I’m just someone who seriously loves good food and believes that cooking doesn’t have to be complicated to be amazing. Whether it’s a quick weeknight dinner or a cozy weekend meal, I’m all about sharing easy, tasty recipes that actually work.


