
Easy Latvian Piragi - Family Gathering Treat
Easy Latvian Piragi - Family Gathering Treat

- Serves: 24 People
- Prepare Time: 45 minutes
- Cooking Time: 20-25 minut
- Calories: -
- Difficulty: Easy
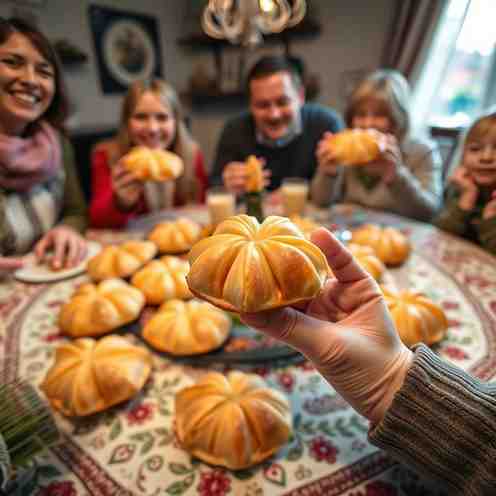
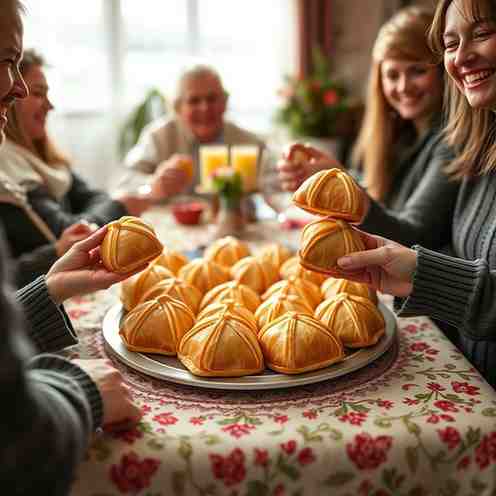
Get ready to bake up some serious comfort! If you're searching for easy food for family gathering that's guaranteed to impress, look no further than these incredible Savory Latvian Pies, affectionately known as Pīrāgi (pee-RAH-gee). Imagine soft, pillowy yeasted buns, each lovingly stuffed with a smoky, savory filling of bacon and sweet caramelized onions. They're the kind of delicious treat that disappears fast, whether you're hosting a holiday feast, settling in for game night, or bringing a standout dish to a potluck.
These aren't just any Pīrāgi; this recipe is designed to be your new go-to. We've packed it with beginner-proof dough cues, a surefire leak-proof shaping method, and a smart make-ahead plan that lets you enjoy the party instead of stressing in the kitchen. So, whether you're a seasoned baker or just getting started with easy recipes to bake, prepare to master these irresistible Latvian delights. They're not only a fantastic way to enjoy make your own bread, but also ideal for batch cook recipes to stock your freezer!
Best For: Parties, freezer stash, easy food for family gathering
Pīrāgi are a beloved staple of Latvian cuisine, essentially soft, savory yeasted buns filled with a delicious mixture, most commonly bacon and onion. In Latvia, they're often called "speķa pīrāgi," which translates to bacon buns, and they are a symbol of hospitality and celebration. It's important to note that while the name might sound similar, Pīrāgi are distinctly different from Polish pierogi (dumplings) or Russian piroshki (filled buns, but often with different dough types and fillings). These are unique, delightful, and truly special!
Ingredients
Directions
- Cook filling and cool completely.
Mix and knead dough until smooth.
First rise until doubled.
Portion dough and let rest.
Fill, seal, and shape into classic crescents.
Final proof until puffy.
Egg wash and bake until golden.
Cool briefly and serve warm! - Latvian Piragi (Bacon & Onion Buns) Ingredients
- For the Dough:
- 1 cup (240ml) warm milk (105-115°F / 40-46°C)
- 2 ¼ teaspoons (7g) active dry yeast
- 2 tablespoons (25g) granulated sugar
- 1 large egg
- ½ cup (113g) unsalted butter, melted
- 1 ½ teaspoons (9g) salt
- 4 to 4 ½ cups (500-560g) all-purpose flour
- For the Filling:
- 12 ounces (340g) bacon, finely diced (¼-inch pieces)
- 1 large yellow onion, finely diced (approx. 1 ½ cups)
- ½ teaspoon freshly ground black pepper
- For the Egg Wash:
- 1 large egg
- 1 tablespoon milk or water
- Latvian Piragi (Bacon & Onion Buns) Step-by-Step Instructions
- Make the Filling (and cool completely!)
- In a large skillet, cook the finely diced bacon over medium-low heat. Render it slowly until it's crispy and most of the fat has been released. This slow rendering is key for flavor and preventing a greasy filling.
- Drain off most of the bacon fat, leaving about 1-2 tablespoons in the pan. You want just enough to sauté the onions, but not so much that the filling becomes greasy.
- Add the finely diced onion to the skillet with the bacon. Sauté over medium heat, stirring occasionally, until the onions are very soft and translucent, about 8-10 minutes.
- Continue cooking until any moisture from the onions has evaporated and the mixture is relatively dry. A "dry filling" checkpoint: there should be no puddle of fat or liquid in the bowl when the filling is cooled.
- Stir in the black pepper. Transfer the filling to a bowl and let it cool completely to room temperature before using. This is crucial; hot filling can activate the yeast too quickly or melt the butter in the dough.
- Make the Dough
- In the bowl of a stand mixer (or a large mixing bowl), combine the warm milk, yeast, and sugar. Let it sit for 5-10 minutes until foamy, indicating the yeast is active.
- Whisk in the egg and melted butter.
- Add the salt and 4 cups (500g) of flour. With the dough hook attachment (or a sturdy spoon), mix on low speed until a shaggy dough forms.
- Increase speed to medium-low and knead for 8-10 minutes, adding more flour (up to ½ cup / 60g) a tablespoon at a time if the dough is too sticky. The dough should be soft, smooth, elastic, and slightly tacky to the touch, but not sticking to your hands or the sides of the bowl.
- Dough feel checkpoint: It should spring back slowly when poked.
- First Rise
- Lightly grease a clean bowl. Form the dough into a ball and place it in the greased bowl, turning once to coat.
- Cover the bowl with plastic wrap or a clean kitchen towel.
- Let the dough rise in a warm place for 1 to 1 ½ hours, or until it has doubled in size.
- "Doubled" definition + finger-dent test: Gently press two fingers into the dough; if the indentations remain, it's ready. If they spring back quickly, it needs more time.
- Portion + Rest
- Gently punch down the risen dough to release the air.
- Turn the dough out onto a lightly floured surface. Divide the dough into 24 equal pieces. A kitchen scale is helpful here; aim for pieces around 1.3-1.4 ounces (37-40g) each.
- Roll each piece into a smooth ball. Cover the dough balls loosely with plastic wrap or a kitchen towel and let them rest for 10-15 minutes. This resting period helps relax the gluten, making the dough easier to roll.
- Fill + Seal + Shape (Classic Crescent)
- Preheat your oven to 375°F (190°C). Line two large baking sheets with parchment paper.
- Take one dough ball at a time, keeping the others covered. On a lightly floured surface, roll it into a thin oval, about 4-5 inches (10-12 cm) long and 3 inches (7-8 cm) wide. The dough should be thin enough to stretch without tearing, but not transparent.
- Place about 1 ½ to 2 teaspoons of the cooled bacon and onion filling in the center of the oval. Don't overfill!
- Fold one long side of the dough over the filling to meet the other long side, creating a half-moon shape.
- Firmly pinch the edges together to seal the bun completely. A good seal method is to press firmly with your fingertips, then crimp the edges like a pie crust.
- Seam-under trick: Place the sealed bun seam-side down on the prepared baking sheet. Gently curve the ends to form a crescent shape.
- Repeat with the remaining dough and filling, placing the shaped piragi about 1 ½ inches (4 cm) apart on the baking sheets.
- Final Proof
- Cover the shaped piragi loosely with plastic wrap or a clean kitchen towel.
- Let them proof in a warm place for 45-60 minutes, or until they look puffy and slightly larger. They won't double in size like the first rise, but they should feel light and airy.
- What "puffy" looks like: The buns should look noticeably fuller and softer, almost marshmallow-like, but still hold their shape.
- Egg Wash + Bake
- While the piragi are proofing, prepare the egg wash: In a small bowl, whisk together the egg and 1 tablespoon of milk or water.
- Gently brush the tops of the proofed piragi with the egg wash. Brush once for a lovely golden sheen, or an optional second brush for extra shine.
- Bake for 20-25 minutes, rotating the sheets halfway through, until the piragi are deeply golden brown and sound hollow when tapped on the bottom.
- Doneness cues: The internal temperature should register around 200-205°F (93-96°C) with an instant-read thermometer.
- Cool Briefly + Serve
- Remove the piragi from the oven and let them cool on the baking sheets for 5-10 minutes before transferring to a wire rack.
- They are best served warm, as the filling sets as they cool slightly. Enjoy these as a delightful easy to make lunch recipe or a fantastic snack!
Easy Latvian Piragi - Family Gathering Treat
- Serves: 24 People
- Prepare Time: 45 minutes
- Cooking Time: 20-25 minut
- Calories: -
- Difficulty: Easy
Get ready to bake up some serious comfort! If you're searching for easy food for family gathering that's guaranteed to impress, look no further than these incredible Savory Latvian Pies, affectionately known as Pīrāgi (pee-RAH-gee). Imagine soft, pillowy yeasted buns, each lovingly stuffed with a smoky, savory filling of bacon and sweet caramelized onions. They're the kind of delicious treat that disappears fast, whether you're hosting a holiday feast, settling in for game night, or bringing a standout dish to a potluck.
These aren't just any Pīrāgi; this recipe is designed to be your new go-to. We've packed it with beginner-proof dough cues, a surefire leak-proof shaping method, and a smart make-ahead plan that lets you enjoy the party instead of stressing in the kitchen. So, whether you're a seasoned baker or just getting started with easy recipes to bake, prepare to master these irresistible Latvian delights. They're not only a fantastic way to enjoy make your own bread, but also ideal for batch cook recipes to stock your freezer!
Best For: Parties, freezer stash, easy food for family gathering
Pīrāgi are a beloved staple of Latvian cuisine, essentially soft, savory yeasted buns filled with a delicious mixture, most commonly bacon and onion. In Latvia, they're often called "speķa pīrāgi," which translates to bacon buns, and they are a symbol of hospitality and celebration. It's important to note that while the name might sound similar, Pīrāgi are distinctly different from Polish pierogi (dumplings) or Russian piroshki (filled buns, but often with different dough types and fillings). These are unique, delightful, and truly special!
Ingredients
Directions
- Cook filling and cool completely.
Mix and knead dough until smooth.
First rise until doubled.
Portion dough and let rest.
Fill, seal, and shape into classic crescents.
Final proof until puffy.
Egg wash and bake until golden.
Cool briefly and serve warm! - Latvian Piragi (Bacon & Onion Buns) Ingredients
- For the Dough:
- 1 cup (240ml) warm milk (105-115°F / 40-46°C)
- 2 ¼ teaspoons (7g) active dry yeast
- 2 tablespoons (25g) granulated sugar
- 1 large egg
- ½ cup (113g) unsalted butter, melted
- 1 ½ teaspoons (9g) salt
- 4 to 4 ½ cups (500-560g) all-purpose flour
- For the Filling:
- 12 ounces (340g) bacon, finely diced (¼-inch pieces)
- 1 large yellow onion, finely diced (approx. 1 ½ cups)
- ½ teaspoon freshly ground black pepper
- For the Egg Wash:
- 1 large egg
- 1 tablespoon milk or water
- Latvian Piragi (Bacon & Onion Buns) Step-by-Step Instructions
- Make the Filling (and cool completely!)
- In a large skillet, cook the finely diced bacon over medium-low heat. Render it slowly until it's crispy and most of the fat has been released. This slow rendering is key for flavor and preventing a greasy filling.
- Drain off most of the bacon fat, leaving about 1-2 tablespoons in the pan. You want just enough to sauté the onions, but not so much that the filling becomes greasy.
- Add the finely diced onion to the skillet with the bacon. Sauté over medium heat, stirring occasionally, until the onions are very soft and translucent, about 8-10 minutes.
- Continue cooking until any moisture from the onions has evaporated and the mixture is relatively dry. A "dry filling" checkpoint: there should be no puddle of fat or liquid in the bowl when the filling is cooled.
- Stir in the black pepper. Transfer the filling to a bowl and let it cool completely to room temperature before using. This is crucial; hot filling can activate the yeast too quickly or melt the butter in the dough.
- Make the Dough
- In the bowl of a stand mixer (or a large mixing bowl), combine the warm milk, yeast, and sugar. Let it sit for 5-10 minutes until foamy, indicating the yeast is active.
- Whisk in the egg and melted butter.
- Add the salt and 4 cups (500g) of flour. With the dough hook attachment (or a sturdy spoon), mix on low speed until a shaggy dough forms.
- Increase speed to medium-low and knead for 8-10 minutes, adding more flour (up to ½ cup / 60g) a tablespoon at a time if the dough is too sticky. The dough should be soft, smooth, elastic, and slightly tacky to the touch, but not sticking to your hands or the sides of the bowl.
- Dough feel checkpoint: It should spring back slowly when poked.
- First Rise
- Lightly grease a clean bowl. Form the dough into a ball and place it in the greased bowl, turning once to coat.
- Cover the bowl with plastic wrap or a clean kitchen towel.
- Let the dough rise in a warm place for 1 to 1 ½ hours, or until it has doubled in size.
- "Doubled" definition + finger-dent test: Gently press two fingers into the dough; if the indentations remain, it's ready. If they spring back quickly, it needs more time.
- Portion + Rest
- Gently punch down the risen dough to release the air.
- Turn the dough out onto a lightly floured surface. Divide the dough into 24 equal pieces. A kitchen scale is helpful here; aim for pieces around 1.3-1.4 ounces (37-40g) each.
- Roll each piece into a smooth ball. Cover the dough balls loosely with plastic wrap or a kitchen towel and let them rest for 10-15 minutes. This resting period helps relax the gluten, making the dough easier to roll.
- Fill + Seal + Shape (Classic Crescent)
- Preheat your oven to 375°F (190°C). Line two large baking sheets with parchment paper.
- Take one dough ball at a time, keeping the others covered. On a lightly floured surface, roll it into a thin oval, about 4-5 inches (10-12 cm) long and 3 inches (7-8 cm) wide. The dough should be thin enough to stretch without tearing, but not transparent.
- Place about 1 ½ to 2 teaspoons of the cooled bacon and onion filling in the center of the oval. Don't overfill!
- Fold one long side of the dough over the filling to meet the other long side, creating a half-moon shape.
- Firmly pinch the edges together to seal the bun completely. A good seal method is to press firmly with your fingertips, then crimp the edges like a pie crust.
- Seam-under trick: Place the sealed bun seam-side down on the prepared baking sheet. Gently curve the ends to form a crescent shape.
- Repeat with the remaining dough and filling, placing the shaped piragi about 1 ½ inches (4 cm) apart on the baking sheets.
- Final Proof
- Cover the shaped piragi loosely with plastic wrap or a clean kitchen towel.
- Let them proof in a warm place for 45-60 minutes, or until they look puffy and slightly larger. They won't double in size like the first rise, but they should feel light and airy.
- What "puffy" looks like: The buns should look noticeably fuller and softer, almost marshmallow-like, but still hold their shape.
- Egg Wash + Bake
- While the piragi are proofing, prepare the egg wash: In a small bowl, whisk together the egg and 1 tablespoon of milk or water.
- Gently brush the tops of the proofed piragi with the egg wash. Brush once for a lovely golden sheen, or an optional second brush for extra shine.
- Bake for 20-25 minutes, rotating the sheets halfway through, until the piragi are deeply golden brown and sound hollow when tapped on the bottom.
- Doneness cues: The internal temperature should register around 200-205°F (93-96°C) with an instant-read thermometer.
- Cool Briefly + Serve
- Remove the piragi from the oven and let them cool on the baking sheets for 5-10 minutes before transferring to a wire rack.
- They are best served warm, as the filling sets as they cool slightly. Enjoy these as a delightful easy to make lunch recipe or a fantastic snack!
You may also like


Hey there! I’m just someone who seriously loves good food and believes that cooking doesn’t have to be complicated to be amazing. Whether it’s a quick weeknight dinner or a cozy weekend meal, I’m all about sharing easy, tasty recipes that actually work.


