
Easy Maple Timbits - Homemade Canadian Donut Holes
Easy Maple Timbits - Homemade Canadian Donut Holes
- Serves: 24 People
- Prepare Time: 15 minutes
- Cooking Time: 10 minutes
- Calories: -
- Difficulty: Easy
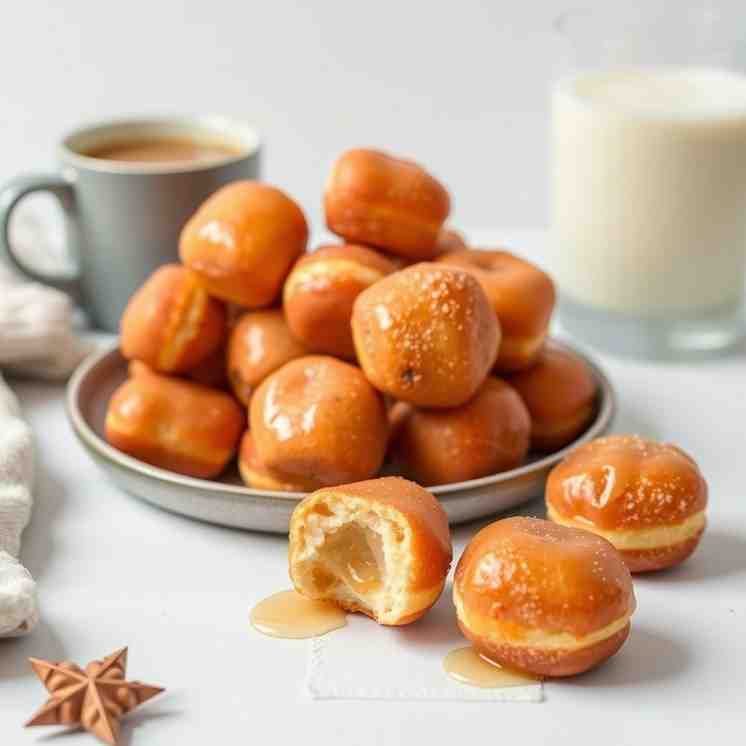
Get ready to whip up a batch of pure Canadian delight right in your own kitchen! These bite-sized Canadian maple donut holes are inspired by the iconic Tim Hortons Timbits, but with an extra punch of rich maple flavor that you're going to adore. Forget complicated yeast doughs; this is a simple no-yeast recipe that promises a crispy outside, a soft, fluffy inside, and that unmistakable big maple taste, all without needing any fancy equipment. If you're looking for an easy homemade snack or a charming Canadian dessert to share, these maple donut holes are your answer. Let's get frying!
Ingredients
Directions
- Mix the Maple Dough
- In a large bowl, whisk together all your dry ingredients: the all-purpose flour, granulated sugar, baking powder, salt, and optional nutmeg/cinnamon. Make sure they’re well combined.
- In a separate medium bowl, whisk together the wet ingredients: the milk, egg, pure maple syrup, and maple extract.
- Pour the wet ingredients into the dry ingredients. Mix with a spoon or spatula until just combined. Be careful not to overmix! The target texture should be a thick, soft, spoonable dough – it won't be a pourable batter.
- If your dough feels too sticky to handle, add a spoonful of flour at a time until it's workable. If it seems too stiff, a tiny splash of milk can help.
- Let the Dough Rest (Short Chill)
- Cover the bowl and let the dough rest at room temperature for about 10–15 minutes. This brief resting period allows the flour to fully hydrate, making the dough easier to handle and helping reduce oil absorption during frying for a more even, tender texture.
- Heat the Oil
- Pour 4-6 cups of neutral frying oil into a heavy-bottomed pot or Dutch oven. The oil should come up about 2-3 inches, leaving plenty of room for the donut holes to float and for the oil to bubble without overflowing.
- Heat the oil over medium heat to a target temperature range of 350–365°F (175–185°C). A thermometer is highly recommended for accuracy.
- No thermometer? No problem! You can test the oil by dropping a tiny pinch of dough into it. If it sizzles immediately and browns in under 30 seconds, your oil is too hot. If it takes several minutes to turn golden and feels greasy, your oil is too cool. Aim for a gentle sizzle and gradual browning.
- Shape the Donut Holes
- Once your oil is at temperature, use a small cookie scoop (about 1.5 tablespoons) or two teaspoons to drop small, consistent portions of dough into the hot oil.
- Work in batches, being careful not to overcrowd the pot. Overcrowding will drop the oil temperature and lead to greasy donut holes. Give them space to swim!
- Fry the Maple Donut Holes
- Gently slide the dough balls into the hot oil. They should immediately begin to bubble and float.
- Turn them regularly with a slotted spoon or spider to ensure even browning on all sides.
- Fry for approximately 3-5 minutes per batch, or until they are a deep golden brown all over.
- How to check for doneness: Carefully remove one donut hole from the oil, let it cool for a moment, then cut it open. The center should be fully cooked, light, and fluffy – not gummy or raw. Adjust frying time for subsequent batches if needed.
- Drain & Cool
- Using your slotted spoon or spider, transfer the fried donut holes to a cooling rack lined with paper towels. The paper towels will help absorb any excess oil.
- Let them cool for a few minutes, just until they’re warm enough to handle comfortably before moving on to coating or glazing.
- Maple Coating & Finishing
- Quick Maple Glaze Option:
- In a shallow bowl, whisk together the powdered sugar, 2 tablespoons of pure maple syrup, and 1 tablespoon of milk. Add the remaining milk a teaspoon at a time until you reach a smooth, drizzling consistency.
- While the donut holes are still warm, gently toss them in the glaze, or arrange them on a cooling rack and drizzle the glaze generously over them. The glaze will set slightly as they cool.
- Cinnamon Maple Sugar Option (Alternate Finish):
- In a shallow bowl, mix together the ½ cup of granulated sugar and 1 teaspoon of ground cinnamon.
- While the donut holes are still warm (this helps the sugar stick!), toss them gently in the cinnamon sugar mixture until evenly coated. This option gives a lighter finish, allowing the maple flavor from the dough itself to shine through.
Easy Maple Timbits - Homemade Canadian Donut Holes

- Serves: 24 People
- Prepare Time: 15 minutes
- Cooking Time: 10 minutes
- Calories: -
- Difficulty: Easy
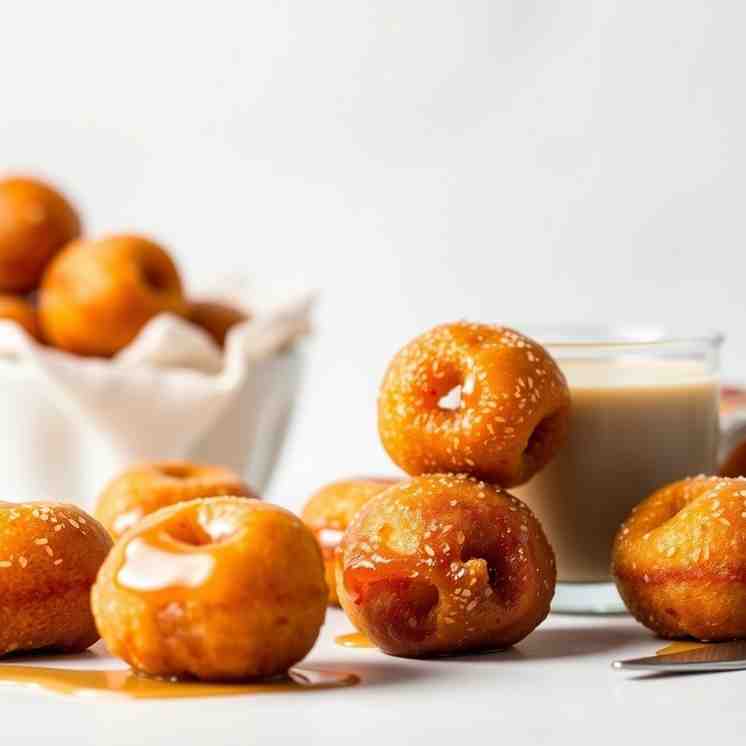
Get ready to whip up a batch of pure Canadian delight right in your own kitchen! These bite-sized Canadian maple donut holes are inspired by the iconic Tim Hortons Timbits, but with an extra punch of rich maple flavor that you're going to adore. Forget complicated yeast doughs; this is a simple no-yeast recipe that promises a crispy outside, a soft, fluffy inside, and that unmistakable big maple taste, all without needing any fancy equipment. If you're looking for an easy homemade snack or a charming Canadian dessert to share, these maple donut holes are your answer. Let's get frying!
Ingredients
Directions
- Mix the Maple Dough
- In a large bowl, whisk together all your dry ingredients: the all-purpose flour, granulated sugar, baking powder, salt, and optional nutmeg/cinnamon. Make sure they’re well combined.
- In a separate medium bowl, whisk together the wet ingredients: the milk, egg, pure maple syrup, and maple extract.
- Pour the wet ingredients into the dry ingredients. Mix with a spoon or spatula until just combined. Be careful not to overmix! The target texture should be a thick, soft, spoonable dough – it won't be a pourable batter.
- If your dough feels too sticky to handle, add a spoonful of flour at a time until it's workable. If it seems too stiff, a tiny splash of milk can help.
- Let the Dough Rest (Short Chill)
- Cover the bowl and let the dough rest at room temperature for about 10–15 minutes. This brief resting period allows the flour to fully hydrate, making the dough easier to handle and helping reduce oil absorption during frying for a more even, tender texture.
- Heat the Oil
- Pour 4-6 cups of neutral frying oil into a heavy-bottomed pot or Dutch oven. The oil should come up about 2-3 inches, leaving plenty of room for the donut holes to float and for the oil to bubble without overflowing.
- Heat the oil over medium heat to a target temperature range of 350–365°F (175–185°C). A thermometer is highly recommended for accuracy.
- No thermometer? No problem! You can test the oil by dropping a tiny pinch of dough into it. If it sizzles immediately and browns in under 30 seconds, your oil is too hot. If it takes several minutes to turn golden and feels greasy, your oil is too cool. Aim for a gentle sizzle and gradual browning.
- Shape the Donut Holes
- Once your oil is at temperature, use a small cookie scoop (about 1.5 tablespoons) or two teaspoons to drop small, consistent portions of dough into the hot oil.
- Work in batches, being careful not to overcrowd the pot. Overcrowding will drop the oil temperature and lead to greasy donut holes. Give them space to swim!
- Fry the Maple Donut Holes
- Gently slide the dough balls into the hot oil. They should immediately begin to bubble and float.
- Turn them regularly with a slotted spoon or spider to ensure even browning on all sides.
- Fry for approximately 3-5 minutes per batch, or until they are a deep golden brown all over.
- How to check for doneness: Carefully remove one donut hole from the oil, let it cool for a moment, then cut it open. The center should be fully cooked, light, and fluffy – not gummy or raw. Adjust frying time for subsequent batches if needed.
- Drain & Cool
- Using your slotted spoon or spider, transfer the fried donut holes to a cooling rack lined with paper towels. The paper towels will help absorb any excess oil.
- Let them cool for a few minutes, just until they’re warm enough to handle comfortably before moving on to coating or glazing.
- Maple Coating & Finishing
- Quick Maple Glaze Option:
- In a shallow bowl, whisk together the powdered sugar, 2 tablespoons of pure maple syrup, and 1 tablespoon of milk. Add the remaining milk a teaspoon at a time until you reach a smooth, drizzling consistency.
- While the donut holes are still warm, gently toss them in the glaze, or arrange them on a cooling rack and drizzle the glaze generously over them. The glaze will set slightly as they cool.
- Cinnamon Maple Sugar Option (Alternate Finish):
- In a shallow bowl, mix together the ½ cup of granulated sugar and 1 teaspoon of ground cinnamon.
- While the donut holes are still warm (this helps the sugar stick!), toss them gently in the cinnamon sugar mixture until evenly coated. This option gives a lighter finish, allowing the maple flavor from the dough itself to shine through.
You may also like


Hey there! I’m just someone who seriously loves good food and believes that cooking doesn’t have to be complicated to be amazing. Whether it’s a quick weeknight dinner or a cozy weekend meal, I’m all about sharing easy, tasty recipes that actually work.


