
Delicious Figolli - Holiday Baking Recipe
Delicious Figolli - Holiday Baking Recipe
- Serves: 15 People
- Prepare Time: 45 minutes
- Cooking Time: 15-20 minut
- Calories: -
- Difficulty: Medium
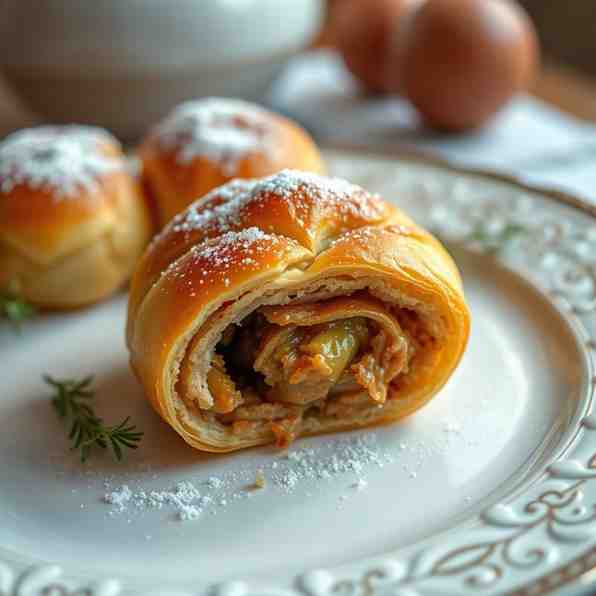
Get ready to add a touch of traditional Maltese magic to your Easter celebrations with these incredible Figolli! If you’re searching for truly special holiday baking recipes, look no further. Figolli are much more than just cookies; they're a cherished Easter tradition in Malta, bringing families together with their delightful buttery cookie base, rich and sweet almond filling, and a simple, vibrant icing.
Don't let their elaborate look intimidate you! While Figolli appear fancy, they are surprisingly doable for both beginners and experienced bakers, especially with the help of festive egg shaped cookie cutters and other cookie cutters holiday themes. We’ll walk you through every step of baking with almond paste to create a stunning almond pastry filling that will have everyone asking for your secret. These homemade sweet recipes are perfect for sharing, gifting, or simply enjoying with a cup of coffee. Let’s dive into creating these beautiful dessert recipes to make your holiday extra special!
Ingredients
Directions
- Make the Cookie Dough:
- In a large bowl, whisk together the all-purpose flour, granulated sugar, and salt.
- Add the cold, cubed butter to the dry ingredients. Using your fingertips or a pastry blender, cut the butter into the flour mixture until it resembles coarse crumbs with some pea-sized pieces.
- In a separate small bowl, whisk the cold egg and vanilla extract (and citrus zest, if using). Add this wet mixture to the dry ingredients.
- Mix until the dough just comes together. Be careful not to overmix, as this can make the cookies tough.
- Gather the dough, flatten it into a disc, wrap it tightly in plastic wrap, and chill in the refrigerator for at least 30 minutes (or up to 2 days). Chilling is crucial for cleaner cuts and to prevent the cookies from spreading too much during baking.
- Mix the Almond Filling:
- In a medium bowl, break up the almond paste into smaller pieces. Add the powdered sugar, almond extract, and citrus zest.
- Gradually add the egg white, starting with about half. Mix with a fork or your hands until the filling comes together. You're looking for a smooth, pliable texture that can be rolled into a ball without being too sticky. Add more egg white, a tiny amount at a time, if the mixture is too dry.
- Once mixed, roll the filling into a log or flatten it slightly, cover it, and set aside.
- Roll & Cut Your Shapes (Pairs):
- Preheat your oven to 350°F (175°C). Line two large baking sheets with parchment paper.
- On a lightly floured surface, roll out the chilled cookie dough to an even thickness of about 1/8 to 1/4 inch (3-6mm). Using a rolling pin with spacers or two rulers on either side of your dough can help ensure evenness.
- Using your chosen cookie cutters (Easter shapes like eggs, bunnies, or crosses work wonderfully), cut out an even number of shapes. Remember, you need a top and a bottom for each cookie.
- Carefully transfer half of your cut-out shapes (these will be the bottoms) to the prepared baking sheets, leaving about an inch between them. A thin spatula or bench scraper can help lift delicate shapes without distorting them.
- Fill & Seal:
- For the filling, either roll small portions into thin ropes and coil them onto the bottom cookie shapes, or gently flatten pieces of filling and place them on the cookie bottoms. Leave a clear border of about 1/4 inch around the edge of each cookie shape. This border is essential for sealing.
- If your dough or filling feels dry, you can lightly brush the border of the bottom cookie shapes with a tiny bit of water or egg white to help the top adhere.
- Carefully place a matching top cookie shape over the filling. Gently press the edges of the top and bottom dough together to seal the filling inside.
- Using a small knife or toothpick, make a tiny vent slit or hole on the top of each cookie. This helps steam escape during baking and prevents the cookies from puffing up or "blowing out."
- Chill Briefly (Shape Insurance):
- Once assembled, place the baking sheets with the filled cookies back into the refrigerator for 10-15 minutes. This quick chill helps the shapes maintain their crisp edges and prevents spreading during baking.
- Bake:
- Bake for 12-18 minutes, or until the edges are just lightly golden. Baking time will vary depending on the size and thickness of your cookies. Larger shapes will need a little longer. Be careful not to over-brown them; Figolli should be pale.
- Rotate the baking sheets halfway through baking for even cooking.
- Cool & Decorate:
- Remove the cookies from the oven and let them cool on the baking sheets for a few minutes before carefully transferring them to a wire rack to cool completely. They must be fully cooled before icing.
- To make the easy glaze: In a small bowl, whisk together the powdered sugar, milk/water, and vanilla/almond extract until smooth. Adjust the consistency by adding more liquid a tiny bit at a time until it's thick enough to cling to the cookie but thin enough to settle smoothly.
- Once the cookies are cool, spread or pipe the glaze over the tops. If using food coloring, divide the glaze and color as desired.
- Decorate with sprinkles, mini chocolate eggs, or drizzles of melted sweet chocolate for baking before the icing sets.
- Allow the icing to set completely (this can take several hours) before stacking or storing the cookies.
Delicious Figolli - Holiday Baking Recipe

- Serves: 15 People
- Prepare Time: 45 minutes
- Cooking Time: 15-20 minut
- Calories: -
- Difficulty: Medium
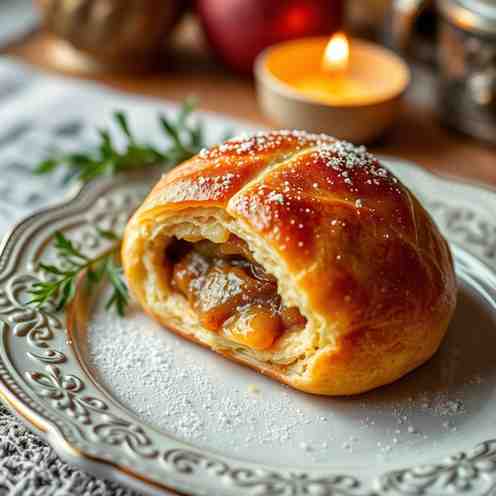
Get ready to add a touch of traditional Maltese magic to your Easter celebrations with these incredible Figolli! If you’re searching for truly special holiday baking recipes, look no further. Figolli are much more than just cookies; they're a cherished Easter tradition in Malta, bringing families together with their delightful buttery cookie base, rich and sweet almond filling, and a simple, vibrant icing.
Don't let their elaborate look intimidate you! While Figolli appear fancy, they are surprisingly doable for both beginners and experienced bakers, especially with the help of festive egg shaped cookie cutters and other cookie cutters holiday themes. We’ll walk you through every step of baking with almond paste to create a stunning almond pastry filling that will have everyone asking for your secret. These homemade sweet recipes are perfect for sharing, gifting, or simply enjoying with a cup of coffee. Let’s dive into creating these beautiful dessert recipes to make your holiday extra special!
Ingredients
Directions
- Make the Cookie Dough:
- In a large bowl, whisk together the all-purpose flour, granulated sugar, and salt.
- Add the cold, cubed butter to the dry ingredients. Using your fingertips or a pastry blender, cut the butter into the flour mixture until it resembles coarse crumbs with some pea-sized pieces.
- In a separate small bowl, whisk the cold egg and vanilla extract (and citrus zest, if using). Add this wet mixture to the dry ingredients.
- Mix until the dough just comes together. Be careful not to overmix, as this can make the cookies tough.
- Gather the dough, flatten it into a disc, wrap it tightly in plastic wrap, and chill in the refrigerator for at least 30 minutes (or up to 2 days). Chilling is crucial for cleaner cuts and to prevent the cookies from spreading too much during baking.
- Mix the Almond Filling:
- In a medium bowl, break up the almond paste into smaller pieces. Add the powdered sugar, almond extract, and citrus zest.
- Gradually add the egg white, starting with about half. Mix with a fork or your hands until the filling comes together. You're looking for a smooth, pliable texture that can be rolled into a ball without being too sticky. Add more egg white, a tiny amount at a time, if the mixture is too dry.
- Once mixed, roll the filling into a log or flatten it slightly, cover it, and set aside.
- Roll & Cut Your Shapes (Pairs):
- Preheat your oven to 350°F (175°C). Line two large baking sheets with parchment paper.
- On a lightly floured surface, roll out the chilled cookie dough to an even thickness of about 1/8 to 1/4 inch (3-6mm). Using a rolling pin with spacers or two rulers on either side of your dough can help ensure evenness.
- Using your chosen cookie cutters (Easter shapes like eggs, bunnies, or crosses work wonderfully), cut out an even number of shapes. Remember, you need a top and a bottom for each cookie.
- Carefully transfer half of your cut-out shapes (these will be the bottoms) to the prepared baking sheets, leaving about an inch between them. A thin spatula or bench scraper can help lift delicate shapes without distorting them.
- Fill & Seal:
- For the filling, either roll small portions into thin ropes and coil them onto the bottom cookie shapes, or gently flatten pieces of filling and place them on the cookie bottoms. Leave a clear border of about 1/4 inch around the edge of each cookie shape. This border is essential for sealing.
- If your dough or filling feels dry, you can lightly brush the border of the bottom cookie shapes with a tiny bit of water or egg white to help the top adhere.
- Carefully place a matching top cookie shape over the filling. Gently press the edges of the top and bottom dough together to seal the filling inside.
- Using a small knife or toothpick, make a tiny vent slit or hole on the top of each cookie. This helps steam escape during baking and prevents the cookies from puffing up or "blowing out."
- Chill Briefly (Shape Insurance):
- Once assembled, place the baking sheets with the filled cookies back into the refrigerator for 10-15 minutes. This quick chill helps the shapes maintain their crisp edges and prevents spreading during baking.
- Bake:
- Bake for 12-18 minutes, or until the edges are just lightly golden. Baking time will vary depending on the size and thickness of your cookies. Larger shapes will need a little longer. Be careful not to over-brown them; Figolli should be pale.
- Rotate the baking sheets halfway through baking for even cooking.
- Cool & Decorate:
- Remove the cookies from the oven and let them cool on the baking sheets for a few minutes before carefully transferring them to a wire rack to cool completely. They must be fully cooled before icing.
- To make the easy glaze: In a small bowl, whisk together the powdered sugar, milk/water, and vanilla/almond extract until smooth. Adjust the consistency by adding more liquid a tiny bit at a time until it's thick enough to cling to the cookie but thin enough to settle smoothly.
- Once the cookies are cool, spread or pipe the glaze over the tops. If using food coloring, divide the glaze and color as desired.
- Decorate with sprinkles, mini chocolate eggs, or drizzles of melted sweet chocolate for baking before the icing sets.
- Allow the icing to set completely (this can take several hours) before stacking or storing the cookies.
You may also like


Hey there! I’m just someone who seriously loves good food and believes that cooking doesn’t have to be complicated to be amazing. Whether it’s a quick weeknight dinner or a cozy weekend meal, I’m all about sharing easy, tasty recipes that actually work.


