
Golden Crispy Samosas - Easy Snacks to Make at Home
Golden Crispy Samosas - Easy Snacks to Make at Home
- Serves: 12 People
- Prepare Time: 45 minutes
- Cooking Time: 30 minutes
- Calories: -
- Difficulty: Medium
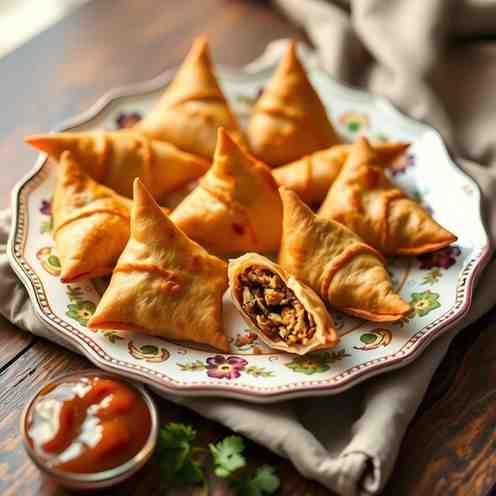
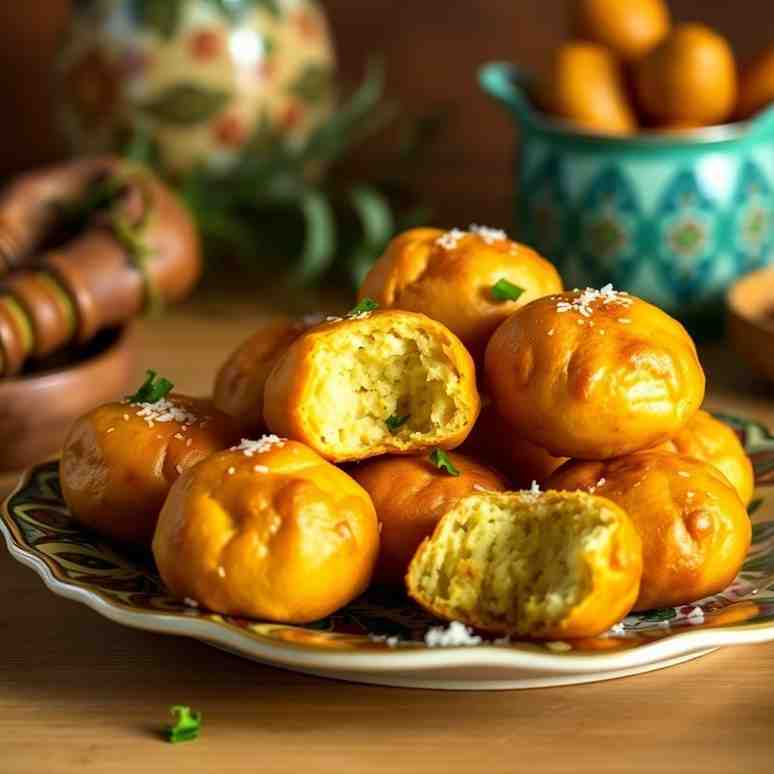
Get ready to transform your kitchen into a bustling Indian street food stall! If you're searching for delicious snacks to make at home, look no further. This definitive guide will walk you through crafting the most irresistible, golden crispy samosas you've ever tasted. We're talking about authentic Punjabi Aloo Samosas – with their perfectly flaky, bubbly crust and a warmly spiced potato-and-pea filling that’s simply out of this world.
Forget those sad, greasy excuses for samosas you might find elsewhere. We’re going to master the traditional deep-frying method for that signature crunch, but don’t worry, we’ll also share easy cooking snacks tips for air frying and baking. Whether you're a beginner cook venturing into authentic Indian food or an experienced baker looking to perfect your technique, this no-fail method ensures every bite is pure bliss. It’s a labor of love, but absolutely worth it, and we'll walk you through every step to make this classic Indian street food right in your own kitchen. Let's get cooking!
A samosa is a beloved savory pastry, typically triangular, filled with a spiced mixture and deep-fried to golden perfection. The term "Punjabi Aloo Samosa" specifically refers to a popular variation from the Punjab region of India, characterized by a hearty potato (aloo) and pea filling, encased in a thick, flaky pastry crust. This crust is crucial – it’s what gives a Punjabi samosa its distinctive texture and makes it one of the best Indian snacks.
Ingredients
Directions
- Cook and Cool the Potatoes
- Wash and peel the potatoes. Cut them into large, uniform pieces.
- Place the potato pieces in a pot, cover with cold water, and add a pinch of salt. Bring to a boil, then reduce heat and simmer until fork-tender but not mushy. You want them to hold their shape slightly.
- Drain the potatoes completely and let them cool down for at least 15-20 minutes.
- Once cool enough to handle, gently crumble the potatoes with your hands or a fork. Avoid mashing them completely; you want some texture, not a whipped consistency. Set aside.
- Make the Spiced Filling
- Heat 2 tablespoons of oil or ghee in a large pan or skillet over medium heat.
- Add the cumin seeds and crushed coriander seeds (if using whole). Sizzle them for 30 seconds until fragrant.
- Add the grated ginger and chopped green chilies (if using). Sauté for another minute until the ginger is fragrant.
- Stir in the garam masala and red chili powder. Cook for 15-30 seconds, stirring constantly to prevent burning.
- Add the crumbled potatoes and frozen peas to the pan. Mix everything thoroughly, gently breaking up any larger potato pieces.
- Season with amchur (or lemon juice) and salt. Continue to cook for 2-3 minutes, allowing the flavors to meld.
- Remove from heat and stir in the fresh cilantro.
- Crucially, let the filling cool completely before you begin stuffing. This prevents steam from building up inside the samosa and causing it to burst during frying.
- Make the Samosa Dough (The "Flaky Crust" Technique)
- In a large bowl, combine the all-purpose flour, salt, and ajwain (if using).
- Pour in the oil or ghee. Using your fingertips, rub the fat into the flour until the mixture resembles coarse breadcrumbs. This step is key for a flaky crust.
- Gradually add the cold water, a tablespoon at a time, mixing until a stiff dough forms. You might not need all the water, or you might need a tiny bit more. The dough should be firm and not sticky, but not smooth like bread dough.
- Knead the dough for just 1-2 minutes until it comes together. Do not over-knead.
- Cover the dough with a damp cloth and let it rest for at least 30 minutes (or up to 1 hour). This relaxes the gluten, making it easier to roll. After resting, give it a brief, gentle knead again.
- Roll, Cut, and Form the Cone
- Divide the dough into 6-8 equal portions. Keep the portions you're not working with covered to prevent them from drying out.
- Take one portion and roll it out on a lightly floured surface into an oval shape, about 6-7 inches long and 4-5 inches wide. Aim for a thickness similar to a thin pizza crust (about ⅛ inch).
- Cut the oval in half lengthwise, creating two semi-circles.
- Take one semi-circle. Lightly moisten the straight edge with a little water (this acts as glue).
- Bring the two ends of the straight edge together, overlapping them slightly (about ½ inch) to form a cone shape. Gently pinch the seam firmly to seal it. Ensure there are no gaps.
- Fill and Seal
- Hold the formed cone in one hand. Spoon 1-2 tablespoons of the cooled potato filling into the cone.
- Do not overfill, as this makes sealing difficult and can cause bursting. Leave about ½ inch of space at the top.
- Moisten the inner edge of the open cone with a little water.
- To seal, bring the two open edges together. You can either pinch them flat, or for a more traditional look, create a small pleat on one side before pinching the edges together firmly. The goal is a tight, secure seal.
- Place the sealed samosa seam-side down on a plate. Keep all formed samosas covered with a damp cloth while you work to prevent the dough from drying out.
- Fry for Crispy, Golden Samosas (Canonical Method)
- Heat vegetable oil in a heavy-bottomed pot or Dutch oven (like a frying pan for deep frying) over medium heat. The oil should be deep enough to submerge the samosas completely.
- Oil Temperature Checkpoint: The ideal frying temperature is initially lower to cook the shell through. Aim for "medium-hot," around 300-325°F (150-160°C). You can test this by dropping a small piece of dough into the oil; it should sizzle gently and slowly rise to the surface.
- Carefully lower 3-4 samosas into the hot oil, ensuring you don't overcrowd the pot.
- Fry on a low to medium-low heat for about 10-12 minutes, flipping occasionally, until the samosa shells are cooked through, firm, and have started to turn a pale golden color. This slow frying is key for crispiness and prevents bubbles/blisters.
- Once the shells are firm and lightly colored, increase the heat to medium-high (around 350-375°F / 175-190°C). Continue frying for another 3-5 minutes, flipping as needed, until the samosas are a beautiful deep golden brown and wonderfully crispy.
- Using a spider strainer or tongs, remove the samosas from the oil.
- Drain them on a wire rack set over a baking sheet. Do not drain only on paper towels, as this can make them soggy. The rack allows air circulation.
- Repeat with the remaining samosas, ensuring the oil temperature returns to the initial lower range before adding the next batch. Serve hot with your favorite chutneys!
Golden Crispy Samosas - Easy Snacks to Make at Home
- Serves: 12 People
- Prepare Time: 45 minutes
- Cooking Time: 30 minutes
- Calories: -
- Difficulty: Medium
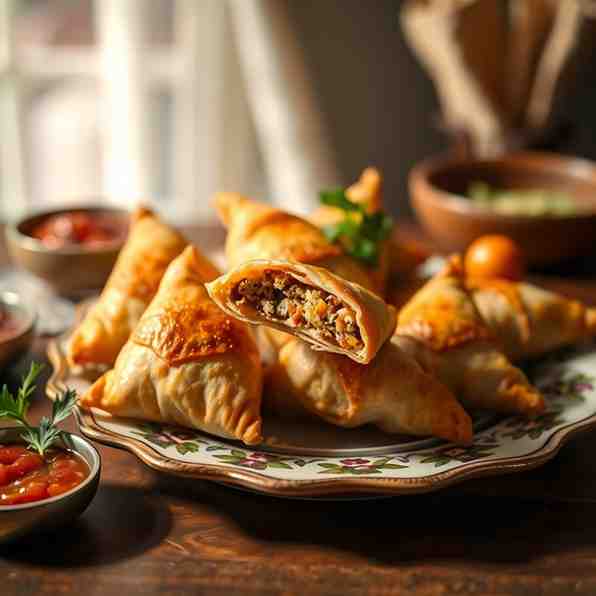
Get ready to transform your kitchen into a bustling Indian street food stall! If you're searching for delicious snacks to make at home, look no further. This definitive guide will walk you through crafting the most irresistible, golden crispy samosas you've ever tasted. We're talking about authentic Punjabi Aloo Samosas – with their perfectly flaky, bubbly crust and a warmly spiced potato-and-pea filling that’s simply out of this world.
Forget those sad, greasy excuses for samosas you might find elsewhere. We’re going to master the traditional deep-frying method for that signature crunch, but don’t worry, we’ll also share easy cooking snacks tips for air frying and baking. Whether you're a beginner cook venturing into authentic Indian food or an experienced baker looking to perfect your technique, this no-fail method ensures every bite is pure bliss. It’s a labor of love, but absolutely worth it, and we'll walk you through every step to make this classic Indian street food right in your own kitchen. Let's get cooking!
A samosa is a beloved savory pastry, typically triangular, filled with a spiced mixture and deep-fried to golden perfection. The term "Punjabi Aloo Samosa" specifically refers to a popular variation from the Punjab region of India, characterized by a hearty potato (aloo) and pea filling, encased in a thick, flaky pastry crust. This crust is crucial – it’s what gives a Punjabi samosa its distinctive texture and makes it one of the best Indian snacks.
Ingredients
Directions
- Cook and Cool the Potatoes
- Wash and peel the potatoes. Cut them into large, uniform pieces.
- Place the potato pieces in a pot, cover with cold water, and add a pinch of salt. Bring to a boil, then reduce heat and simmer until fork-tender but not mushy. You want them to hold their shape slightly.
- Drain the potatoes completely and let them cool down for at least 15-20 minutes.
- Once cool enough to handle, gently crumble the potatoes with your hands or a fork. Avoid mashing them completely; you want some texture, not a whipped consistency. Set aside.
- Make the Spiced Filling
- Heat 2 tablespoons of oil or ghee in a large pan or skillet over medium heat.
- Add the cumin seeds and crushed coriander seeds (if using whole). Sizzle them for 30 seconds until fragrant.
- Add the grated ginger and chopped green chilies (if using). Sauté for another minute until the ginger is fragrant.
- Stir in the garam masala and red chili powder. Cook for 15-30 seconds, stirring constantly to prevent burning.
- Add the crumbled potatoes and frozen peas to the pan. Mix everything thoroughly, gently breaking up any larger potato pieces.
- Season with amchur (or lemon juice) and salt. Continue to cook for 2-3 minutes, allowing the flavors to meld.
- Remove from heat and stir in the fresh cilantro.
- Crucially, let the filling cool completely before you begin stuffing. This prevents steam from building up inside the samosa and causing it to burst during frying.
- Make the Samosa Dough (The "Flaky Crust" Technique)
- In a large bowl, combine the all-purpose flour, salt, and ajwain (if using).
- Pour in the oil or ghee. Using your fingertips, rub the fat into the flour until the mixture resembles coarse breadcrumbs. This step is key for a flaky crust.
- Gradually add the cold water, a tablespoon at a time, mixing until a stiff dough forms. You might not need all the water, or you might need a tiny bit more. The dough should be firm and not sticky, but not smooth like bread dough.
- Knead the dough for just 1-2 minutes until it comes together. Do not over-knead.
- Cover the dough with a damp cloth and let it rest for at least 30 minutes (or up to 1 hour). This relaxes the gluten, making it easier to roll. After resting, give it a brief, gentle knead again.
- Roll, Cut, and Form the Cone
- Divide the dough into 6-8 equal portions. Keep the portions you're not working with covered to prevent them from drying out.
- Take one portion and roll it out on a lightly floured surface into an oval shape, about 6-7 inches long and 4-5 inches wide. Aim for a thickness similar to a thin pizza crust (about ⅛ inch).
- Cut the oval in half lengthwise, creating two semi-circles.
- Take one semi-circle. Lightly moisten the straight edge with a little water (this acts as glue).
- Bring the two ends of the straight edge together, overlapping them slightly (about ½ inch) to form a cone shape. Gently pinch the seam firmly to seal it. Ensure there are no gaps.
- Fill and Seal
- Hold the formed cone in one hand. Spoon 1-2 tablespoons of the cooled potato filling into the cone.
- Do not overfill, as this makes sealing difficult and can cause bursting. Leave about ½ inch of space at the top.
- Moisten the inner edge of the open cone with a little water.
- To seal, bring the two open edges together. You can either pinch them flat, or for a more traditional look, create a small pleat on one side before pinching the edges together firmly. The goal is a tight, secure seal.
- Place the sealed samosa seam-side down on a plate. Keep all formed samosas covered with a damp cloth while you work to prevent the dough from drying out.
- Fry for Crispy, Golden Samosas (Canonical Method)
- Heat vegetable oil in a heavy-bottomed pot or Dutch oven (like a frying pan for deep frying) over medium heat. The oil should be deep enough to submerge the samosas completely.
- Oil Temperature Checkpoint: The ideal frying temperature is initially lower to cook the shell through. Aim for "medium-hot," around 300-325°F (150-160°C). You can test this by dropping a small piece of dough into the oil; it should sizzle gently and slowly rise to the surface.
- Carefully lower 3-4 samosas into the hot oil, ensuring you don't overcrowd the pot.
- Fry on a low to medium-low heat for about 10-12 minutes, flipping occasionally, until the samosa shells are cooked through, firm, and have started to turn a pale golden color. This slow frying is key for crispiness and prevents bubbles/blisters.
- Once the shells are firm and lightly colored, increase the heat to medium-high (around 350-375°F / 175-190°C). Continue frying for another 3-5 minutes, flipping as needed, until the samosas are a beautiful deep golden brown and wonderfully crispy.
- Using a spider strainer or tongs, remove the samosas from the oil.
- Drain them on a wire rack set over a baking sheet. Do not drain only on paper towels, as this can make them soggy. The rack allows air circulation.
- Repeat with the remaining samosas, ensuring the oil temperature returns to the initial lower range before adding the next batch. Serve hot with your favorite chutneys!
You may also like


Hey there! I’m just someone who seriously loves good food and believes that cooking doesn’t have to be complicated to be amazing. Whether it’s a quick weeknight dinner or a cozy weekend meal, I’m all about sharing easy, tasty recipes that actually work.


