
Hawaiian Malasadas - Easy Sweet Bread Recipe & Ingredients
Hawaiian Malasadas - Easy Sweet Bread Recipe & Ingredients
- Serves: 16 People
- Prepare Time: 45 minutes
- Cooking Time: 20 minutes
- Calories: -
- Difficulty: Medium
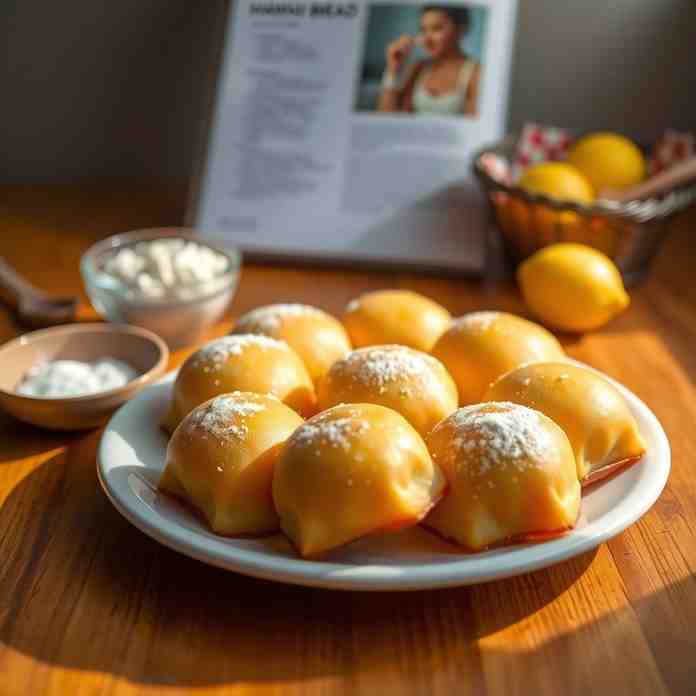
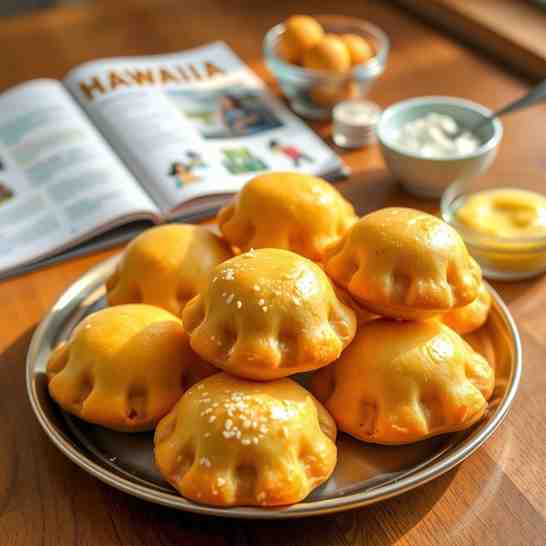
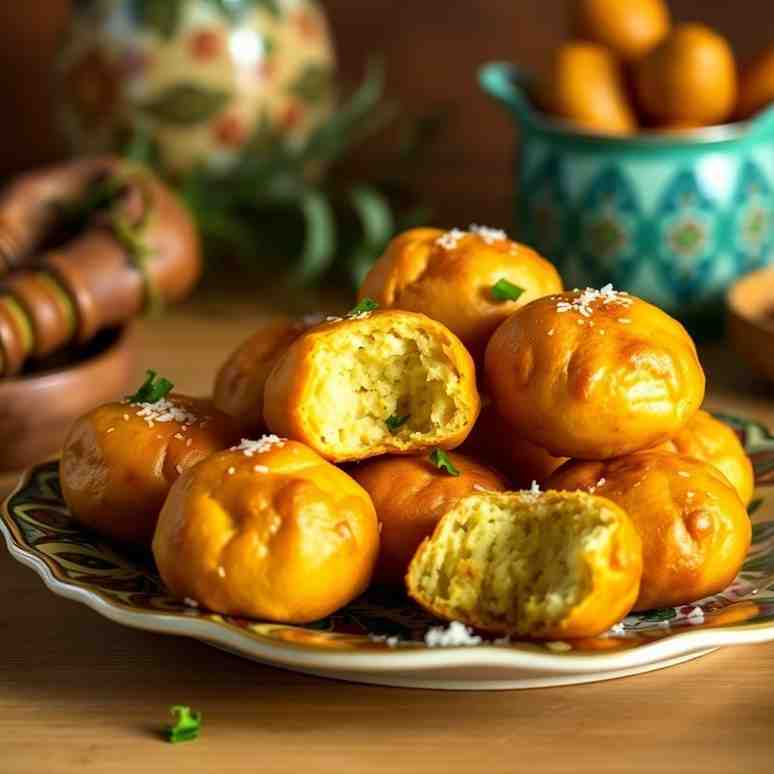
Aloha, fellow food lovers! Ever dreamed of sinking your teeth into a warm, sugary, melt-in-your-mouth donut that just screams tropical paradise? Well, you're in the right place! Today, we're diving headfirst into the wonderful world of Hawaiian Malasadas. These aren't just any donuts; they're a beloved Hawaiian treat with Portuguese roots, and trust me, they're utterly irresistible. While often compared to traditional donuts, malasadas have a unique airy texture and a delightful chewiness that sets them apart.
This recipe is your golden ticket to creating the most perfect malasadas right in your own kitchen. We're talking pillowy soft insides, those crave-worthy crisp edges, and a generous sugar coat that actually sticks. You'll discover all the essential hawaiian sweet bread ingredients you need and learn how to transform them into pure magic. Get ready to make some of the best homemade sweet treats you've ever tasted!
Fair warning: malasadas are definitely best enjoyed fresh and warm, straight from the fryer. But don't worry, I'll also share some clever tips for prepping ahead, so you can enjoy these delicious foods to make at home whenever the craving strikes. Get ready to bake (or rather, fry!) up some happiness!
Ingredients
Directions
- Equipment You'll Need:
- Dutch oven or heavy-bottomed pot (for frying)
- Deep-fry thermometer (strongly recommended for consistent results)
- Spider or slotted spoon (for safely handling malasadas)
- Large sheet pan lined with paper towels, topped with a wire rack (for draining)
- Large mixing bowl
- Whisk and spatula
- Optional: Stand mixer with a dough hook (makes kneading easier, but hand-kneading works great too!)
- Before You Start (Success Tips That Prevent Failure):
- Warm Milk the Safe Way: Your milk needs to be just right for the yeast. Aim for a temperature between 105-115°F (40-46°C). Too cold, and the yeast won't activate; too hot, and you'll kill it! The best way to check is with an instant-read thermometer.
- Proofing Cues (Don't Trust the Clock Alone): Yeast doughs are living things, and rise times can vary. For the first rise, your dough should roughly double in size. For the second rise, gently press a finger into the dough; if the indentation slowly springs back halfway, it's ready. If it springs back completely, it needs more time. If it collapses, it's over-proofed.
- Frying Setup Checklist: Before you even think about frying, get organized! Ensure your oil is at least 3-4 inches deep in your pot. Have your bowl of coating sugar ready and waiting. Plan to fry in small batches (3-4 malasadas at a time) to avoid overcrowding the pot, which can drop the oil temperature and lead to greasy donuts.
- Let's Make Malasadas!
- Activate the Yeast: In a large mixing bowl (or stand mixer bowl), combine the warm milk and ¼ cup of granulated sugar. Sprinkle the active dry yeast over the top. Give it a gentle stir and let it sit for 5-10 minutes. It should become foamy and bubbly, indicating the yeast is alive and happy. If it doesn't foam, your yeast might be old or your milk wasn't the right temperature – start over with fresh yeast and carefully check your milk temp!
- Mix & Knead the Dough: To the foamy yeast mixture, add the eggs, melted and cooled butter, salt, and optional vanilla extract. Whisk to combine. Gradually add the all-purpose flour, starting with 3 ½ cups, mixing with a wooden spoon or dough hook until a shaggy dough forms. Turn the dough out onto a lightly floured surface and knead for 8-10 minutes (or 6-8 minutes in a stand mixer on medium-low speed) until it's smooth, elastic, and no longer sticky. Add more flour, a tablespoon at a time, only if absolutely necessary to prevent sticking, as too much flour will make your malasadas dense. The dough should feel soft and slightly tacky, but not sticky.
- First Rise: Lightly grease a clean bowl with a little oil. Place the kneaded dough in the bowl, turning it once to coat. Cover the bowl tightly with plastic wrap or a clean kitchen towel. Let it rise in a warm, draft-free place for 1 to 1 ½ hours, or until it has roughly doubled in size.
- Portion & Shape: Gently punch down the risen dough to release the air. Turn it out onto a lightly floured surface. You can either roll the dough to about ½-inch thickness and use a round cutter (about 2 ½-3 inches in diameter) or simply pinch off small pieces of dough (about 1.5-2 ounces each) and gently shape them into smooth, round balls or slightly oval shapes.
- Size Targets: Aim for pieces about 2 ½ inches in diameter and ½-¾ inch thick for consistent frying and a beautiful puff.
- Second Rise: Place the shaped malasadas on a lightly floured baking sheet, leaving about 2 inches between each. Cover loosely with plastic wrap or a clean towel. Let them rise again in a warm place for 30-45 minutes, or until visibly puffy and a gentle finger-dent test shows they slowly spring back halfway.
- Fry: While the malasadas are doing their second rise, pour the vegetable oil into your Dutch oven or heavy pot. Heat the oil over medium-high heat until it reaches 350-360°F (175-182°C). Use your deep-fry thermometer to monitor the temperature closely. Carefully lower 3-4 malasadas into the hot oil using your spider or slotted spoon, being careful not to overcrowd the pot. Fry for 2-3 minutes per side, flipping once, until they are golden brown and puffed up.
- Sugar Coat: Once golden, remove the malasadas from the oil with the spider and place them on the wire rack over the paper towel-lined sheet pan to drain for about 30 seconds. While they are still warm (but not dripping with oil!), immediately transfer them to the bowl of coating sugar. Roll them gently to coat completely. Repeat with the remaining dough, ensuring the oil temperature stays consistent between batches.
Hawaiian Malasadas - Easy Sweet Bread Recipe & Ingredients

- Serves: 16 People
- Prepare Time: 45 minutes
- Cooking Time: 20 minutes
- Calories: -
- Difficulty: Medium
Aloha, fellow food lovers! Ever dreamed of sinking your teeth into a warm, sugary, melt-in-your-mouth donut that just screams tropical paradise? Well, you're in the right place! Today, we're diving headfirst into the wonderful world of Hawaiian Malasadas. These aren't just any donuts; they're a beloved Hawaiian treat with Portuguese roots, and trust me, they're utterly irresistible. While often compared to traditional donuts, malasadas have a unique airy texture and a delightful chewiness that sets them apart.
This recipe is your golden ticket to creating the most perfect malasadas right in your own kitchen. We're talking pillowy soft insides, those crave-worthy crisp edges, and a generous sugar coat that actually sticks. You'll discover all the essential hawaiian sweet bread ingredients you need and learn how to transform them into pure magic. Get ready to make some of the best homemade sweet treats you've ever tasted!
Fair warning: malasadas are definitely best enjoyed fresh and warm, straight from the fryer. But don't worry, I'll also share some clever tips for prepping ahead, so you can enjoy these delicious foods to make at home whenever the craving strikes. Get ready to bake (or rather, fry!) up some happiness!
Ingredients
Directions
- Equipment You'll Need:
- Dutch oven or heavy-bottomed pot (for frying)
- Deep-fry thermometer (strongly recommended for consistent results)
- Spider or slotted spoon (for safely handling malasadas)
- Large sheet pan lined with paper towels, topped with a wire rack (for draining)
- Large mixing bowl
- Whisk and spatula
- Optional: Stand mixer with a dough hook (makes kneading easier, but hand-kneading works great too!)
- Before You Start (Success Tips That Prevent Failure):
- Warm Milk the Safe Way: Your milk needs to be just right for the yeast. Aim for a temperature between 105-115°F (40-46°C). Too cold, and the yeast won't activate; too hot, and you'll kill it! The best way to check is with an instant-read thermometer.
- Proofing Cues (Don't Trust the Clock Alone): Yeast doughs are living things, and rise times can vary. For the first rise, your dough should roughly double in size. For the second rise, gently press a finger into the dough; if the indentation slowly springs back halfway, it's ready. If it springs back completely, it needs more time. If it collapses, it's over-proofed.
- Frying Setup Checklist: Before you even think about frying, get organized! Ensure your oil is at least 3-4 inches deep in your pot. Have your bowl of coating sugar ready and waiting. Plan to fry in small batches (3-4 malasadas at a time) to avoid overcrowding the pot, which can drop the oil temperature and lead to greasy donuts.
- Let's Make Malasadas!
- Activate the Yeast: In a large mixing bowl (or stand mixer bowl), combine the warm milk and ¼ cup of granulated sugar. Sprinkle the active dry yeast over the top. Give it a gentle stir and let it sit for 5-10 minutes. It should become foamy and bubbly, indicating the yeast is alive and happy. If it doesn't foam, your yeast might be old or your milk wasn't the right temperature – start over with fresh yeast and carefully check your milk temp!
- Mix & Knead the Dough: To the foamy yeast mixture, add the eggs, melted and cooled butter, salt, and optional vanilla extract. Whisk to combine. Gradually add the all-purpose flour, starting with 3 ½ cups, mixing with a wooden spoon or dough hook until a shaggy dough forms. Turn the dough out onto a lightly floured surface and knead for 8-10 minutes (or 6-8 minutes in a stand mixer on medium-low speed) until it's smooth, elastic, and no longer sticky. Add more flour, a tablespoon at a time, only if absolutely necessary to prevent sticking, as too much flour will make your malasadas dense. The dough should feel soft and slightly tacky, but not sticky.
- First Rise: Lightly grease a clean bowl with a little oil. Place the kneaded dough in the bowl, turning it once to coat. Cover the bowl tightly with plastic wrap or a clean kitchen towel. Let it rise in a warm, draft-free place for 1 to 1 ½ hours, or until it has roughly doubled in size.
- Portion & Shape: Gently punch down the risen dough to release the air. Turn it out onto a lightly floured surface. You can either roll the dough to about ½-inch thickness and use a round cutter (about 2 ½-3 inches in diameter) or simply pinch off small pieces of dough (about 1.5-2 ounces each) and gently shape them into smooth, round balls or slightly oval shapes.
- Size Targets: Aim for pieces about 2 ½ inches in diameter and ½-¾ inch thick for consistent frying and a beautiful puff.
- Second Rise: Place the shaped malasadas on a lightly floured baking sheet, leaving about 2 inches between each. Cover loosely with plastic wrap or a clean towel. Let them rise again in a warm place for 30-45 minutes, or until visibly puffy and a gentle finger-dent test shows they slowly spring back halfway.
- Fry: While the malasadas are doing their second rise, pour the vegetable oil into your Dutch oven or heavy pot. Heat the oil over medium-high heat until it reaches 350-360°F (175-182°C). Use your deep-fry thermometer to monitor the temperature closely. Carefully lower 3-4 malasadas into the hot oil using your spider or slotted spoon, being careful not to overcrowd the pot. Fry for 2-3 minutes per side, flipping once, until they are golden brown and puffed up.
- Sugar Coat: Once golden, remove the malasadas from the oil with the spider and place them on the wire rack over the paper towel-lined sheet pan to drain for about 30 seconds. While they are still warm (but not dripping with oil!), immediately transfer them to the bowl of coating sugar. Roll them gently to coat completely. Repeat with the remaining dough, ensuring the oil temperature stays consistent between batches.
You may also like

Hey there! I’m just someone who seriously loves good food and believes that cooking doesn’t have to be complicated to be amazing. Whether it’s a quick weeknight dinner or a cozy weekend meal, I’m all about sharing easy, tasty recipes that actually work.


