Homemade Malawach - Flaky Yemeni Bread Recipe
Homemade Malawach - Flaky Yemeni Bread Recipe

- Serves: 6 People
- Prepare Time: 30 minutes
- Cooking Time: 20 minutes
- Calories: -
- Difficulty: Medium
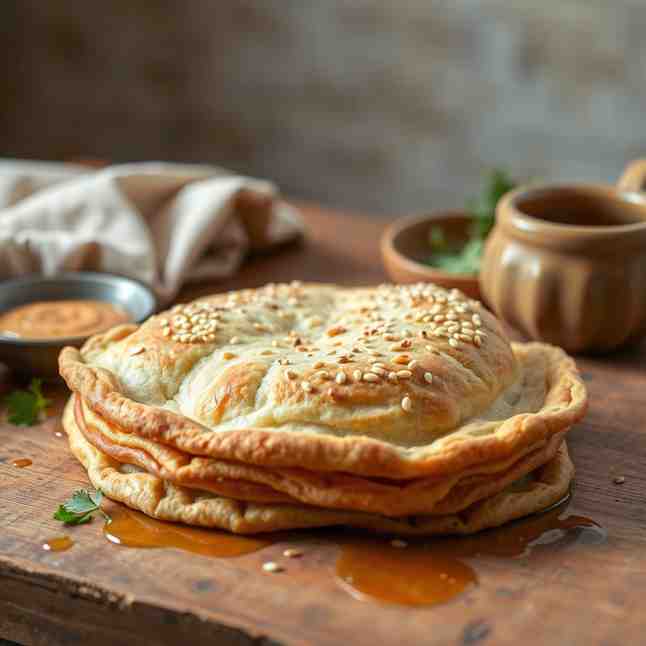
Craving a truly special homemade bread recipe that transports your taste buds? Look no further than Malawach! This incredible flaky Yemeni delight is a staple in Yemeni and Israeli Jewish cuisine, renowned for its irresistible layers and golden, crispy exterior. Forget complicated bakes; with our easy-to-follow guide, you'll be making authentic Malawach that rivals the best.
Malawach isn't just any homemade recipe; it's a culinary experience. Traditionally served for breakfast or as a hearty snack, it’s perfect with a drizzle of honey, a sprinkle of za'atar, or alongside a spicy tomato dip. We've combined the best techniques from top culinary sources – from the precise coiling method that guarantees maximum flakiness to practical make-ahead tips and expert heat wisdom – to bring you the most comprehensive and approachable recipe for homemade Malawach. Get ready to discover the joy of creating this beautiful Yemeni bread right in your own kitchen. It’s a recipe to try that you won't regret!
Ingredients
Directions
- Prepare the Dough In a large mixing bowl, combine the flour and salt. In a separate small bowl, whisk together the warm water, sugar, and olive oil. Gradually add the wet ingredients to the dry ingredients, mixing with a wooden spoon or your hands until a shaggy dough forms.
- Knead the Dough Turn the dough out onto a lightly floured surface. Knead for 8-10 minutes until the dough is smooth, elastic, and no longer sticky. It should spring back when gently poked. Divide the dough into 6-8 equal portions (about 100-110g each). Shape each portion into a smooth ball.
- First Rest Period Lightly grease a large bowl with a little olive oil. Place the dough balls in the bowl, turning to coat them lightly. Cover the bowl tightly with plastic wrap and let it rest at room temperature for at least 30 minutes, or up to 2 hours. This resting period is crucial for relaxing the gluten, making the dough easier to work with.
- Prepare the Butter Mixture While the dough rests, combine the softened butter and a tablespoon of vegetable oil in a small bowl. Mix until well combined and spreadable. This butter mixture is key to achieving those beautiful flaky layers.
- Roll and Coil the Dough (The Flaky Secret!) Lightly grease your work surface (a large, clean countertop is ideal) with a little of the butter mixture. Take one dough ball and, using your hands or a rolling pin, stretch it out as thinly as possible into a large, rectangular or oval shape. Aim for near-translucence without tearing. Don't worry if it's not perfectly shaped.
- Spread a thin, even layer of the butter mixture over the entire surface of the stretched dough. Starting from one of the longer sides, tightly roll the dough into a long, thin log. Now, take this log and coil it into a snail shape, tucking the end underneath. Place the coiled dough on a parchment-lined baking sheet. Repeat with the remaining dough balls.
- Second Rest Period (Critical for Flakiness) Once all the dough balls are coiled, cover the baking sheet loosely with plastic wrap. Refrigerate for at least 2 hours, or ideally overnight (up to 24 hours). This chilling period solidifies the butter, allowing it to create distinct layers when cooked, and further relaxes the dough for easy flattening.
- Flatten the Malawach When ready to cook, remove the coiled dough from the refrigerator. On a lightly floured surface (or a surface lightly greased with vegetable oil), gently flatten each coiled dough ball with your hands or a rolling pin into a round disc, about 6-8 inches in diameter and ¼ inch thick. Be gentle to maintain the layers.
- Cook the Malawach Heat a large, heavy-bottomed skillet or frying pan (cast iron works wonderfully, or any good non-stick pan to cook with) over medium heat. Add about 1 tablespoon of vegetable oil to the pan. Once hot, carefully place one Malawach disc in the pan.
- Cook for 3-4 minutes per side, or until golden brown and puffed, with visible flaky layers. If you prefer to cook with parchment paper for easier handling, you can place the flattened Malawach on a piece of parchment and carefully transfer it to the pan, then remove the parchment after a minute or two. Adjust the heat as needed to prevent burning. Repeat with the remaining Malawach, adding more oil to the pan as necessary.
- Serve Warm Serve the Malawach immediately, while it's still warm and flaky. Enjoy with your favorite toppings!
Homemade Malawach - Flaky Yemeni Bread Recipe
- Serves: 6 People
- Prepare Time: 30 minutes
- Cooking Time: 20 minutes
- Calories: -
- Difficulty: Medium
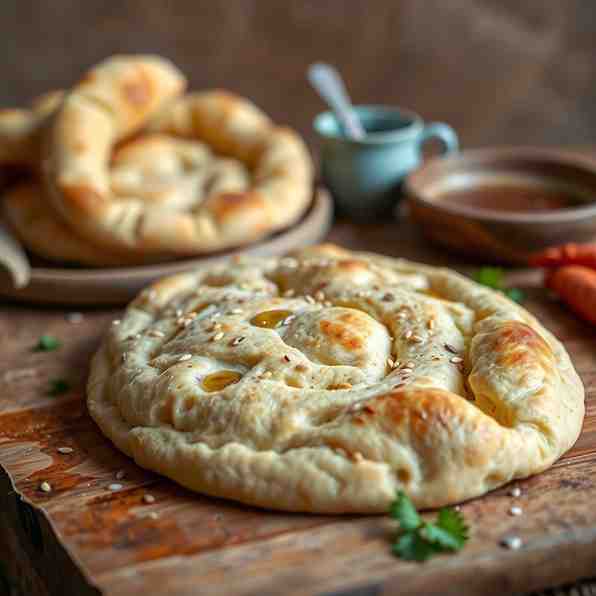
Craving a truly special homemade bread recipe that transports your taste buds? Look no further than Malawach! This incredible flaky Yemeni delight is a staple in Yemeni and Israeli Jewish cuisine, renowned for its irresistible layers and golden, crispy exterior. Forget complicated bakes; with our easy-to-follow guide, you'll be making authentic Malawach that rivals the best.
Malawach isn't just any homemade recipe; it's a culinary experience. Traditionally served for breakfast or as a hearty snack, it’s perfect with a drizzle of honey, a sprinkle of za'atar, or alongside a spicy tomato dip. We've combined the best techniques from top culinary sources – from the precise coiling method that guarantees maximum flakiness to practical make-ahead tips and expert heat wisdom – to bring you the most comprehensive and approachable recipe for homemade Malawach. Get ready to discover the joy of creating this beautiful Yemeni bread right in your own kitchen. It’s a recipe to try that you won't regret!
Ingredients
Directions
- Prepare the Dough In a large mixing bowl, combine the flour and salt. In a separate small bowl, whisk together the warm water, sugar, and olive oil. Gradually add the wet ingredients to the dry ingredients, mixing with a wooden spoon or your hands until a shaggy dough forms.
- Knead the Dough Turn the dough out onto a lightly floured surface. Knead for 8-10 minutes until the dough is smooth, elastic, and no longer sticky. It should spring back when gently poked. Divide the dough into 6-8 equal portions (about 100-110g each). Shape each portion into a smooth ball.
- First Rest Period Lightly grease a large bowl with a little olive oil. Place the dough balls in the bowl, turning to coat them lightly. Cover the bowl tightly with plastic wrap and let it rest at room temperature for at least 30 minutes, or up to 2 hours. This resting period is crucial for relaxing the gluten, making the dough easier to work with.
- Prepare the Butter Mixture While the dough rests, combine the softened butter and a tablespoon of vegetable oil in a small bowl. Mix until well combined and spreadable. This butter mixture is key to achieving those beautiful flaky layers.
- Roll and Coil the Dough (The Flaky Secret!) Lightly grease your work surface (a large, clean countertop is ideal) with a little of the butter mixture. Take one dough ball and, using your hands or a rolling pin, stretch it out as thinly as possible into a large, rectangular or oval shape. Aim for near-translucence without tearing. Don't worry if it's not perfectly shaped.
- Spread a thin, even layer of the butter mixture over the entire surface of the stretched dough. Starting from one of the longer sides, tightly roll the dough into a long, thin log. Now, take this log and coil it into a snail shape, tucking the end underneath. Place the coiled dough on a parchment-lined baking sheet. Repeat with the remaining dough balls.
- Second Rest Period (Critical for Flakiness) Once all the dough balls are coiled, cover the baking sheet loosely with plastic wrap. Refrigerate for at least 2 hours, or ideally overnight (up to 24 hours). This chilling period solidifies the butter, allowing it to create distinct layers when cooked, and further relaxes the dough for easy flattening.
- Flatten the Malawach When ready to cook, remove the coiled dough from the refrigerator. On a lightly floured surface (or a surface lightly greased with vegetable oil), gently flatten each coiled dough ball with your hands or a rolling pin into a round disc, about 6-8 inches in diameter and ¼ inch thick. Be gentle to maintain the layers.
- Cook the Malawach Heat a large, heavy-bottomed skillet or frying pan (cast iron works wonderfully, or any good non-stick pan to cook with) over medium heat. Add about 1 tablespoon of vegetable oil to the pan. Once hot, carefully place one Malawach disc in the pan.
- Cook for 3-4 minutes per side, or until golden brown and puffed, with visible flaky layers. If you prefer to cook with parchment paper for easier handling, you can place the flattened Malawach on a piece of parchment and carefully transfer it to the pan, then remove the parchment after a minute or two. Adjust the heat as needed to prevent burning. Repeat with the remaining Malawach, adding more oil to the pan as necessary.
- Serve Warm Serve the Malawach immediately, while it's still warm and flaky. Enjoy with your favorite toppings!
You may also like


Hey there! I’m just someone who seriously loves good food and believes that cooking doesn’t have to be complicated to be amazing. Whether it’s a quick weeknight dinner or a cozy weekend meal, I’m all about sharing easy, tasty recipes that actually work.