
Sweet & Spicy Pepper Jelly Recipe - Make Yours Today
Sweet & Spicy Pepper Jelly Recipe - Make Yours Today
- Serves: 6 People
- Prepare Time: 25 minutes
- Cooking Time: 30 minutes
- Calories: -
- Difficulty: Easy
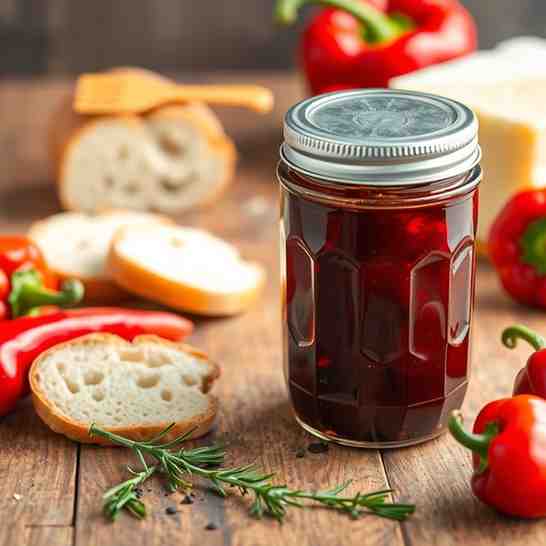
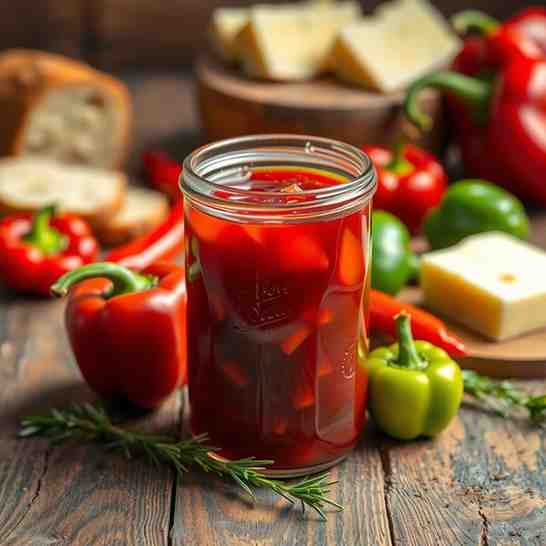
Get ready to add a burst of flavor to your kitchen with homemade pepper jelly! This vibrant condiment is the perfect blend of sweet and spicy, with a delightful kick that wakes up your taste buds. Most people adore serving it simply: spooned generously over a block of cream cheese or goat cheese, accompanied by your favorite crackers for an irresistible appetizer. But trust us, this jalapeno pepper jelly is so much more versatile than just a party starter.
Ingredients
Directions
- Prep the Peppers First things first, wash all your bell peppers and jalapeños thoroughly. For the bell peppers, remove the stems, seeds, and any white ribs inside. For the jalapeños, you decide the heat: for milder jelly, remove all seeds and white ribs; for medium heat, leave a few seeds; for hotter, leave more. Remember to wear gloves when handling jalapeños to prevent skin irritation. Once prepped, chop all the peppers finely. You can do this by hand with a sharp knife or use a food processor for a quicker, more uniform chop. The goal is to keep the total volume of chopped peppers consistent with the recipe's specified amount.
- Cook the Pepper Mixture In a large, heavy-bottomed pot, combine your finely chopped peppers, granulated sugar, apple cider vinegar, and salt. Stir everything together well. Place the pot over medium-high heat and bring the mixture to a gentle but active boil, stirring occasionally to prevent sticking. Once boiling, reduce the heat slightly and let it simmer for approximately 10-15 minutes, or until the peppers have softened and the mixture has thickened slightly.
- Add the Pectin & Test for Set With the pepper mixture simmering, stir in the powdered pectin. Make sure to stir constantly to dissolve it completely and prevent lumps. Bring the mixture back to a rolling boil that cannot be stirred down, and continue boiling for exactly 1 minute (or follow the specific instructions on your pectin package). After 1 minute, remove the pot from the heat.
- Now, it's time to test for the set. A simple method is the spoon or sheet test: dip a cold spoon into the jelly, lift it, and tilt it. If the jelly forms a "sheet" or a few large drops that run together off the spoon, it's ready. You can also do a quick freezer plate test: place a small spoonful of hot jelly onto a plate that's been chilling in the freezer for a few minutes. Let it sit for 30 seconds, then push it with your finger. If it wrinkles, it's set. Don't worry if it looks very thin at this stage; it thickens significantly as it cools.
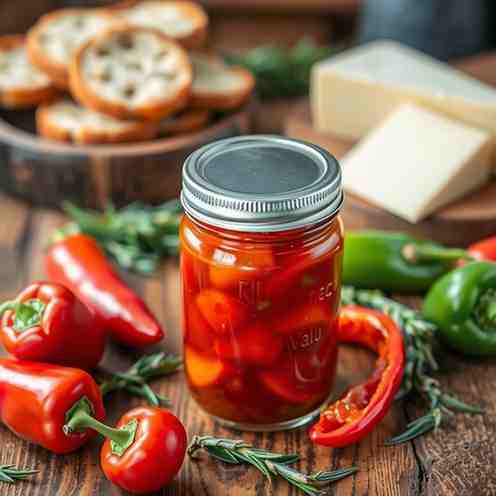
- Fill the Jars If any foam has formed on top of your jelly, gently skim it off with a spoon. Carefully ladle the hot pepper jelly into clean, sterilized jars, leaving about 1/4 inch of headspace (the space between the jelly and the rim of the jar). Wipe the rims of the jars thoroughly with a clean, damp cloth to ensure a good seal. Place new lids on the jars and screw on the rings finger-tight.
- Refrigerator / Freezer Version (No Canning) If you're not planning to can your jelly for shelf storage, or if you've made significant changes to the sugar or acid ratios, this is the best option. Simply let the filled jars cool completely at room temperature. Once cool, transfer them to the refrigerator and use within 3-4 weeks. For longer storage, you can freeze the jelly for up to 6 months.
Sweet & Spicy Pepper Jelly Recipe - Make Yours Today
- Serves: 6 People
- Prepare Time: 25 minutes
- Cooking Time: 30 minutes
- Calories: -
- Difficulty: Easy
Get ready to add a burst of flavor to your kitchen with homemade pepper jelly! This vibrant condiment is the perfect blend of sweet and spicy, with a delightful kick that wakes up your taste buds. Most people adore serving it simply: spooned generously over a block of cream cheese or goat cheese, accompanied by your favorite crackers for an irresistible appetizer. But trust us, this jalapeno pepper jelly is so much more versatile than just a party starter.
Ingredients
Directions
- Prep the Peppers First things first, wash all your bell peppers and jalapeños thoroughly. For the bell peppers, remove the stems, seeds, and any white ribs inside. For the jalapeños, you decide the heat: for milder jelly, remove all seeds and white ribs; for medium heat, leave a few seeds; for hotter, leave more. Remember to wear gloves when handling jalapeños to prevent skin irritation. Once prepped, chop all the peppers finely. You can do this by hand with a sharp knife or use a food processor for a quicker, more uniform chop. The goal is to keep the total volume of chopped peppers consistent with the recipe's specified amount.
- Cook the Pepper Mixture In a large, heavy-bottomed pot, combine your finely chopped peppers, granulated sugar, apple cider vinegar, and salt. Stir everything together well. Place the pot over medium-high heat and bring the mixture to a gentle but active boil, stirring occasionally to prevent sticking. Once boiling, reduce the heat slightly and let it simmer for approximately 10-15 minutes, or until the peppers have softened and the mixture has thickened slightly.
- Add the Pectin & Test for Set With the pepper mixture simmering, stir in the powdered pectin. Make sure to stir constantly to dissolve it completely and prevent lumps. Bring the mixture back to a rolling boil that cannot be stirred down, and continue boiling for exactly 1 minute (or follow the specific instructions on your pectin package). After 1 minute, remove the pot from the heat.
- Now, it's time to test for the set. A simple method is the spoon or sheet test: dip a cold spoon into the jelly, lift it, and tilt it. If the jelly forms a "sheet" or a few large drops that run together off the spoon, it's ready. You can also do a quick freezer plate test: place a small spoonful of hot jelly onto a plate that's been chilling in the freezer for a few minutes. Let it sit for 30 seconds, then push it with your finger. If it wrinkles, it's set. Don't worry if it looks very thin at this stage; it thickens significantly as it cools.
- Fill the Jars If any foam has formed on top of your jelly, gently skim it off with a spoon. Carefully ladle the hot pepper jelly into clean, sterilized jars, leaving about 1/4 inch of headspace (the space between the jelly and the rim of the jar). Wipe the rims of the jars thoroughly with a clean, damp cloth to ensure a good seal. Place new lids on the jars and screw on the rings finger-tight.
- Refrigerator / Freezer Version (No Canning) If you're not planning to can your jelly for shelf storage, or if you've made significant changes to the sugar or acid ratios, this is the best option. Simply let the filled jars cool completely at room temperature. Once cool, transfer them to the refrigerator and use within 3-4 weeks. For longer storage, you can freeze the jelly for up to 6 months.
You may also like


Hey there! I’m just someone who seriously loves good food and believes that cooking doesn’t have to be complicated to be amazing. Whether it’s a quick weeknight dinner or a cozy weekend meal, I’m all about sharing easy, tasty recipes that actually work.


