
Icelandic Rye Bread - Easy Flatkaka Recipe
Icelandic Rye Bread - Easy Flatkaka Recipe
- Serves: 10 People
- Prepare Time: 20 minutes
- Cooking Time: 25 minutes
- Calories: -
- Difficulty: Easy
Craving a taste of the land of fire and ice? You're in the right place! This authentic Icelandic Flatkaka recipe brings the traditional flavors of Iceland straight to your kitchen. Often described as an easy, mostly-unleavened rye bread, Flatkaka is a delightful, pan-fried flatbread that’s incredibly simple to make, even if you're new to baking. We'll guide you through the traditional methods, adapted to be perfectly friendly for your modern home kitchen. Get ready to enjoy a truly unique and delicious iceland rye bread experience!
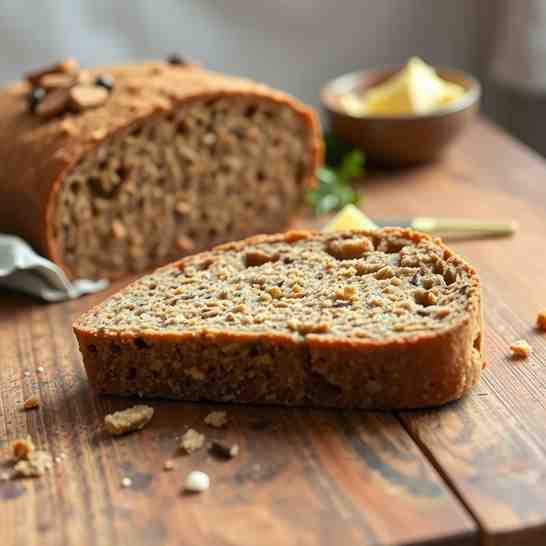
Flatkaka, pronounced "FLAT-ka-ka," is a thin, soft, and chewy rye flatbread known for its distinctive dark spots from pan-frying. It's a staple in Iceland, cherished for its simple ingredients and versatile nature. While often referred to as flatkaka, you might also hear it called flatkökur (plural) or flatbrauð, meaning "flatbread." Traditionally, it's enjoyed with a smear of butter and topped with smoked fish like salmon, pickled herring, or even a slice of smoked lamb. It’s a humble yet incredibly satisfying treat!
This recipe is designed for success, whether you're a seasoned baker or just starting out. We focus on a few key techniques that make all the difference:
Boiling water + mixing: Using boiling water helps to "gelatinize" the starches in the rye flour, making the dough easier to work with and contributing to the flatbread's soft texture. It also helps prevent the dough from getting too sticky.
Resting the dough: A short rest allows the flour to fully hydrate and the gluten (even minimal in rye) to relax, making the dough pliable and easy to roll super thin without tearing.
Rolling thin + docking: Rolling the dough to an almost paper-thin consistency is crucial for the authentic texture. Docking with a fork prevents excessive puffing, ensuring a flat, uniform bread.
Hot dry pan + keeping breads moist after cooking: A screaming hot, dry skillet gives you those beautiful dark spots and cooks the bread quickly. Immediately storing the cooked flatkaka under a clean towel or in a sealed bag traps steam, keeping them wonderfully soft and flexible.
Ingredients
Directions
- Mix Dry Ingredients: In a medium-sized mixing bowl, combine the rye flour, whole wheat flour, baking powder, and salt. Whisk briefly to ensure everything is well distributed.
- Add Boiling Water Gradually: Carefully pour the boiling water into the dry ingredients while stirring continuously with a wooden spoon or heatproof spatula. The mixture will look shaggy and crumbly at first.
- Knead Briefly: Once cool enough to handle, turn the dough out onto a lightly floured surface. Knead briefly for 1-2 minutes until the dough comes together into a smooth, cohesive ball. Be careful not to overwork it.
- Rest the Dough: Place the dough back into the bowl, cover it with a clean kitchen towel, and let it rest at room temperature for at least 15-20 minutes. This allows the flour to fully hydrate and the dough to become more pliable.
- Divide & Shape: Divide the dough into 10-12 equal pieces. Roll each piece into a smooth ball.
- Roll Very Thin: Lightly flour your work surface and rolling pin. Take one dough ball and roll it out as thinly as possible – aiming for about 1/16th of an inch (1.5 mm) thick. If desired, use a plate or bowl as a guide to cut perfect rounds. Gather any scraps, gently re-knead, and roll them out again.
- Dock with Fork: Using a fork, prick the surface of each rolled-out flatbread several times. This helps prevent large air pockets from forming during cooking.
- Preheat Dry Pan: Place your heavy skillet or griddle over medium-high heat. Let it preheat for several minutes until it's very hot. You should see a faint wisp of smoke or feel intense heat when you hold your hand a few inches above the surface. Do NOT add any oil.
- Cook First Side: Carefully place one flatbread onto the hot, dry pan. Cook for 1 to 2 minutes, or until you see small bubbles forming on the surface and dark brown spots appear on the underside.
- Flip & Cook Second Side: Flip the flatbread and cook for another 1 to 2 minutes on the second side, until it also develops dark spots and is cooked through.
- Keep Soft: As each flatbread finishes cooking, immediately transfer it to a plate and cover it with a clean kitchen towel. For extra softness, you can briefly mist the hot flatbread with a little water or quickly dip it in water (just a second!) before stacking it under the towel or transferring it to a resealable bag/container. This traps the steam and keeps them moist. Repeat with the remaining dough.
- How to serveFlatkaka is wonderfully versatile! Here are some classic Icelandic-style toppings and serving ideas:
- Classic Icelandic: Spread generously with butter and top with thinly sliced smoked salmon (lax), pickled herring, or hangikjöt (smoked lamb).
- Simple & Fresh: Butter and fresh cucumber slices make a refreshing snack.
- Hearty: Serve with traditional Icelandic lamb pâté or a creamy cheese spread.
- Make it a Snack: Enjoy plain, with a cup of coffee or tea.
- Make it Lunch: Use it as a base for open-faced sandwiches with your favorite deli meats, cheeses, or even scrambled eggs.
Icelandic Rye Bread - Easy Flatkaka Recipe
- Serves: 10 People
- Prepare Time: 20 minutes
- Cooking Time: 25 minutes
- Calories: -
- Difficulty: Easy
Craving a taste of the land of fire and ice? You're in the right place! This authentic Icelandic Flatkaka recipe brings the traditional flavors of Iceland straight to your kitchen. Often described as an easy, mostly-unleavened rye bread, Flatkaka is a delightful, pan-fried flatbread that’s incredibly simple to make, even if you're new to baking. We'll guide you through the traditional methods, adapted to be perfectly friendly for your modern home kitchen. Get ready to enjoy a truly unique and delicious iceland rye bread experience!
Flatkaka, pronounced "FLAT-ka-ka," is a thin, soft, and chewy rye flatbread known for its distinctive dark spots from pan-frying. It's a staple in Iceland, cherished for its simple ingredients and versatile nature. While often referred to as flatkaka, you might also hear it called flatkökur (plural) or flatbrauð, meaning "flatbread." Traditionally, it's enjoyed with a smear of butter and topped with smoked fish like salmon, pickled herring, or even a slice of smoked lamb. It’s a humble yet incredibly satisfying treat!
This recipe is designed for success, whether you're a seasoned baker or just starting out. We focus on a few key techniques that make all the difference:
Boiling water + mixing: Using boiling water helps to "gelatinize" the starches in the rye flour, making the dough easier to work with and contributing to the flatbread's soft texture. It also helps prevent the dough from getting too sticky.
Resting the dough: A short rest allows the flour to fully hydrate and the gluten (even minimal in rye) to relax, making the dough pliable and easy to roll super thin without tearing.
Rolling thin + docking: Rolling the dough to an almost paper-thin consistency is crucial for the authentic texture. Docking with a fork prevents excessive puffing, ensuring a flat, uniform bread.
Hot dry pan + keeping breads moist after cooking: A screaming hot, dry skillet gives you those beautiful dark spots and cooks the bread quickly. Immediately storing the cooked flatkaka under a clean towel or in a sealed bag traps steam, keeping them wonderfully soft and flexible.
Ingredients
Directions
- Mix Dry Ingredients: In a medium-sized mixing bowl, combine the rye flour, whole wheat flour, baking powder, and salt. Whisk briefly to ensure everything is well distributed.
- Add Boiling Water Gradually: Carefully pour the boiling water into the dry ingredients while stirring continuously with a wooden spoon or heatproof spatula. The mixture will look shaggy and crumbly at first.
- Knead Briefly: Once cool enough to handle, turn the dough out onto a lightly floured surface. Knead briefly for 1-2 minutes until the dough comes together into a smooth, cohesive ball. Be careful not to overwork it.
- Rest the Dough: Place the dough back into the bowl, cover it with a clean kitchen towel, and let it rest at room temperature for at least 15-20 minutes. This allows the flour to fully hydrate and the dough to become more pliable.
- Divide & Shape: Divide the dough into 10-12 equal pieces. Roll each piece into a smooth ball.
- Roll Very Thin: Lightly flour your work surface and rolling pin. Take one dough ball and roll it out as thinly as possible – aiming for about 1/16th of an inch (1.5 mm) thick. If desired, use a plate or bowl as a guide to cut perfect rounds. Gather any scraps, gently re-knead, and roll them out again.
- Dock with Fork: Using a fork, prick the surface of each rolled-out flatbread several times. This helps prevent large air pockets from forming during cooking.
- Preheat Dry Pan: Place your heavy skillet or griddle over medium-high heat. Let it preheat for several minutes until it's very hot. You should see a faint wisp of smoke or feel intense heat when you hold your hand a few inches above the surface. Do NOT add any oil.
- Cook First Side: Carefully place one flatbread onto the hot, dry pan. Cook for 1 to 2 minutes, or until you see small bubbles forming on the surface and dark brown spots appear on the underside.
- Flip & Cook Second Side: Flip the flatbread and cook for another 1 to 2 minutes on the second side, until it also develops dark spots and is cooked through.
- Keep Soft: As each flatbread finishes cooking, immediately transfer it to a plate and cover it with a clean kitchen towel. For extra softness, you can briefly mist the hot flatbread with a little water or quickly dip it in water (just a second!) before stacking it under the towel or transferring it to a resealable bag/container. This traps the steam and keeps them moist. Repeat with the remaining dough.
- How to serveFlatkaka is wonderfully versatile! Here are some classic Icelandic-style toppings and serving ideas:
- Classic Icelandic: Spread generously with butter and top with thinly sliced smoked salmon (lax), pickled herring, or hangikjöt (smoked lamb).
- Simple & Fresh: Butter and fresh cucumber slices make a refreshing snack.
- Hearty: Serve with traditional Icelandic lamb pâté or a creamy cheese spread.
- Make it a Snack: Enjoy plain, with a cup of coffee or tea.
- Make it Lunch: Use it as a base for open-faced sandwiches with your favorite deli meats, cheeses, or even scrambled eggs.
You may also like


Hey there! I’m just someone who seriously loves good food and believes that cooking doesn’t have to be complicated to be amazing. Whether it’s a quick weeknight dinner or a cozy weekend meal, I’m all about sharing easy, tasty recipes that actually work.


