
Crispy Gluten-Free Falafel - Jordanian Recipe
Crispy Gluten-Free Falafel - Jordanian Recipe

- Serves: 4 People
- Prepare Time: 30 minutes
- Cooking Time: 20 minutes
- Calories: -
- Difficulty: Medium
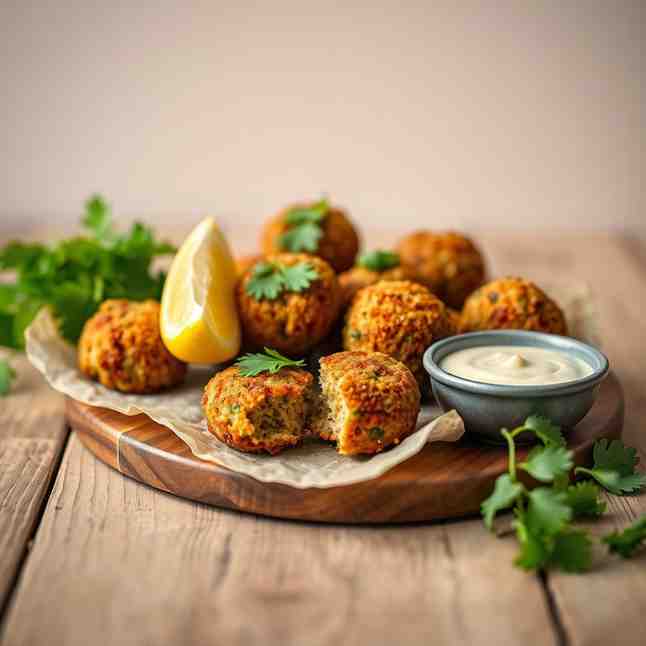
Craving that incredible street-style Jordanian-style falafel you dream about? Get ready to make the most unbelievably crispy, bright-green, herb-packed gluten-free falafel right in your own kitchen! This recipe is designed to be super friendly and totally doable, even if you’re a beginner. What’s more, it’s naturally vegan gluten-free, making it a fantastic option for healthy gluten-free food and a staple for middle eastern meal prep.
This recipe truly works because we’re going to unlock the secrets to perfect falafel:
Why dried chickpeas matter: Forget the canned stuff! We’ll show you why starting with dried chickpeas is non-negotiable for that authentic texture.
The exact texture you’re aiming for: We’ll guide you to the perfect "coarse wet sand" consistency that holds together without being gummy.
How to keep falafel from falling apart: Say goodbye to crumbling falafel disasters with our chilling and shaping tips.
How to meal-prep and freeze it: Make a big batch and enjoy delicious, homemade falafel whenever the craving strikes!
Jordanian falafel stands out with its incredible herbiness and specific serving style. Here’s what you can expect:
Common sandwich build + fixings: Typically served in fresh pita bread with creamy tahini sauce, tangy pickles, fresh tomatoes, a simple chopped salad (like tomato-cucumber), and a kick of hot sauce.
Flavor expectations: Bursting with fresh parsley and cilantro, complemented by the warm, earthy notes of cumin and coriander. It’s vibrant, savory, and utterly delicious.
How it’s typically eaten: Whether as a satisfying street sandwich for a quick bite or as part of a larger mezze plate with various dips and salads, it’s always a crowd-pleaser.
Ingredients
Directions
- Soak the chickpeasPlace the dried chickpeas in a large bowl and cover them with at least 3-4 inches of cold water. They will expand significantly. Let them soak at room temperature for 12-24 hours.
- What they should look/feel like: After soaking, the chickpeas should be plump and roughly double in size. They should be tender enough to bite into but still firm, not mushy.
- Drain + dry properlyThoroughly drain the soaked chickpeas in a colander. For best results, spread them out on a clean kitchen towel or paper towels and gently pat them dry. Allow them to air dry for another 10-15 minutes.
- Why moisture control matters: Excess moisture is the enemy of crispy falafel! It can lead to a dense, gummy interior and prevent the exterior from getting perfectly crisp.
- Process to the right textureAdd the drained, dried chickpeas, fresh parsley, cilantro, onion, garlic, cumin, coriander, baking powder, salt, and pepper to a large food processor. Pulse repeatedly, scraping down the sides as needed, until the mixture resembles "coarse wet sand" or fine crumbs.
- What NOT to do: Do not over-process! You’re aiming for a textured mixture, not a smooth puree or paste. There should still be some small pieces of chickpeas and herbs visible.
- Rest/chill the mixtureTransfer the falafel mixture to a bowl, cover it tightly, and refrigerate for at least 30 minutes, or up to 2 hours. This step is important!
- What chilling fixes: Chilling helps the flavors meld and, more importantly, firms up the mixture, making it easier to shape and less likely to fall apart during frying.
- ShapeUsing slightly damp hands or a falafel scoop, shape the mixture into small, uniform patties or balls, about 1 ½ inches in diameter and ½ inch thick. Don't press them too firmly.
- Size target: Aim for consistent size for even cooking.
- Hand moisture trick: Keeping your hands slightly damp prevents the mixture from sticking.
- FryPour the neutral oil into a deep, heavy-bottomed pot or Dutch oven, ensuring it’s at least 2-3 inches deep. Heat the oil over medium-high heat until it reaches 350-360°F (175-180°C). A thermometer is highly recommended for accuracy.
- Oil depth guidance: Enough oil to submerge the falafel fully or at least halfway.
- Temperature target: Maintaining the correct oil temperature is key to crispy falafel that cooks evenly without burning or becoming greasy.
- Test-fry protocol: Fry one falafel first to test the oil temperature and mixture consistency. Adjust heat or add a tiny bit of chickpea flour if needed.
- Batch size + timing: Fry falafel in small batches to avoid overcrowding the pot, which can lower the oil temperature. Fry for 2-4 minutes per batch, flipping halfway, until deep golden brown and crispy.
- Drain + serveUsing a spider or slotted spoon, carefully remove the fried falafel from the oil and transfer them to a wire rack set over a baking sheet lined with paper towels.
- Drain method: Draining on a rack allows air circulation and prevents the falafel from becoming soggy.
- Serve immediately for best texture: Falafel is best enjoyed hot and fresh out of the fryer!
Crispy Gluten-Free Falafel - Jordanian Recipe

- Serves: 4 People
- Prepare Time: 30 minutes
- Cooking Time: 20 minutes
- Calories: -
- Difficulty: Medium
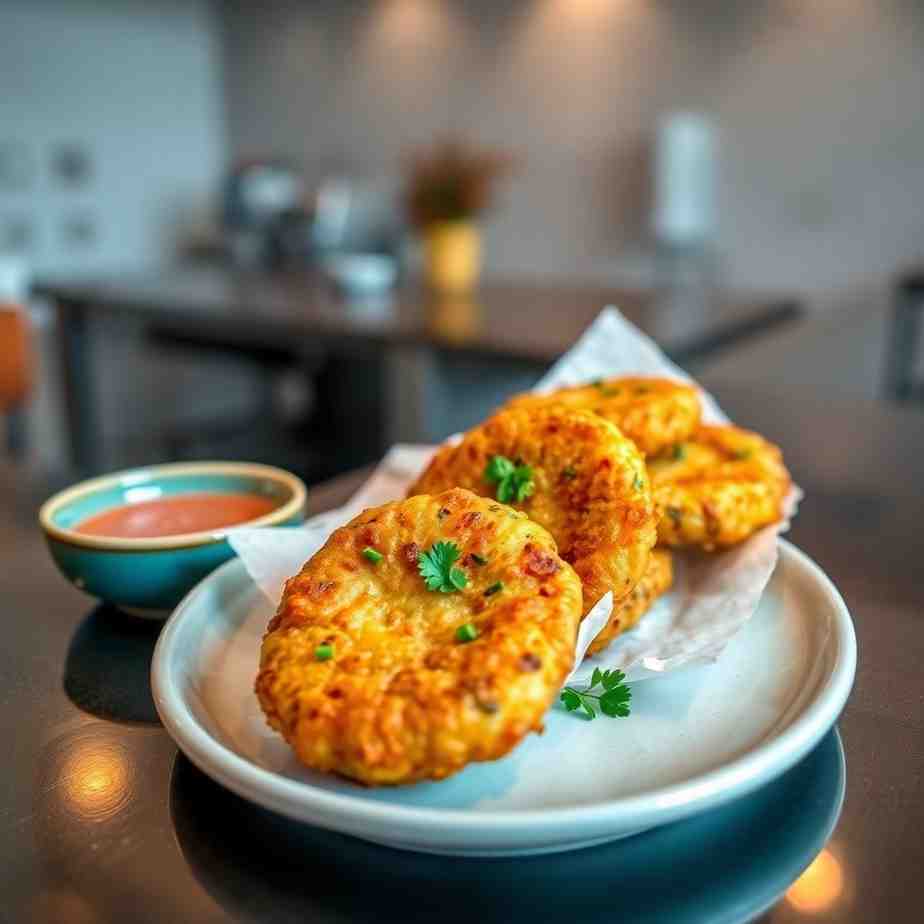
Craving that incredible street-style Jordanian-style falafel you dream about? Get ready to make the most unbelievably crispy, bright-green, herb-packed gluten-free falafel right in your own kitchen! This recipe is designed to be super friendly and totally doable, even if you’re a beginner. What’s more, it’s naturally vegan gluten-free, making it a fantastic option for healthy gluten-free food and a staple for middle eastern meal prep.
This recipe truly works because we’re going to unlock the secrets to perfect falafel:
Why dried chickpeas matter: Forget the canned stuff! We’ll show you why starting with dried chickpeas is non-negotiable for that authentic texture.
The exact texture you’re aiming for: We’ll guide you to the perfect "coarse wet sand" consistency that holds together without being gummy.
How to keep falafel from falling apart: Say goodbye to crumbling falafel disasters with our chilling and shaping tips.
How to meal-prep and freeze it: Make a big batch and enjoy delicious, homemade falafel whenever the craving strikes!
Jordanian falafel stands out with its incredible herbiness and specific serving style. Here’s what you can expect:
Common sandwich build + fixings: Typically served in fresh pita bread with creamy tahini sauce, tangy pickles, fresh tomatoes, a simple chopped salad (like tomato-cucumber), and a kick of hot sauce.
Flavor expectations: Bursting with fresh parsley and cilantro, complemented by the warm, earthy notes of cumin and coriander. It’s vibrant, savory, and utterly delicious.
How it’s typically eaten: Whether as a satisfying street sandwich for a quick bite or as part of a larger mezze plate with various dips and salads, it’s always a crowd-pleaser.
Ingredients
Directions
- Soak the chickpeasPlace the dried chickpeas in a large bowl and cover them with at least 3-4 inches of cold water. They will expand significantly. Let them soak at room temperature for 12-24 hours.
- What they should look/feel like: After soaking, the chickpeas should be plump and roughly double in size. They should be tender enough to bite into but still firm, not mushy.
- Drain + dry properlyThoroughly drain the soaked chickpeas in a colander. For best results, spread them out on a clean kitchen towel or paper towels and gently pat them dry. Allow them to air dry for another 10-15 minutes.
- Why moisture control matters: Excess moisture is the enemy of crispy falafel! It can lead to a dense, gummy interior and prevent the exterior from getting perfectly crisp.
- Process to the right textureAdd the drained, dried chickpeas, fresh parsley, cilantro, onion, garlic, cumin, coriander, baking powder, salt, and pepper to a large food processor. Pulse repeatedly, scraping down the sides as needed, until the mixture resembles "coarse wet sand" or fine crumbs.
- What NOT to do: Do not over-process! You’re aiming for a textured mixture, not a smooth puree or paste. There should still be some small pieces of chickpeas and herbs visible.
- Rest/chill the mixtureTransfer the falafel mixture to a bowl, cover it tightly, and refrigerate for at least 30 minutes, or up to 2 hours. This step is important!
- What chilling fixes: Chilling helps the flavors meld and, more importantly, firms up the mixture, making it easier to shape and less likely to fall apart during frying.
- ShapeUsing slightly damp hands or a falafel scoop, shape the mixture into small, uniform patties or balls, about 1 ½ inches in diameter and ½ inch thick. Don't press them too firmly.
- Size target: Aim for consistent size for even cooking.
- Hand moisture trick: Keeping your hands slightly damp prevents the mixture from sticking.
- FryPour the neutral oil into a deep, heavy-bottomed pot or Dutch oven, ensuring it’s at least 2-3 inches deep. Heat the oil over medium-high heat until it reaches 350-360°F (175-180°C). A thermometer is highly recommended for accuracy.
- Oil depth guidance: Enough oil to submerge the falafel fully or at least halfway.
- Temperature target: Maintaining the correct oil temperature is key to crispy falafel that cooks evenly without burning or becoming greasy.
- Test-fry protocol: Fry one falafel first to test the oil temperature and mixture consistency. Adjust heat or add a tiny bit of chickpea flour if needed.
- Batch size + timing: Fry falafel in small batches to avoid overcrowding the pot, which can lower the oil temperature. Fry for 2-4 minutes per batch, flipping halfway, until deep golden brown and crispy.
- Drain + serveUsing a spider or slotted spoon, carefully remove the fried falafel from the oil and transfer them to a wire rack set over a baking sheet lined with paper towels.
- Drain method: Draining on a rack allows air circulation and prevents the falafel from becoming soggy.
- Serve immediately for best texture: Falafel is best enjoyed hot and fresh out of the fryer!
You may also like


Hey there! I’m just someone who seriously loves good food and believes that cooking doesn’t have to be complicated to be amazing. Whether it’s a quick weeknight dinner or a cozy weekend meal, I’m all about sharing easy, tasty recipes that actually work.


