
Make Your Own Chocolate Bar - Smooth Swiss-Style Treat
Make Your Own Chocolate Bar - Smooth Swiss-Style Treat

- Serves: 4 People
- Prepare Time: 15 minutes
- Cooking Time: 30 minutes
- Calories: -
- Difficulty: Medium
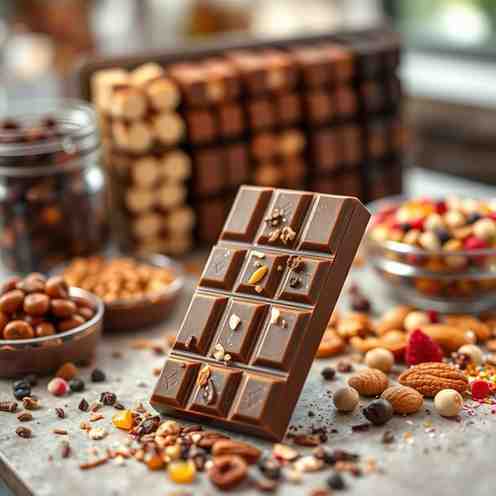
Ever dreamed of crafting your very own gourmet chocolate bars right in your kitchen? This isn't just about melting some chocolate and pouring it into a mold; it's about creating something truly special. We're talking about a homemade chocolate bar that has that perfect glossy shine, a satisfying snap when you break it, and absolutely no streaky white haze. If you're looking to make your own chocolate bar that rivals the best artisan treats, you've come to the right place.
This guide is designed for first-timers and seasoned home bakers alike, offering a reliable, foolproof method to achieve professional results. We'll dive into the secrets of creating smooth, high-quality chocolate treats with easy methods that use standard home-kitchen tools. What makes our recipe "Swiss-style"? It's all about achieving that signature melt-in-your-mouth smoothness and rich dairy notes often found in premium milk chocolate, along with a focus on using the best ingredients for premium chocolate to elevate your creation. Get ready to impress yourself and everyone else with your incredible homemade chocolate!
Ingredients
Directions
- Prep for Perfection Before you begin, ensure all your tools are perfectly clean and completely dry – even a tiny drop of water or a bit of steam can cause your chocolate to seize. Finely chop your chosen couverture chocolate into small, even pieces; this helps it melt smoothly and quickly. If you're using chocolate bar molds, warm them slightly (you can place them on top of a warm oven or near a gentle heat source for a few minutes) to help with even setting.
- Gentle Melt Place about 70% of your finely chopped chocolate into a heatproof bowl. If using, add the cocoa butter and pinch of salt. Set the bowl over a saucepan of barely simmering water, ensuring the bottom of the bowl does not touch the water. Stir gently and continuously with a silicone spatula until the chocolate is mostly melted and smooth. For milk chocolate, aim for a melt temperature of around 110-115°F (43-46°C); for dark chocolate, target 115-120°F (46-49°C). Remove the bowl from the heat.
- Seed to Cool Now, add the remaining 30% of your finely chopped, unmelted chocolate (your "seed" chocolate) to the melted chocolate. Stir constantly and gently. The goal here is to cool the chocolate down while incorporating the seed, which helps form the correct crystal structure for temper. Continue stirring until the chocolate is perfectly smooth, free of any lumps, and has cooled to its working temperature. For milk chocolate, this is typically 86-88°F (30-31°C); for dark chocolate, 88-90°F (31-32°C).
- Quick Temper Test To quickly check if your chocolate is properly tempered, take a small smear of chocolate on the tip of your silicone spatula or a piece of parchment paper. Let it sit at cool room temperature for 3-5 minutes. If it sets quickly, looks glossy, and feels firm to the touch without any streaks or dull spots, your chocolate is perfectly tempered! If not, you might need to gently warm it slightly (very briefly over the simmering water) or add a tiny bit more seed chocolate and stir until it reaches the correct working temperature and passes the test.
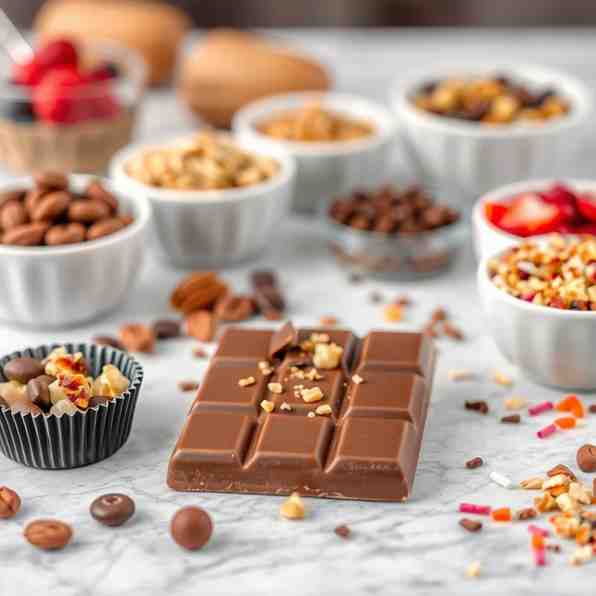
- Mold Your Masterpiece Carefully pour the tempered chocolate into your clean, dry chocolate bar molds. Fill them nearly to the top. Gently tap the molds on your countertop a few times to release any trapped air bubbles – this helps create a smooth, blemish-free surface. If you're adding optional inclusions like nuts or freeze-dried fruit, sprinkle them evenly over the wet chocolate now, pressing them gently to ensure they adhere. You can use a bench scraper to smooth the back of the bars for a clean finish.
- Set and Unmold Allow your chocolate bars to set undisturbed at a cool room temperature (ideally 65-70°F or 18-21°C). Avoid the refrigerator, as rapid cooling can dull the shine and cause bloom. Depending on your room temperature, this can take anywhere from 1 to 2 hours. Once fully firm and cool, the bars should easily release from the molds with a gentle flex. They'll have that beautiful snap and shine you're looking for!
Make Your Own Chocolate Bar - Smooth Swiss-Style Treat
- Serves: 4 People
- Prepare Time: 15 minutes
- Cooking Time: 30 minutes
- Calories: -
- Difficulty: Medium
Ever dreamed of crafting your very own gourmet chocolate bars right in your kitchen? This isn't just about melting some chocolate and pouring it into a mold; it's about creating something truly special. We're talking about a homemade chocolate bar that has that perfect glossy shine, a satisfying snap when you break it, and absolutely no streaky white haze. If you're looking to make your own chocolate bar that rivals the best artisan treats, you've come to the right place.
This guide is designed for first-timers and seasoned home bakers alike, offering a reliable, foolproof method to achieve professional results. We'll dive into the secrets of creating smooth, high-quality chocolate treats with easy methods that use standard home-kitchen tools. What makes our recipe "Swiss-style"? It's all about achieving that signature melt-in-your-mouth smoothness and rich dairy notes often found in premium milk chocolate, along with a focus on using the best ingredients for premium chocolate to elevate your creation. Get ready to impress yourself and everyone else with your incredible homemade chocolate!
Ingredients
Directions
- Prep for Perfection Before you begin, ensure all your tools are perfectly clean and completely dry – even a tiny drop of water or a bit of steam can cause your chocolate to seize. Finely chop your chosen couverture chocolate into small, even pieces; this helps it melt smoothly and quickly. If you're using chocolate bar molds, warm them slightly (you can place them on top of a warm oven or near a gentle heat source for a few minutes) to help with even setting.
- Gentle Melt Place about 70% of your finely chopped chocolate into a heatproof bowl. If using, add the cocoa butter and pinch of salt. Set the bowl over a saucepan of barely simmering water, ensuring the bottom of the bowl does not touch the water. Stir gently and continuously with a silicone spatula until the chocolate is mostly melted and smooth. For milk chocolate, aim for a melt temperature of around 110-115°F (43-46°C); for dark chocolate, target 115-120°F (46-49°C). Remove the bowl from the heat.
- Seed to Cool Now, add the remaining 30% of your finely chopped, unmelted chocolate (your "seed" chocolate) to the melted chocolate. Stir constantly and gently. The goal here is to cool the chocolate down while incorporating the seed, which helps form the correct crystal structure for temper. Continue stirring until the chocolate is perfectly smooth, free of any lumps, and has cooled to its working temperature. For milk chocolate, this is typically 86-88°F (30-31°C); for dark chocolate, 88-90°F (31-32°C).
- Quick Temper Test To quickly check if your chocolate is properly tempered, take a small smear of chocolate on the tip of your silicone spatula or a piece of parchment paper. Let it sit at cool room temperature for 3-5 minutes. If it sets quickly, looks glossy, and feels firm to the touch without any streaks or dull spots, your chocolate is perfectly tempered! If not, you might need to gently warm it slightly (very briefly over the simmering water) or add a tiny bit more seed chocolate and stir until it reaches the correct working temperature and passes the test.
- Mold Your Masterpiece Carefully pour the tempered chocolate into your clean, dry chocolate bar molds. Fill them nearly to the top. Gently tap the molds on your countertop a few times to release any trapped air bubbles – this helps create a smooth, blemish-free surface. If you're adding optional inclusions like nuts or freeze-dried fruit, sprinkle them evenly over the wet chocolate now, pressing them gently to ensure they adhere. You can use a bench scraper to smooth the back of the bars for a clean finish.
- Set and Unmold Allow your chocolate bars to set undisturbed at a cool room temperature (ideally 65-70°F or 18-21°C). Avoid the refrigerator, as rapid cooling can dull the shine and cause bloom. Depending on your room temperature, this can take anywhere from 1 to 2 hours. Once fully firm and cool, the bars should easily release from the molds with a gentle flex. They'll have that beautiful snap and shine you're looking for!
You may also like


Hey there! I’m just someone who seriously loves good food and believes that cooking doesn’t have to be complicated to be amazing. Whether it’s a quick weeknight dinner or a cozy weekend meal, I’m all about sharing easy, tasty recipes that actually work.


