
Easy Manx Soda Bread - Yeast-Free Bread Recipe
Easy Manx Soda Bread - Yeast-Free Bread Recipe
- Serves: 8 People
- Prepare Time: 10 minutes
- Cooking Time: 35 minutes
- Calories: -
- Difficulty: Easy
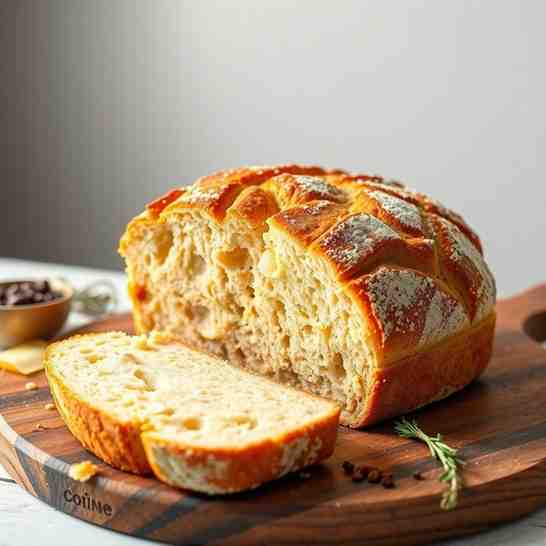
Welcome to the wonderful world of Manx Soda Bread, often known as Bonnag-style bread! If you're looking for a truly satisfying, yeast free bread that comes together in a flash, you've found your new favorite. This isn't just any fresh baked bread; it's a simple, rustic loaf with an irresistibly crusty outside and a tender, slightly dense interior – perfect for anyone who wants to learn to bake bread without the fuss of yeast. You won't find multiple confusing versions here; this is our single, definitive recipe for Manx Soda Bread, with optional add-ins listed separately to keep things super straightforward.
So, what exactly is Manx soda bread? It's the Isle of Man's traditional take on soda bread, a family of quick breads that rely on a chemical reaction for their rise. Unlike traditional loaf of bread recipes that use yeast, this speedy method means you can enjoy delicious, homemade gluten free bread (if you choose the right flour!) or a classic wheat loaf in under an hour. This makes it an ideal choice for busy weeknights or when you simply can't wait for dough to rise.
The magic behind this bread's quick rise is surprisingly simple: it's all about baking soda meeting an acid, specifically buttermilk. When these two ingredients combine, they create carbon dioxide bubbles, which are what give the bread its lift and tender texture. Because this reaction starts immediately, the key to a perfect loaf is to mix your ingredients quickly and get your dough into the oven right away – no waiting around for yeast to do its thing!
Ingredients
Directions
- Tools You'll Need:You don't need fancy equipment for this **yeast free bread**. A large mixing bowl, a fork or spatula, and a baking sheet or cast iron skillet are your essentials. For best results, we highly recommend a digital scale for accurate ingredient measurement and an instant-read thermometer for checking doneness.
- Before You Start (3 Success Tips):
Mix Quickly: Once the buttermilk hits the dry ingredients, the leavening reaction begins. Work efficiently to get it into the oven.
Handle Dough as Little as Possible: Overworking the dough can develop the gluten too much, leading to a tough, dense loaf. Be gentle!
Score the Top: A deep cross or 'X' scored into the top of the loaf isn't just for looks; it helps the center bake through evenly and prevents cracking in unwanted places.
Let's Bake! - Preheat & Pan Setup. Preheat your oven to 400°F (200°C). If using a baking sheet, line it with parchment paper. If using a cast iron skillet, you can lightly dust it with flour or line it with parchment for easy release. We recommend a baking sheet for beginners, as it's simpler to handle.
- Mix Dry Ingredients Thoroughly. In your large mixing bowl, combine the all-purpose flour, whole wheat flour, baking soda, and salt. Use a whisk or fork to mix everything really well. This is crucial to avoid pockets of unmixed baking soda, which can cause a bitter taste. If using optional add-ins like currants or caraway, stir them in now.
- Add Buttermilk & Stir Just Until Combined. Make a well in the center of your dry ingredients and pour in the buttermilk. Use a fork or spatula to gently stir the mixture. Mix *just* until no dry flour remains. The dough will be shaggy and sticky – that's exactly what you want!
- Dough Consistency Checkpoint. Your dough should be soft, sticky, and somewhat shaggy. It should not be a smooth, elastic dough like yeast bread. If it feels too wet to handle, you can add a tiny bit more all-purpose flour (1 tablespoon at a time), but resist the urge to add too much. If it seems too dry, a splash more buttermilk can help.
- Shape Gently. Lightly flour your hands and a clean work surface. Turn the dough out onto the floured surface. Gently pat and shape it into a round loaf, about 6-7 inches in diameter and 1.5-2 inches thick. Handle it as little as possible – a minimal knead (just a few turns to bring it together) is only needed if it's very shaggy. Transfer the shaped loaf to your prepared baking sheet or skillet.
- Score the Top. Using a sharp knife, score a deep cross or 'X' across the top of the loaf, extending almost to the edges and about half an inch deep. This helps the bread expand properly in the oven.
- Bake. Place the bread in the preheated oven. Bake for 30-35 minutes, or until the crust is golden brown and sounds hollow when tapped on the bottom. For a definitive doneness target, an instant-read thermometer inserted into the center of the loaf should read between 200°F and 210°F (93°C-99°C).
- Cool Time & Slicing. Once baked, transfer the loaf to a wire rack to cool completely. Cooling time is important; it allows the internal structure of the bread to set and prevents a gummy texture. Slice with a serrated knife once fully cooled (or at least warm enough to handle comfortably).
Easy Manx Soda Bread - Yeast-Free Bread Recipe
- Serves: 8 People
- Prepare Time: 10 minutes
- Cooking Time: 35 minutes
- Calories: -
- Difficulty: Easy
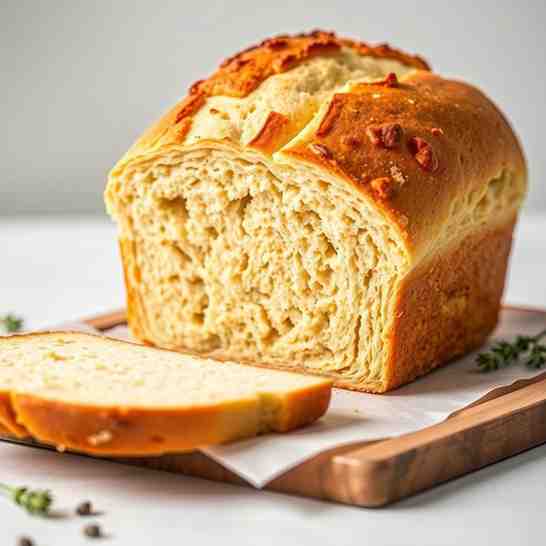
Welcome to the wonderful world of Manx Soda Bread, often known as Bonnag-style bread! If you're looking for a truly satisfying, yeast free bread that comes together in a flash, you've found your new favorite. This isn't just any fresh baked bread; it's a simple, rustic loaf with an irresistibly crusty outside and a tender, slightly dense interior – perfect for anyone who wants to learn to bake bread without the fuss of yeast. You won't find multiple confusing versions here; this is our single, definitive recipe for Manx Soda Bread, with optional add-ins listed separately to keep things super straightforward.
So, what exactly is Manx soda bread? It's the Isle of Man's traditional take on soda bread, a family of quick breads that rely on a chemical reaction for their rise. Unlike traditional loaf of bread recipes that use yeast, this speedy method means you can enjoy delicious, homemade gluten free bread (if you choose the right flour!) or a classic wheat loaf in under an hour. This makes it an ideal choice for busy weeknights or when you simply can't wait for dough to rise.
The magic behind this bread's quick rise is surprisingly simple: it's all about baking soda meeting an acid, specifically buttermilk. When these two ingredients combine, they create carbon dioxide bubbles, which are what give the bread its lift and tender texture. Because this reaction starts immediately, the key to a perfect loaf is to mix your ingredients quickly and get your dough into the oven right away – no waiting around for yeast to do its thing!
Ingredients
Directions
- Tools You'll Need:You don't need fancy equipment for this **yeast free bread**. A large mixing bowl, a fork or spatula, and a baking sheet or cast iron skillet are your essentials. For best results, we highly recommend a digital scale for accurate ingredient measurement and an instant-read thermometer for checking doneness.
- Before You Start (3 Success Tips):
Mix Quickly: Once the buttermilk hits the dry ingredients, the leavening reaction begins. Work efficiently to get it into the oven.
Handle Dough as Little as Possible: Overworking the dough can develop the gluten too much, leading to a tough, dense loaf. Be gentle!
Score the Top: A deep cross or 'X' scored into the top of the loaf isn't just for looks; it helps the center bake through evenly and prevents cracking in unwanted places.
Let's Bake! - Preheat & Pan Setup. Preheat your oven to 400°F (200°C). If using a baking sheet, line it with parchment paper. If using a cast iron skillet, you can lightly dust it with flour or line it with parchment for easy release. We recommend a baking sheet for beginners, as it's simpler to handle.
- Mix Dry Ingredients Thoroughly. In your large mixing bowl, combine the all-purpose flour, whole wheat flour, baking soda, and salt. Use a whisk or fork to mix everything really well. This is crucial to avoid pockets of unmixed baking soda, which can cause a bitter taste. If using optional add-ins like currants or caraway, stir them in now.
- Add Buttermilk & Stir Just Until Combined. Make a well in the center of your dry ingredients and pour in the buttermilk. Use a fork or spatula to gently stir the mixture. Mix *just* until no dry flour remains. The dough will be shaggy and sticky – that's exactly what you want!
- Dough Consistency Checkpoint. Your dough should be soft, sticky, and somewhat shaggy. It should not be a smooth, elastic dough like yeast bread. If it feels too wet to handle, you can add a tiny bit more all-purpose flour (1 tablespoon at a time), but resist the urge to add too much. If it seems too dry, a splash more buttermilk can help.
- Shape Gently. Lightly flour your hands and a clean work surface. Turn the dough out onto the floured surface. Gently pat and shape it into a round loaf, about 6-7 inches in diameter and 1.5-2 inches thick. Handle it as little as possible – a minimal knead (just a few turns to bring it together) is only needed if it's very shaggy. Transfer the shaped loaf to your prepared baking sheet or skillet.
- Score the Top. Using a sharp knife, score a deep cross or 'X' across the top of the loaf, extending almost to the edges and about half an inch deep. This helps the bread expand properly in the oven.
- Bake. Place the bread in the preheated oven. Bake for 30-35 minutes, or until the crust is golden brown and sounds hollow when tapped on the bottom. For a definitive doneness target, an instant-read thermometer inserted into the center of the loaf should read between 200°F and 210°F (93°C-99°C).
- Cool Time & Slicing. Once baked, transfer the loaf to a wire rack to cool completely. Cooling time is important; it allows the internal structure of the bread to set and prevents a gummy texture. Slice with a serrated knife once fully cooled (or at least warm enough to handle comfortably).
You may also like


Hey there! I’m just someone who seriously loves good food and believes that cooking doesn’t have to be complicated to be amazing. Whether it’s a quick weeknight dinner or a cozy weekend meal, I’m all about sharing easy, tasty recipes that actually work.


