 At Home | CulinaryCreationss alt=")
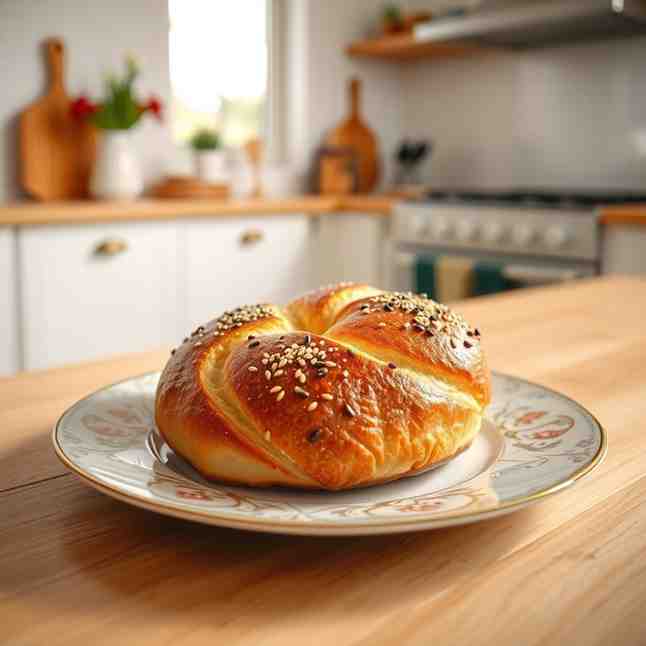
Flaky Poppy Seed Danish (Wienerbrød) At Home
Flaky Poppy Seed Danish (Wienerbrød) At Home
- Serves: 12 People
- Prepare Time: 60 minutes
- Cooking Time: 20-25 minut
- Calories: -
- Difficulty: Hard
Welcome to the wonderful world of Danish pastry! If you've ever dreamt of creating those impossibly flaky, buttery, and utterly delicious breakfast treats right in your own kitchen, you've come to the right place. Forget those store-bought imitations; today, we're diving deep into the art of making authentic Wienerbrød, the classic Danish pastry dough that forms the foundation for so many easy pastries for breakfast and other sweet pastry recipe delights.
Wienerbrød isn't just any pastry; it's a true labor of love, a rich, yeasted dough carefully laminated with layers of butter to create an explosion of delicate flakes with every bite. While our primary focus is on mastering this dough for a classic filling, the beauty of Wienerbrød lies in its versatility. Once you've perfected this foundational recipe, you'll be able to whip up everything from simple jam-filled squares to elegant braids, and yes, even a delightful poppy seed danish.
Ready to embark on a rewarding baking journey that will elevate your breakfast game and impress everyone lucky enough to taste your creations? Let's get started on making these truly delicious baking recipes!
Ingredients
Directions
- Stage 1: Mix the Base Dough
- Warm the Milk & Activate Yeast: Gently warm the whole milk to between 105-115°F (40-46°C). If using active dry yeast, sprinkle it over the warm milk and let it sit for 5-10 minutes until foamy. If using instant yeast, you can mix it directly with the flour.
- Combine Wet Ingredients: In the bowl of a stand mixer (or a large mixing bowl if kneading by hand), combine the warmed milk (with yeast, if activated), sugar, and egg. Mix briefly.
- Add Dry & Butter: Add the flour and salt to the wet ingredients. Add the softened butter in small pieces.
- Mix & Knead: Using the dough hook attachment (or your hands), mix on low speed for 2-3 minutes until a shaggy dough forms. Increase speed to medium-low and knead for 6-8 minutes (10-12 minutes by hand) until the dough is smooth, elastic, and slightly sticky. It should pull away from the sides of the bowl.
- First Rise: Lightly grease a clean bowl. Place the dough in the bowl, turning once to coat. Cover with plastic wrap and let rise in a warm place (around 70-75°F / 21-24°C) for 1 to 1.5 hours, or until visibly doubled in size. You can gently poke it; if the indentation remains, it's ready.
- Stage 2: Make the Butter Block
- Prepare Butter: Place the high-fat unsalted butter between two sheets of parchment paper. If you're using the Scandi-style method, sprinkle the tablespoon of flour over the butter before covering.
- Shape & Chill: Using a rolling pin, pound and roll the butter into an even 8x8 inch (20x20 cm) square. Aim for a consistent thickness. Once shaped, place the butter block in the refrigerator for at least 30 minutes to firm up. It should be pliable enough to bend without cracking, but firm enough not to ooze when rolled.
- Stage 3: Lock in the Butter
- Roll the Dough: On a lightly floured surface, gently punch down the risen dough. Roll it out into a rectangle approximately 16x8 inches (40x20 cm).
- Position Butter: Retrieve the chilled butter block. You have two main options:
- Envelope Style: Place the butter block diagonally in the center of the dough. Fold each corner of the dough over the butter block, meeting in the middle like an envelope, sealing the edges well.
- Two-Thirds Style: Place the butter block on the bottom two-thirds of the dough, leaving the top third uncovered. Fold the uncovered top third down over the middle of the butter, then fold the bottom third (with butter) up over the top. This effectively creates three layers of dough and two layers of butter.
- Why structure matters: Whichever method you choose, ensuring the butter is fully enclosed and the edges are sealed is critical to prevent butter leakage during lamination.
- Chill: Wrap the dough tightly in plastic wrap and refrigerate for 30 minutes to allow the butter to firm up and the gluten to relax.
- Stage 4: Laminate the Dough (Create the Layers)Lamination is all about creating those beautiful, flaky layers. This involves a series of rolling and folding, with chilling in between.
- Fold 1 (Single Fold):
- Roll: On a lightly floured surface, roll the chilled dough into a long rectangle, about 18x9 inches (45x23 cm) and roughly ¼ inch (6mm) thick. Roll gently and evenly, maintaining a rectangular shape. If butter peeks through, sprinkle a tiny bit of flour over it and gently seal with your fingers.
- Fold: Brush off any excess flour. Fold the dough into thirds, like a letter. Bring one short end to the center, then fold the other short end over it. You now have three layers.
- Chill: Wrap tightly in plastic wrap and refrigerate for 30-45 minutes. This is crucial for chilling the butter and relaxing the gluten.
- Fold 2 (Single Fold):
- Rotate & Roll: Place the dough on your work surface so the open "seam" is on your right (like a book spine). Roll it out again into an 18x9 inch (45x23 cm) rectangle, aiming for consistent thickness.
- Fold & Chill: Brush off excess flour and fold into thirds again. Wrap tightly and chill for another 30-45 minutes.
- Fold 3 (Single Fold):
- Rotate & Roll: Repeat the process: rotate the dough, roll it out to 18x9 inches.
- Fold & Chill: Fold into thirds one last time. This final fold, combined with the initial butter layering, will give you approximately 27 layers in total, ensuring maximum flakiness. Wrap tightly and chill for at least 1-2 hours, or preferably overnight.
- Visual Cues: The dough should feel smooth, cool, and flexible. If you encounter cracks or butter smears, don't panic! Gently press them together. If the dough shrinks excessively, let it rest for 10-15 minutes at room temperature before continuing.
- Stage 5: Shape Simple Breakfast DanishesNow for the fun part – turning your beautifully laminated dough into pastries! We'll focus on simple squares with a custard filling.
- Prepare Custard: While the dough chills, prepare your simple vanilla custard. Whisk egg yolk, sugar, and flour/cornstarch in a bowl. Heat milk in a saucepan until simmering. Gradually whisk hot milk into the egg mixture, then return to saucepan. Cook over medium heat, whisking constantly, until thickened. Remove from heat, stir in vanilla. Let cool completely before use.
- Roll Final Dough: On a lightly floured surface, roll the chilled laminated dough into a large rectangle, about 1/8 inch (3mm) thick. Aim for a size around 18x12 inches (45x30 cm).
- Cut Squares: Using a sharp knife or pizza cutter and a ruler, trim the edges to create a neat rectangle. Then, cut the dough into 3-inch (7.5 cm) squares. You should get about 12-16 squares.
- Shape Squares (Envelope Style):
- Place a spoonful of cooled custard (about 1-2 teaspoons) in the center of each square.
- Take one corner of the square and fold it towards the center, pressing gently to adhere. Repeat with the opposite corner. Then, take the remaining two corners and fold them over, slightly overlapping the first two, pressing firmly in the center. This creates a simple "envelope" or "pinwheel" shape.
- Avoid over-filling to prevent leakage. If the filling is too liquid, it will seep out.
- Place on Baking Sheets: Arrange the shaped pastries on parchment-lined baking sheets, leaving ample space (about 2 inches) between them for expansion during proofing and baking.
- Egg Wash Edges: If desired, lightly brush the exposed dough edges with an egg wash (1 egg beaten with 1 tablespoon water) for a golden sheen.
- Stage 6: Proof & BakeThe final steps to perfectly golden, flaky pastries!
- Second Rise (Proofing): Loosely cover the pastries with plastic wrap or a clean kitchen towel. Let them proof in a warm, draft-free place for 1 to 1.5 hours, or until visibly puffy and slightly jiggly when gently nudged. They won't double in size like bread dough, but they should feel light.
- Preheat Oven: While proofing, preheat your oven to 400°F (200°C). Position an oven rack in the middle of the oven.Baking: Bake the pastries for 18-25 minutes, rotating the baking sheet halfway through, until they are deep golden brown, puffed, and crisp around the edges. If you notice any butter leaking, it's normal to some extent; ensure you have parchment paper on your trays.
- Cooling & Glazing: Let the pastries cool on the baking sheet for 5-10 minutes before transferring them to a wire rack to cool completely. Once cool (or still slightly warm), whisk together powdered sugar and milk/water for a simple glaze. Drizzle over the pastries, or dust with powdered sugar.
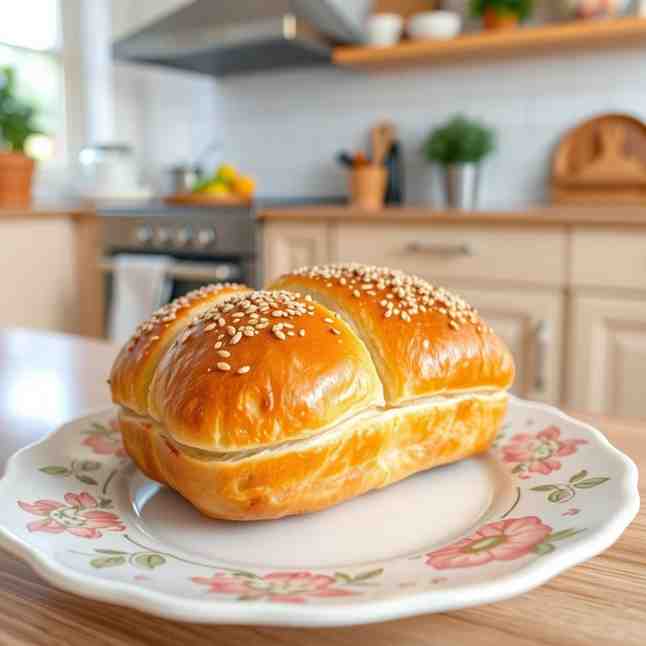
Flaky Poppy Seed Danish (Wienerbrød) At Home
-At-Home.jpg)
- Serves: 12 People
- Prepare Time: 60 minutes
- Cooking Time: 20-25 minut
- Calories: -
- Difficulty: Hard
Welcome to the wonderful world of Danish pastry! If you've ever dreamt of creating those impossibly flaky, buttery, and utterly delicious breakfast treats right in your own kitchen, you've come to the right place. Forget those store-bought imitations; today, we're diving deep into the art of making authentic Wienerbrød, the classic Danish pastry dough that forms the foundation for so many easy pastries for breakfast and other sweet pastry recipe delights.
Wienerbrød isn't just any pastry; it's a true labor of love, a rich, yeasted dough carefully laminated with layers of butter to create an explosion of delicate flakes with every bite. While our primary focus is on mastering this dough for a classic filling, the beauty of Wienerbrød lies in its versatility. Once you've perfected this foundational recipe, you'll be able to whip up everything from simple jam-filled squares to elegant braids, and yes, even a delightful poppy seed danish.
Ready to embark on a rewarding baking journey that will elevate your breakfast game and impress everyone lucky enough to taste your creations? Let's get started on making these truly delicious baking recipes!
Ingredients
Directions
- Stage 1: Mix the Base Dough
- Warm the Milk & Activate Yeast: Gently warm the whole milk to between 105-115°F (40-46°C). If using active dry yeast, sprinkle it over the warm milk and let it sit for 5-10 minutes until foamy. If using instant yeast, you can mix it directly with the flour.
- Combine Wet Ingredients: In the bowl of a stand mixer (or a large mixing bowl if kneading by hand), combine the warmed milk (with yeast, if activated), sugar, and egg. Mix briefly.
- Add Dry & Butter: Add the flour and salt to the wet ingredients. Add the softened butter in small pieces.
- Mix & Knead: Using the dough hook attachment (or your hands), mix on low speed for 2-3 minutes until a shaggy dough forms. Increase speed to medium-low and knead for 6-8 minutes (10-12 minutes by hand) until the dough is smooth, elastic, and slightly sticky. It should pull away from the sides of the bowl.
- First Rise: Lightly grease a clean bowl. Place the dough in the bowl, turning once to coat. Cover with plastic wrap and let rise in a warm place (around 70-75°F / 21-24°C) for 1 to 1.5 hours, or until visibly doubled in size. You can gently poke it; if the indentation remains, it's ready.
- Stage 2: Make the Butter Block
- Prepare Butter: Place the high-fat unsalted butter between two sheets of parchment paper. If you're using the Scandi-style method, sprinkle the tablespoon of flour over the butter before covering.
- Shape & Chill: Using a rolling pin, pound and roll the butter into an even 8x8 inch (20x20 cm) square. Aim for a consistent thickness. Once shaped, place the butter block in the refrigerator for at least 30 minutes to firm up. It should be pliable enough to bend without cracking, but firm enough not to ooze when rolled.
- Stage 3: Lock in the Butter
- Roll the Dough: On a lightly floured surface, gently punch down the risen dough. Roll it out into a rectangle approximately 16x8 inches (40x20 cm).
- Position Butter: Retrieve the chilled butter block. You have two main options:
- Envelope Style: Place the butter block diagonally in the center of the dough. Fold each corner of the dough over the butter block, meeting in the middle like an envelope, sealing the edges well.
- Two-Thirds Style: Place the butter block on the bottom two-thirds of the dough, leaving the top third uncovered. Fold the uncovered top third down over the middle of the butter, then fold the bottom third (with butter) up over the top. This effectively creates three layers of dough and two layers of butter.
- Why structure matters: Whichever method you choose, ensuring the butter is fully enclosed and the edges are sealed is critical to prevent butter leakage during lamination.
- Chill: Wrap the dough tightly in plastic wrap and refrigerate for 30 minutes to allow the butter to firm up and the gluten to relax.
- Stage 4: Laminate the Dough (Create the Layers)Lamination is all about creating those beautiful, flaky layers. This involves a series of rolling and folding, with chilling in between.
- Fold 1 (Single Fold):
- Roll: On a lightly floured surface, roll the chilled dough into a long rectangle, about 18x9 inches (45x23 cm) and roughly ¼ inch (6mm) thick. Roll gently and evenly, maintaining a rectangular shape. If butter peeks through, sprinkle a tiny bit of flour over it and gently seal with your fingers.
- Fold: Brush off any excess flour. Fold the dough into thirds, like a letter. Bring one short end to the center, then fold the other short end over it. You now have three layers.
- Chill: Wrap tightly in plastic wrap and refrigerate for 30-45 minutes. This is crucial for chilling the butter and relaxing the gluten.
- Fold 2 (Single Fold):
- Rotate & Roll: Place the dough on your work surface so the open "seam" is on your right (like a book spine). Roll it out again into an 18x9 inch (45x23 cm) rectangle, aiming for consistent thickness.
- Fold & Chill: Brush off excess flour and fold into thirds again. Wrap tightly and chill for another 30-45 minutes.
- Fold 3 (Single Fold):
- Rotate & Roll: Repeat the process: rotate the dough, roll it out to 18x9 inches.
- Fold & Chill: Fold into thirds one last time. This final fold, combined with the initial butter layering, will give you approximately 27 layers in total, ensuring maximum flakiness. Wrap tightly and chill for at least 1-2 hours, or preferably overnight.
- Visual Cues: The dough should feel smooth, cool, and flexible. If you encounter cracks or butter smears, don't panic! Gently press them together. If the dough shrinks excessively, let it rest for 10-15 minutes at room temperature before continuing.
- Stage 5: Shape Simple Breakfast DanishesNow for the fun part – turning your beautifully laminated dough into pastries! We'll focus on simple squares with a custard filling.
- Prepare Custard: While the dough chills, prepare your simple vanilla custard. Whisk egg yolk, sugar, and flour/cornstarch in a bowl. Heat milk in a saucepan until simmering. Gradually whisk hot milk into the egg mixture, then return to saucepan. Cook over medium heat, whisking constantly, until thickened. Remove from heat, stir in vanilla. Let cool completely before use.
- Roll Final Dough: On a lightly floured surface, roll the chilled laminated dough into a large rectangle, about 1/8 inch (3mm) thick. Aim for a size around 18x12 inches (45x30 cm).
- Cut Squares: Using a sharp knife or pizza cutter and a ruler, trim the edges to create a neat rectangle. Then, cut the dough into 3-inch (7.5 cm) squares. You should get about 12-16 squares.
- Shape Squares (Envelope Style):
- Place a spoonful of cooled custard (about 1-2 teaspoons) in the center of each square.
- Take one corner of the square and fold it towards the center, pressing gently to adhere. Repeat with the opposite corner. Then, take the remaining two corners and fold them over, slightly overlapping the first two, pressing firmly in the center. This creates a simple "envelope" or "pinwheel" shape.
- Avoid over-filling to prevent leakage. If the filling is too liquid, it will seep out.
- Place on Baking Sheets: Arrange the shaped pastries on parchment-lined baking sheets, leaving ample space (about 2 inches) between them for expansion during proofing and baking.
- Egg Wash Edges: If desired, lightly brush the exposed dough edges with an egg wash (1 egg beaten with 1 tablespoon water) for a golden sheen.
- Stage 6: Proof & BakeThe final steps to perfectly golden, flaky pastries!
- Second Rise (Proofing): Loosely cover the pastries with plastic wrap or a clean kitchen towel. Let them proof in a warm, draft-free place for 1 to 1.5 hours, or until visibly puffy and slightly jiggly when gently nudged. They won't double in size like bread dough, but they should feel light.
- Preheat Oven: While proofing, preheat your oven to 400°F (200°C). Position an oven rack in the middle of the oven.Baking: Bake the pastries for 18-25 minutes, rotating the baking sheet halfway through, until they are deep golden brown, puffed, and crisp around the edges. If you notice any butter leaking, it's normal to some extent; ensure you have parchment paper on your trays.
- Cooling & Glazing: Let the pastries cool on the baking sheet for 5-10 minutes before transferring them to a wire rack to cool completely. Once cool (or still slightly warm), whisk together powdered sugar and milk/water for a simple glaze. Drizzle over the pastries, or dust with powdered sugar.
You may also like


Hey there! I’m just someone who seriously loves good food and believes that cooking doesn’t have to be complicated to be amazing. Whether it’s a quick weeknight dinner or a cozy weekend meal, I’m all about sharing easy, tasty recipes that actually work.


