
Farata Recipe - Soft & Flaky Mauritian Flatbread
Farata Recipe - Soft & Flaky Mauritian Flatbread
- Serves: 8 People
- Prepare Time: 30 minutes
- Cooking Time: 20 minutes
- Calories: -
- Difficulty: Easy
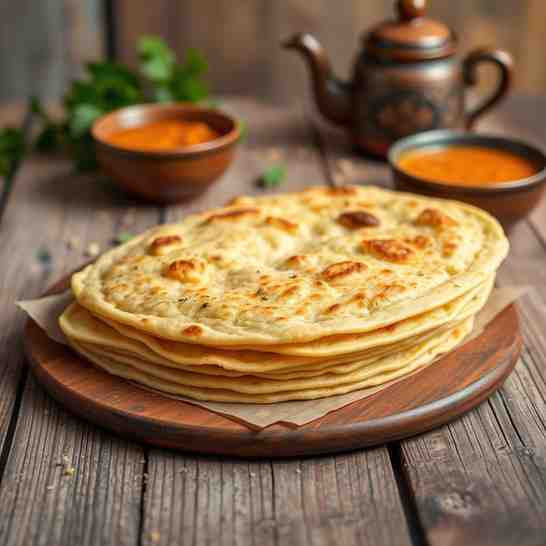
Get ready to discover the magic of Mauritian Farata – a truly delightful soft white bread recipe that's about to become your new favorite obsession! This isn't just any flatbread; it's a staple in Mauritian homes, renowned for its incredible flakiness and tender texture. Whether you're a seasoned baker looking for a new challenge or a beginner searching for an easy and healthy bread recipe, this guide will walk you through making this homemade recipe for bread from scratch.
Farata is more than just food; it's a culinary hug, a versatile companion to nearly any meal. Its history is deeply rooted in the island's diverse culture, evolving from Indian parathas into its own unique, beloved form. We'll show you how to achieve those signature delicate layers and that irresistible soft chew, transforming simple ingredients into a truly delicious experience. Perfect for pairing with rich curries, hearty stews, or even just a simple dip, this rolled bread recipe is a must-try. Let's dive in and learn how to make this wonderful bread from scratch recipe!
Ingredients
Directions
- Mix the Dough In a large mixing bowl, combine the all-purpose flour and salt. If using, add the optional turmeric powder. Create a well in the center and pour in the warm water and 1 tablespoon of oil or ghee. Gradually mix the wet ingredients into the dry with a spoon or your hands until a shaggy dough forms.
- Knead the Dough Turn the dough out onto a lightly floured surface. Knead for about 8-10 minutes until the dough is smooth, elastic, and no longer sticky. Key Tip: Proper kneading is crucial for developing the gluten, which gives the farata its structure and helps achieve that optimal flaky texture. If the dough is too sticky, add a tiny bit more flour; if it's too dry, add a few drops of water.
- Rest the Dough Form the kneaded dough into a ball. Lightly grease the bowl with a little oil, place the dough back in, and turn to coat. Cover the bowl with a clean kitchen towel or plastic wrap and let it rest at room temperature for at least 30 minutes, or up to an hour. Key Tip: Resting allows the gluten to relax, making the dough easier to roll and contributing to a softer, more pliable farata. (Refer to step-by-step images showing the dough before and after resting.)
- Divide and Shape Once rested, gently punch down the dough and divide it into 8 equal pieces. Roll each piece into a smooth ball.
- Roll and Oil for Layers (The Flaky Secret!) On a lightly floured surface, take one dough ball and roll it out into a very thin circle, about 8-10 inches in diameter. Brush the entire surface of the rolled dough generously with vegetable oil or melted ghee. (Refer to step-by-step images illustrating rolling and oiling.)
- Pro-Tip Section: Using oil between layers is the secret to achieving those distinct, flaky layers. Don't be shy with the oil!
- Fold and Coil Now for the fun part! Fold the oiled circle of dough back and forth like an accordion or a fan. You'll end up with a long, pleated strip. Gently stretch this strip slightly, then coil it tightly into a snail shape, tucking the end underneath. Place the coiled dough onto a plate, cover with a towel, and repeat with the remaining dough balls. Let these coiled dough balls rest for another 15-20 minutes. This second rest further relaxes the gluten, making final rolling easier. (Refer to step-by-step images showing the accordion fold and coiling.)
- Final Roll Take one coiled dough ball and gently flatten it with your palm. On a lightly floured surface, roll it out again into a thin circle, about 6-7 inches in diameter. Be careful not to press too hard, as you want to preserve those internal layers. (Refer to step-by-step images of the final rolling process.)
- Cook the Farata Heat a tawa (flat griddle) or a heavy-bottomed frying pan over medium-high heat. Once hot, place one rolled farata onto the dry pan. Cook for about 30 seconds to 1 minute, until small bubbles appear on the surface. (Refer to step-by-step images showing farata on the pan.)
- Flip and Oil Flip the farata over. Brush the cooked side lightly with oil or ghee. Cook for another 30 seconds to 1 minute until golden brown spots appear. Flip again, brush the other side with oil, and cook until both sides are beautifully golden and lightly puffed. Troubleshooting Tip: If your farata isn't puffing, your pan might not be hot enough or your dough might be too thick. Ensure adequate heat and thin rolling for the best results.
- "Clap" for Flakiness and Serve Once cooked, remove the farata from the pan. While it's still hot, gently clap it between your palms a few times. This action helps to separate the internal layers, enhancing that signature flakiness. (Refer to step-by-step images demonstrating the "clapping" technique.) Serve your delicious homemade recipe for bread immediately with your favorite curries, stews, or dips!
Farata Recipe - Soft & Flaky Mauritian Flatbread
- Serves: 8 People
- Prepare Time: 30 minutes
- Cooking Time: 20 minutes
- Calories: -
- Difficulty: Easy
Get ready to discover the magic of Mauritian Farata – a truly delightful soft white bread recipe that's about to become your new favorite obsession! This isn't just any flatbread; it's a staple in Mauritian homes, renowned for its incredible flakiness and tender texture. Whether you're a seasoned baker looking for a new challenge or a beginner searching for an easy and healthy bread recipe, this guide will walk you through making this homemade recipe for bread from scratch.
Farata is more than just food; it's a culinary hug, a versatile companion to nearly any meal. Its history is deeply rooted in the island's diverse culture, evolving from Indian parathas into its own unique, beloved form. We'll show you how to achieve those signature delicate layers and that irresistible soft chew, transforming simple ingredients into a truly delicious experience. Perfect for pairing with rich curries, hearty stews, or even just a simple dip, this rolled bread recipe is a must-try. Let's dive in and learn how to make this wonderful bread from scratch recipe!
Ingredients
Directions
- Mix the Dough In a large mixing bowl, combine the all-purpose flour and salt. If using, add the optional turmeric powder. Create a well in the center and pour in the warm water and 1 tablespoon of oil or ghee. Gradually mix the wet ingredients into the dry with a spoon or your hands until a shaggy dough forms.
- Knead the Dough Turn the dough out onto a lightly floured surface. Knead for about 8-10 minutes until the dough is smooth, elastic, and no longer sticky. Key Tip: Proper kneading is crucial for developing the gluten, which gives the farata its structure and helps achieve that optimal flaky texture. If the dough is too sticky, add a tiny bit more flour; if it's too dry, add a few drops of water.
- Rest the Dough Form the kneaded dough into a ball. Lightly grease the bowl with a little oil, place the dough back in, and turn to coat. Cover the bowl with a clean kitchen towel or plastic wrap and let it rest at room temperature for at least 30 minutes, or up to an hour. Key Tip: Resting allows the gluten to relax, making the dough easier to roll and contributing to a softer, more pliable farata. (Refer to step-by-step images showing the dough before and after resting.)
- Divide and Shape Once rested, gently punch down the dough and divide it into 8 equal pieces. Roll each piece into a smooth ball.
- Roll and Oil for Layers (The Flaky Secret!) On a lightly floured surface, take one dough ball and roll it out into a very thin circle, about 8-10 inches in diameter. Brush the entire surface of the rolled dough generously with vegetable oil or melted ghee. (Refer to step-by-step images illustrating rolling and oiling.)
- Pro-Tip Section: Using oil between layers is the secret to achieving those distinct, flaky layers. Don't be shy with the oil!
- Fold and Coil Now for the fun part! Fold the oiled circle of dough back and forth like an accordion or a fan. You'll end up with a long, pleated strip. Gently stretch this strip slightly, then coil it tightly into a snail shape, tucking the end underneath. Place the coiled dough onto a plate, cover with a towel, and repeat with the remaining dough balls. Let these coiled dough balls rest for another 15-20 minutes. This second rest further relaxes the gluten, making final rolling easier. (Refer to step-by-step images showing the accordion fold and coiling.)
- Final Roll Take one coiled dough ball and gently flatten it with your palm. On a lightly floured surface, roll it out again into a thin circle, about 6-7 inches in diameter. Be careful not to press too hard, as you want to preserve those internal layers. (Refer to step-by-step images of the final rolling process.)
- Cook the Farata Heat a tawa (flat griddle) or a heavy-bottomed frying pan over medium-high heat. Once hot, place one rolled farata onto the dry pan. Cook for about 30 seconds to 1 minute, until small bubbles appear on the surface. (Refer to step-by-step images showing farata on the pan.)
- Flip and Oil Flip the farata over. Brush the cooked side lightly with oil or ghee. Cook for another 30 seconds to 1 minute until golden brown spots appear. Flip again, brush the other side with oil, and cook until both sides are beautifully golden and lightly puffed. Troubleshooting Tip: If your farata isn't puffing, your pan might not be hot enough or your dough might be too thick. Ensure adequate heat and thin rolling for the best results.
- "Clap" for Flakiness and Serve Once cooked, remove the farata from the pan. While it's still hot, gently clap it between your palms a few times. This action helps to separate the internal layers, enhancing that signature flakiness. (Refer to step-by-step images demonstrating the "clapping" technique.) Serve your delicious homemade recipe for bread immediately with your favorite curries, stews, or dips!
You may also like


Hey there! I’m just someone who seriously loves good food and believes that cooking doesn’t have to be complicated to be amazing. Whether it’s a quick weeknight dinner or a cozy weekend meal, I’m all about sharing easy, tasty recipes that actually work.


