
Naan-e Kord Recipe - Easy Skillet Flatbread at Home
Naan-e Kord Recipe - Easy Skillet Flatbread at Home
- Serves: 8 People
- Prepare Time: 25 minutes
- Cooking Time: 20 minutes
- Calories: -
- Difficulty: Easy
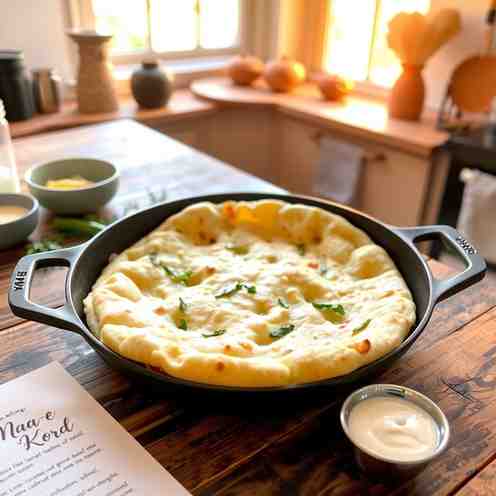
Get ready to bring the warmth and flavor of Kurdish cuisine right into your kitchen with this incredible recipe of Naan-e Kord! This isn't just any flat bread naan; it's a soft, pliable, and utterly delicious skillet bread, perfect for dipping, wrapping, or enjoying alongside your favorite meals. You’ll love how simple it is to achieve those beautiful browned spots and chewy texture without a fancy oven. This recipe to make naan will quickly become a staple in your home!
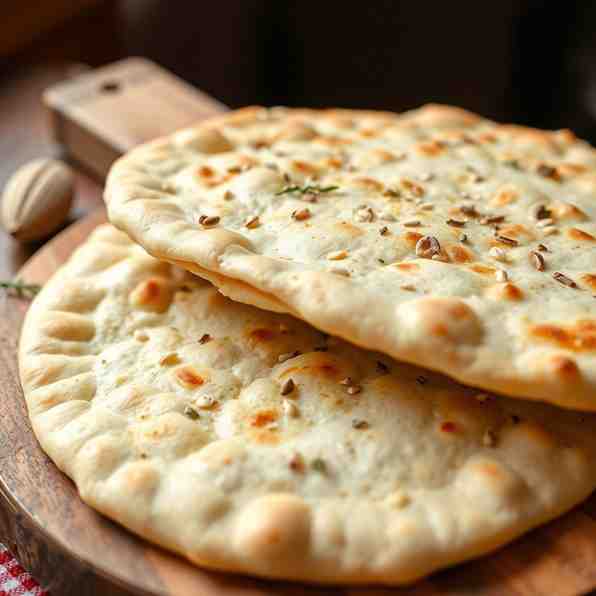
Naan-e Kord is a traditional Kurdish-style flatbread, beloved for its simplicity and versatility. Unlike some other breads that require a specialized oven, this one is cooked quickly on a hot surface, typically a skillet or griddle. The result is a delightfully thin to medium-thin bread that's incredibly pliable and chewy, often featuring beautiful browned spots from the direct heat. It’s commonly served in Kurdish homes as a wrap, a side for hearty stews, or simply for dipping into various spreads and sauces.
It’s easy to get confused with other delicious Kurdish breads, so let’s clarify without adding extra recipes:
Kalāneh is a variation of Kurdish flatbread, often stuffed with scallions or wild garlic, offering a distinct aromatic flavor.
Zatila or Kadeh refers to filled and folded skillet breads, sometimes incorporating herbs, cheese, or other fillings, creating a richer, more substantial bread. Our Naan-e Kord recipe focuses on the plain, foundational flatbread, perfect for any occasion!
Ingredients
Directions
- MixIn your large mixing bowl, combine the flour, yeast, and salt. If using optional dried herbs or scallions, add them now. Give it a quick whisk to distribute everything evenly. Pour in the warm water and olive oil. Using a sturdy spoon or your hands, mix until a shaggy dough forms. Stop when all the dry ingredients are incorporated and there are no dusty patches of flour remaining in the bowl.
- KneadTurn the dough out onto a lightly floured surface. Knead for about 5-7 minutes by hand until it becomes smooth, elastic, and barely tacky. If using a stand mixer with a dough hook, knead on medium-low speed for 3-4 minutes. The dough should pull away from the sides of the bowl.
- First RestLightly grease your mixing bowl with a tiny bit of oil. Place the dough ball in the bowl, turning it once to coat. Cover the bowl tightly with plastic wrap or a clean kitchen towel. Let it rest in a warm spot for about 1 hour, or until it has roughly doubled in size.
- Portion + RollGently punch down the risen dough to release the air. Turn it out onto a lightly floured surface and divide it into 8 equal pieces. For consistent results, you can weigh each piece (they should be around 70-75g each). Roll each piece into a smooth ball. On a lightly floured surface, use a rolling pin to roll each ball into a thin, round flatbread, about 6-8 inches in diameter and roughly 1/8 inch thick (think the thickness of a nickel or slightly thinner). To prevent sticking without drying the dough, use just enough flour on your surface and rolling pin to keep it from grabbing, brushing off any excess before cooking.
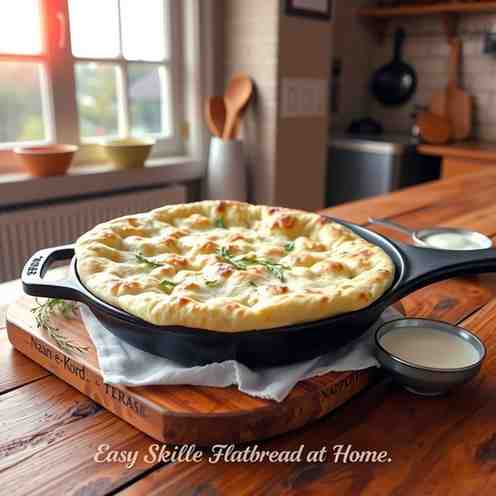
- Cook on the SkilletPlace your cast iron or heavy skillet over medium-high heat. Let it preheat for 3-5 minutes until it’s nice and hot – a drop of water should sizzle and evaporate immediately.Carefully place one rolled flatbread onto the hot, dry skillet.
- First Side: Cook for 1-2 minutes until you see bubbles forming on the surface and the underside has developed lovely golden-brown spots.
- Flip Timing: Once you see good bubbling and browning, flip the bread using tongs or a spatula.
- Second Side: Cook for another 1-2 minutes on the second side, until it also has browned spots and the bread is cooked through.
- Finish + ServeFor an extra touch of flavor and softness, you can brush the warm flatbreads with a little melted butter immediately after removing them from the skillet. Serve your Naan-e Kord warm, and enjoy!
- How to Get the Best Browning + Bubbles (Mini Technique Guide)Achieving those beautiful browned spots and airy bubbles is all about heat and minimal interference!
- Pan Heat Calibration: The first bread is always your tester! If it scorches quickly, your pan is too hot. If it just sits there without bubbling or browning, it’s not hot enough. Adjust the heat as needed for the subsequent breads. Medium-high is usually the sweet spot.
- Don’t Over-Flour the Surface: Too much flour on the dough surface can prevent good contact with the hot pan, leading to less browning and fewer bubbles. Use just enough to prevent sticking.
- Press Lightly Only If Needed: If a large bubble forms and isn't deflating, you can very gently press on it with a spatula to encourage even cooking, but generally, let the bread do its thing.
- Troubleshooting (Fixes That Actually Work)
- Dough too dry / cracking: This means your dough wasn't hydrated enough. Next time, add a teaspoon of water at a time until it reaches the "barely tacky" stage. You can try to gently knead in a tiny bit of water now, but it's harder once the dough is formed.
- Dough too sticky: You’ve added too much water or not enough flour. Add a tablespoon of flour at a time during kneading until it’s smooth and barely tacky.
- Bread is tough: Over-kneading can develop too much gluten, making the bread tough. Also, not allowing enough rest time for the gluten to relax can contribute to this. Ensure you knead just until smooth and elastic, and let it rest fully.
- Bread won’t bubble: Your skillet isn't hot enough, or you might have used too much flour on the surface. Make sure the skillet is piping hot before adding the bread.
- Bread scorches before it cooks through: Your skillet is too hot! Reduce the heat slightly and cook for a bit longer per side.
Naan-e Kord Recipe - Easy Skillet Flatbread at Home
- Serves: 8 People
- Prepare Time: 25 minutes
- Cooking Time: 20 minutes
- Calories: -
- Difficulty: Easy
Get ready to bring the warmth and flavor of Kurdish cuisine right into your kitchen with this incredible recipe of Naan-e Kord! This isn't just any flat bread naan; it's a soft, pliable, and utterly delicious skillet bread, perfect for dipping, wrapping, or enjoying alongside your favorite meals. You’ll love how simple it is to achieve those beautiful browned spots and chewy texture without a fancy oven. This recipe to make naan will quickly become a staple in your home!
Naan-e Kord is a traditional Kurdish-style flatbread, beloved for its simplicity and versatility. Unlike some other breads that require a specialized oven, this one is cooked quickly on a hot surface, typically a skillet or griddle. The result is a delightfully thin to medium-thin bread that's incredibly pliable and chewy, often featuring beautiful browned spots from the direct heat. It’s commonly served in Kurdish homes as a wrap, a side for hearty stews, or simply for dipping into various spreads and sauces.
It’s easy to get confused with other delicious Kurdish breads, so let’s clarify without adding extra recipes:
Kalāneh is a variation of Kurdish flatbread, often stuffed with scallions or wild garlic, offering a distinct aromatic flavor.
Zatila or Kadeh refers to filled and folded skillet breads, sometimes incorporating herbs, cheese, or other fillings, creating a richer, more substantial bread. Our Naan-e Kord recipe focuses on the plain, foundational flatbread, perfect for any occasion!
Ingredients
Directions
- MixIn your large mixing bowl, combine the flour, yeast, and salt. If using optional dried herbs or scallions, add them now. Give it a quick whisk to distribute everything evenly. Pour in the warm water and olive oil. Using a sturdy spoon or your hands, mix until a shaggy dough forms. Stop when all the dry ingredients are incorporated and there are no dusty patches of flour remaining in the bowl.
- KneadTurn the dough out onto a lightly floured surface. Knead for about 5-7 minutes by hand until it becomes smooth, elastic, and barely tacky. If using a stand mixer with a dough hook, knead on medium-low speed for 3-4 minutes. The dough should pull away from the sides of the bowl.
- First RestLightly grease your mixing bowl with a tiny bit of oil. Place the dough ball in the bowl, turning it once to coat. Cover the bowl tightly with plastic wrap or a clean kitchen towel. Let it rest in a warm spot for about 1 hour, or until it has roughly doubled in size.
- Portion + RollGently punch down the risen dough to release the air. Turn it out onto a lightly floured surface and divide it into 8 equal pieces. For consistent results, you can weigh each piece (they should be around 70-75g each). Roll each piece into a smooth ball. On a lightly floured surface, use a rolling pin to roll each ball into a thin, round flatbread, about 6-8 inches in diameter and roughly 1/8 inch thick (think the thickness of a nickel or slightly thinner). To prevent sticking without drying the dough, use just enough flour on your surface and rolling pin to keep it from grabbing, brushing off any excess before cooking.
- Cook on the SkilletPlace your cast iron or heavy skillet over medium-high heat. Let it preheat for 3-5 minutes until it’s nice and hot – a drop of water should sizzle and evaporate immediately.Carefully place one rolled flatbread onto the hot, dry skillet.
- First Side: Cook for 1-2 minutes until you see bubbles forming on the surface and the underside has developed lovely golden-brown spots.
- Flip Timing: Once you see good bubbling and browning, flip the bread using tongs or a spatula.
- Second Side: Cook for another 1-2 minutes on the second side, until it also has browned spots and the bread is cooked through.
- Finish + ServeFor an extra touch of flavor and softness, you can brush the warm flatbreads with a little melted butter immediately after removing them from the skillet. Serve your Naan-e Kord warm, and enjoy!
- How to Get the Best Browning + Bubbles (Mini Technique Guide)Achieving those beautiful browned spots and airy bubbles is all about heat and minimal interference!
- Pan Heat Calibration: The first bread is always your tester! If it scorches quickly, your pan is too hot. If it just sits there without bubbling or browning, it’s not hot enough. Adjust the heat as needed for the subsequent breads. Medium-high is usually the sweet spot.
- Don’t Over-Flour the Surface: Too much flour on the dough surface can prevent good contact with the hot pan, leading to less browning and fewer bubbles. Use just enough to prevent sticking.
- Press Lightly Only If Needed: If a large bubble forms and isn't deflating, you can very gently press on it with a spatula to encourage even cooking, but generally, let the bread do its thing.
- Troubleshooting (Fixes That Actually Work)
- Dough too dry / cracking: This means your dough wasn't hydrated enough. Next time, add a teaspoon of water at a time until it reaches the "barely tacky" stage. You can try to gently knead in a tiny bit of water now, but it's harder once the dough is formed.
- Dough too sticky: You’ve added too much water or not enough flour. Add a tablespoon of flour at a time during kneading until it’s smooth and barely tacky.
- Bread is tough: Over-kneading can develop too much gluten, making the bread tough. Also, not allowing enough rest time for the gluten to relax can contribute to this. Ensure you knead just until smooth and elastic, and let it rest fully.
- Bread won’t bubble: Your skillet isn't hot enough, or you might have used too much flour on the surface. Make sure the skillet is piping hot before adding the bread.
- Bread scorches before it cooks through: Your skillet is too hot! Reduce the heat slightly and cook for a bit longer per side.
You may also like


Hey there! I’m just someone who seriously loves good food and believes that cooking doesn’t have to be complicated to be amazing. Whether it’s a quick weeknight dinner or a cozy weekend meal, I’m all about sharing easy, tasty recipes that actually work.


