
Nasi Goreng - The Best Indonesian Fried Rice Recipe
Nasi Goreng - The Best Indonesian Fried Rice Recipe
- Serves: 4 People
- Prepare Time: 15 minutes
- Cooking Time: 20 minutes
- Calories: -
- Difficulty: Easy
Get ready to dive into the irresistible world of Nasi Goreng, Indonesia's beloved special fried rice! This isn't just any fried rice; it's a sweet-salty, deeply caramelized delight, often crowned with a perfect fried egg. And the best part? If your rice is prepped, you can have this incredible dish on your table in about 20 minutes. We're going to show you how to capture that authentic Indonesian flavor and nail the perfect rice texture every single time, whether you're a seasoned chef or just starting your culinary journey.
So, what exactly is Nasi Goreng? In plain English, it simply means "fried rice" in Indonesian. But what truly sets it apart from other Asian fried rice dishes? It's all about the magic of kecap manis, a thick, sweet soy sauce that gives Nasi Goreng its signature dark color and unique caramelized sweetness. This dish is usually stir-fried hard and fast, allowing the rice to develop a slightly crispy exterior while remaining fluffy inside. Classic toppings like a fried egg, fresh cucumber, and tomato slices are essential, adding freshness and richness to every bite.
For a truly authentic experience, here's a quick checklist of what makes Nasi Goreng shine:
Kecap Manis: The star ingredient for that sweet-savory depth and rich color.
Sambal or Fresh Chiles: For a customizable kick of heat.
Fried Egg: A sunny-side up egg is the traditional crown jewel.
Cucumber & Tomato: Essential fresh garnishes to balance the richness.
(Optional but classic) Terasi & Fried Shallots: For an extra layer of umami and texture.
Ready to make some magic? Let's get cooking!
Ingredients
Directions
- Overview: This recipe takes about 15 minutes of prep and 20 minutes to cook. The key is to have all your ingredients prepped and ready before you turn on the stove.
- Prep Everything (Mise en Place):
- Ensure your cooked rice is cold and ideally day-old. If not, see our "Nailing the Rice Texture" tips below.
- Mince your garlic, chop your shallot/onion, and slice any chiles.
- In a small bowl, whisk together the kecap manis, regular soy sauce, sugar (if using), and salt to create your sauce mixture. If using terasi, mash it into this sauce until dissolved.
- Chop your scallions and prepare your lime wedges.
- If using protein, have it ready to go.
- Fry Aromatics:
- Heat 2-3 tablespoons of cooking oil in your widest pan or wok over high heat until shimmering.
- Add the minced garlic and chopped shallot/onion (and fresh chiles, if using). Stir-fry quickly for about 30-60 seconds until fragrant, being careful not to burn the garlic. Keep the heat high but be ready to toss!
- Cook Protein (if using):
- If adding raw chicken or shrimp, add them now and stir-fry until cooked through. If using pre-cooked protein or tofu, add it briefly to heat through, then remove the protein from the pan and set aside.
- Fry Rice Hard and Hot:
- Add the cold, cooked rice to the hot pan. Using the back of your spatula or spoon, break up any clumps.
- Spread the rice evenly across the pan and let it sit for 30-60 seconds without stirring to get some good caramelization. Then, stir-fry vigorously, tossing and flipping the rice for 3-5 minutes. The goal here is to dry out the rice grains and get them slightly toasted. You should hear a sizzling sound, not steaming.
- Add Sauce & Caramelize:
- Pour the prepared kecap manis-based sauce mixture evenly over the rice.
- Stir-fry continuously, tossing and folding, until the sauce is completely absorbed and the rice grains are evenly dark, glossy, and lightly caramelized. This should take another 2-3 minutes. Make sure every grain is coated!
- Finish the Dish:
- Return the cooked protein (if using) to the pan and toss to combine and heat through.
- Stir in most of the chopped scallions, reserving a little for garnish.
- Remove from heat immediately.
- Fry the Egg:
- In a separate small pan, heat a little oil over medium-high heat. Crack an egg into the pan and fry sunny-side up until the whites are set and the yolk is still runny, or to your preference. Repeat for each serving.
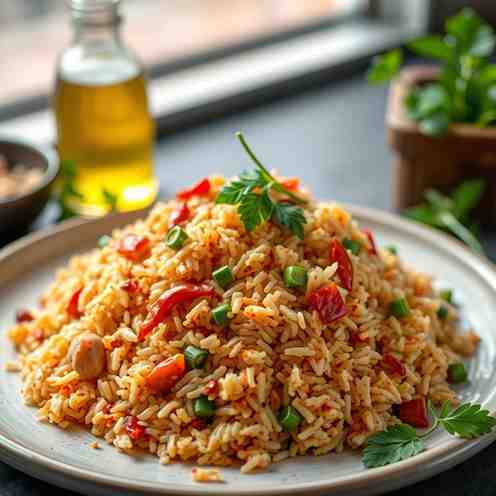
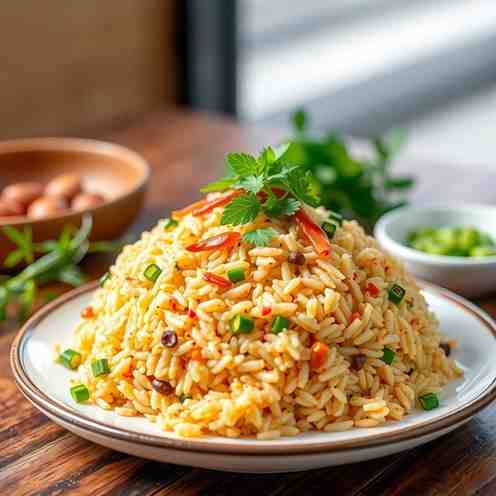
- Visual/Texture Targets:When your Nasi Goreng is "done," it should look evenly brown and glossy, but not wet or mushy. The individual rice grains should be separate and have a slightly toasted, caramelized texture.
Nasi Goreng - The Best Indonesian Fried Rice Recipe

- Serves: 4 People
- Prepare Time: 15 minutes
- Cooking Time: 20 minutes
- Calories: -
- Difficulty: Easy
Get ready to dive into the irresistible world of Nasi Goreng, Indonesia's beloved special fried rice! This isn't just any fried rice; it's a sweet-salty, deeply caramelized delight, often crowned with a perfect fried egg. And the best part? If your rice is prepped, you can have this incredible dish on your table in about 20 minutes. We're going to show you how to capture that authentic Indonesian flavor and nail the perfect rice texture every single time, whether you're a seasoned chef or just starting your culinary journey.
So, what exactly is Nasi Goreng? In plain English, it simply means "fried rice" in Indonesian. But what truly sets it apart from other Asian fried rice dishes? It's all about the magic of kecap manis, a thick, sweet soy sauce that gives Nasi Goreng its signature dark color and unique caramelized sweetness. This dish is usually stir-fried hard and fast, allowing the rice to develop a slightly crispy exterior while remaining fluffy inside. Classic toppings like a fried egg, fresh cucumber, and tomato slices are essential, adding freshness and richness to every bite.
For a truly authentic experience, here's a quick checklist of what makes Nasi Goreng shine:
Kecap Manis: The star ingredient for that sweet-savory depth and rich color.
Sambal or Fresh Chiles: For a customizable kick of heat.
Fried Egg: A sunny-side up egg is the traditional crown jewel.
Cucumber & Tomato: Essential fresh garnishes to balance the richness.
(Optional but classic) Terasi & Fried Shallots: For an extra layer of umami and texture.
Ready to make some magic? Let's get cooking!
Ingredients
Directions
- Overview: This recipe takes about 15 minutes of prep and 20 minutes to cook. The key is to have all your ingredients prepped and ready before you turn on the stove.
- Prep Everything (Mise en Place):
- Ensure your cooked rice is cold and ideally day-old. If not, see our "Nailing the Rice Texture" tips below.
- Mince your garlic, chop your shallot/onion, and slice any chiles.
- In a small bowl, whisk together the kecap manis, regular soy sauce, sugar (if using), and salt to create your sauce mixture. If using terasi, mash it into this sauce until dissolved.
- Chop your scallions and prepare your lime wedges.
- If using protein, have it ready to go.
- Fry Aromatics:
- Heat 2-3 tablespoons of cooking oil in your widest pan or wok over high heat until shimmering.
- Add the minced garlic and chopped shallot/onion (and fresh chiles, if using). Stir-fry quickly for about 30-60 seconds until fragrant, being careful not to burn the garlic. Keep the heat high but be ready to toss!
- Cook Protein (if using):
- If adding raw chicken or shrimp, add them now and stir-fry until cooked through. If using pre-cooked protein or tofu, add it briefly to heat through, then remove the protein from the pan and set aside.
- Fry Rice Hard and Hot:
- Add the cold, cooked rice to the hot pan. Using the back of your spatula or spoon, break up any clumps.
- Spread the rice evenly across the pan and let it sit for 30-60 seconds without stirring to get some good caramelization. Then, stir-fry vigorously, tossing and flipping the rice for 3-5 minutes. The goal here is to dry out the rice grains and get them slightly toasted. You should hear a sizzling sound, not steaming.
- Add Sauce & Caramelize:
- Pour the prepared kecap manis-based sauce mixture evenly over the rice.
- Stir-fry continuously, tossing and folding, until the sauce is completely absorbed and the rice grains are evenly dark, glossy, and lightly caramelized. This should take another 2-3 minutes. Make sure every grain is coated!
- Finish the Dish:
- Return the cooked protein (if using) to the pan and toss to combine and heat through.
- Stir in most of the chopped scallions, reserving a little for garnish.
- Remove from heat immediately.
- Fry the Egg:
- In a separate small pan, heat a little oil over medium-high heat. Crack an egg into the pan and fry sunny-side up until the whites are set and the yolk is still runny, or to your preference. Repeat for each serving.
- Visual/Texture Targets:When your Nasi Goreng is "done," it should look evenly brown and glossy, but not wet or mushy. The individual rice grains should be separate and have a slightly toasted, caramelized texture.
You may also like


Hey there! I’m just someone who seriously loves good food and believes that cooking doesn’t have to be complicated to be amazing. Whether it’s a quick weeknight dinner or a cozy weekend meal, I’m all about sharing easy, tasty recipes that actually work.


