
Pan de Cristal Recipe - Bread's Crispy Crust
Pan de Cristal Recipe - Bread's Crispy Crust
- Serves: 8 People
- Prepare Time: 30 minutes
- Cooking Time: 25 minutes
- Calories: -
- Difficulty: Medium
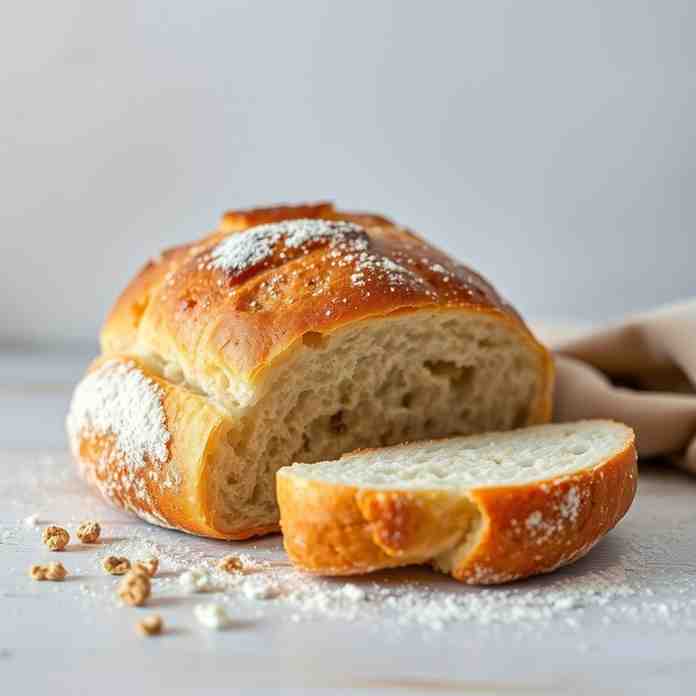
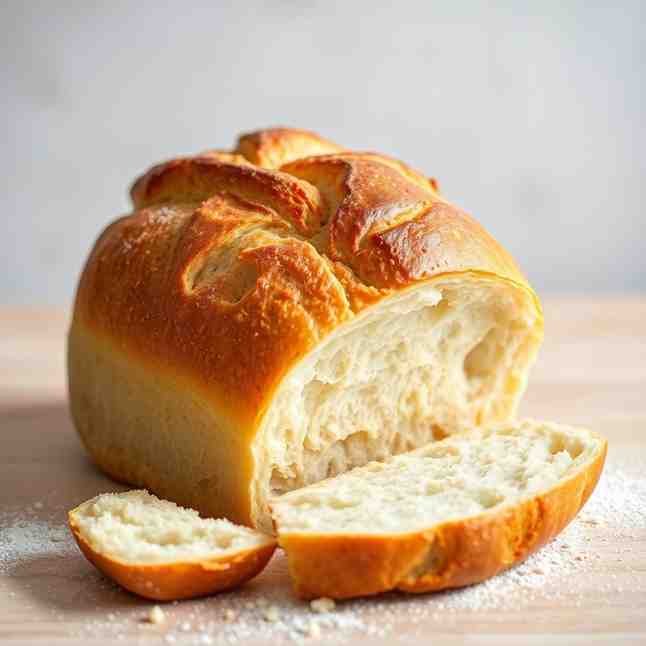
Ever dream of baking a bread so light and airy it practically floats, with a crust that shatters like delicate candy? Then you're ready for Pan de Cristal, the legendary Spanish "glass bread" that boasts an incredibly shatter-crisp crust and a crazy open crumb full of big, beautiful holes. This isn't just any homemade bread; it's a revelation, perfect for everything from simple toast to gourmet sandwiches. Don't let its elegant appearance fool you—with our definitive guide, you'll be baking this iconic loaf like a pro. Get ready to impress!
Jump to: [Recipe](#pan-de-cristal-step-by-step-instructions) | [How It Works](#what-is-pan-de-cristal) | [Troubleshooting](#troubleshooting-fast-fixes) | [Variations](#ingredient-substitutions-variations)
Quick Stats: Prep Time: 30 minutes | Rise Time: 3 hours 30 minutes | Bake Time: 25 minutes | Yield: 1 large loaf | Skill Level: Medium
Pan de Cristal, which translates to "glass bread," is a highly hydrated Spanish bread famous for its incredibly light texture and delicate, crisp crust. Imagine a bread so thin-walled inside that it almost looks like glass—that's Pan de Cristal! It comes from Catalonia, Spain, and has become famous worldwide, especially as the ideal canvas for classic pan con tomate (bread with tomato).
Shattering Crust + Airy Inside: Experience the unique contrast of a delicate, crackly crust giving way to an unbelievably soft, open-holed interior.
Simple Ingredients: You only need a few basic pantry staples to create this masterpiece.
No Kneading Required: Forget the arm workout! This recipe uses gentle folds to build strength, making it surprisingly hands-off.
Best for Crunchy Sandwiches & Tomato Toast: Its light structure and crispness make it the perfect foundation for absorbing flavors without getting soggy.
Pan de Cristal stands out among types of bread for baking. While it shares some similarities with other wet doughs, it has its own unique character.
Pan de Cristal vs. Ciabatta: Both are wet doughs, but Pan de Cristal is even wetter, leading to a thinner crust and larger, more irregular holes. Ciabatta often has a chewier crumb.
Pan de Cristal vs. Baguette: Baguettes have a much lower hydration and are shaped into long, slender loaves with a tighter crumb. Pan de Cristal is all about extreme hydration and minimal handling.
Pan de Cristal vs. Focaccia: Focaccia is typically pan-baked and has a thicker, oilier crumb, often with toppings pressed into it. Pan de Cristal is lighter and traditionally baked free-form.
If you enjoy rustic, no-knead breads and want to explore high-hydration doughs, Pan de Cristal is your next baking adventure!
Ingredients
Directions
- Mix (expect batter): In a large bowl, combine the bread flour, warm water, instant yeast, and salt. Mix with a sturdy spatula or your hand until all the flour is hydrated and you have a shaggy, very wet batter. Don't worry about kneading!
- Checkpoint: Your dough will look like a thick, sticky batter, almost like pancake mix but a bit stiffer. It will be very sticky and ragged—this is perfectly normal.
- Rest (hydration + gluten starts): Cover the bowl with a damp towel or plastic wrap and let it rest for 20 minutes at room temperature. This brief rest allows the flour to fully hydrate and the gluten development to begin on its own.
- Checkpoint: After resting, the dough will still be very wet but should feel slightly less ragged, starting to come together a little more.
- Fold Series (build strength without kneading): Over the next 1 hour, you'll perform four sets of folds, with 20 minutes of rest in between each set. To do a fold: wet your hands slightly, grab a portion of the dough from one side, gently stretch it upwards, and fold it over the center. Rotate the bowl a quarter turn and repeat this process 3-4 times, effectively folding all sides into the center.
- After Fold 1 (20 min rest): Dough will start to show some elasticity, but still be very loose.
- After Fold 2 (20 min rest): You'll notice more tension and a smoother surface. Small bubbles might start to appear.
- After Fold 3 (20 min rest): The dough will feel significantly stronger, holding its shape better when stretched, and you'll see more visible bubbles.
- After Fold 4 (no rest, proceed to bulk ferment): The dough should be smooth, elastic, and full of air bubbles, indicating good gluten development.
- Bulk Ferment (until puffy, not just ‘x hours’): Cover the bowl again and let the dough bulk ferment at room temperature (around 70-75°F / 21-24°C) for 2 to 3 hours. The exact time depends on your kitchen temperature. We're looking for visual cues, not just the clock!
- Checkpoint: The dough should increase in volume by about 70-80%. If you transfer it to a straight-sided container, you can clearly see the rise. It will look significantly puffy, light, and full of trapped air.
- Divide + Shape (minimal handling, don’t degas): Gently flour your work surface generously. Carefully pour or scrape the dough out onto the floured surface, trying not to deflate the precious air bubbles. Flour the top of the dough lightly. Using a dough scraper, gently divide the dough into two equal pieces (or leave as one large loaf). Very gently stretch each piece into a roughly rectangular shape, about ¾ to 1 inch thick. Avoid pressing out the air!
- Checkpoint: The dough should look jiggly, delicate, and visibly full of trapped air bubbles. Handle it like a cloud! Transfer the shaped dough carefully to a piece of parchment paper.
- Final Rest: Let the shaped dough rest uncovered on the parchment paper for 15-20 minutes. This allows the surface to dry slightly, making it easier to handle and contributing to that super-crisp crust.Bake with Steam (safe, home-oven friendly): While the dough rests, preheat your oven to 475°F (245°C) with your baking stone/steel (or inverted sheet pan) inside for at least 30-45 minutes. If using, place a cast iron pan or oven-safe dish on the bottom rack during preheating.
- Carefully slide the parchment with the dough onto the hot stone/sheet pan. Immediately pour ½ cup of hot water into the preheated cast iron pan (use extreme caution, steam is hot!) and quickly close the oven door. This steam is crucial for a thin, crisp crust.
- Bake for 15 minutes with steam, then carefully open the door to vent the steam (remove the water pan if you can do so safely). Reduce the oven temperature to 450°F (230°C) and continue baking for another 10-15 minutes, or until the crust is a deep golden brown and sounds hollow when tapped.
- Optional “oven-dry” finish: For an even crunchier crust, turn off the oven and leave the bread inside with the door slightly ajar for an additional 5-10 minutes.
- Cool + Slice: Transfer the baked bread to a wire rack and cool completely for at least 1 hour before slicing.
- Why cooling matters: Slicing hot bread traps steam, making the crumb gummy.
- How to slice: Use a serrated bread knife with a gentle sawing motion to avoid smashing the delicate, crisp crust.
- What Success Looks LikeYou’ll know you’ve nailed your Pan de Cristal when:
- Crust: It’s thin, delicate, and crackles loudly when you touch it. It should be a deep golden brown, almost caramelized in spots.
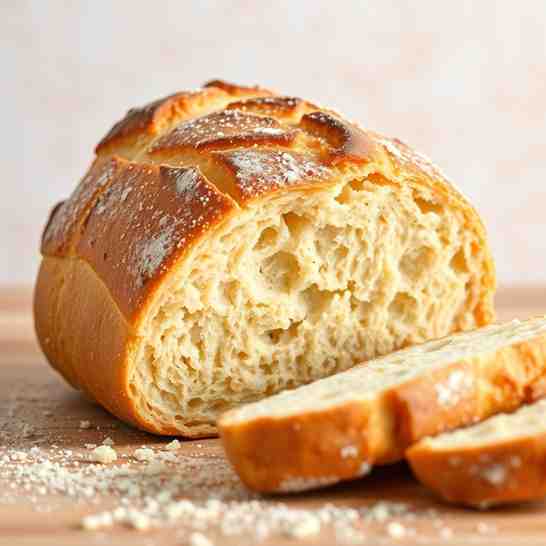
- Crumb: The interior is unbelievably airy with huge, irregular holes throughout. It should be light and delicate, not dense or gummy.
- Aroma and Color: It smells wonderfully yeasty and slightly nutty, with a beautiful, creamy white interior.
Pan de Cristal Recipe - Bread's Crispy Crust
- Serves: 8 People
- Prepare Time: 30 minutes
- Cooking Time: 25 minutes
- Calories: -
- Difficulty: Medium
Ever dream of baking a bread so light and airy it practically floats, with a crust that shatters like delicate candy? Then you're ready for Pan de Cristal, the legendary Spanish "glass bread" that boasts an incredibly shatter-crisp crust and a crazy open crumb full of big, beautiful holes. This isn't just any homemade bread; it's a revelation, perfect for everything from simple toast to gourmet sandwiches. Don't let its elegant appearance fool you—with our definitive guide, you'll be baking this iconic loaf like a pro. Get ready to impress!
Jump to: [Recipe](#pan-de-cristal-step-by-step-instructions) | [How It Works](#what-is-pan-de-cristal) | [Troubleshooting](#troubleshooting-fast-fixes) | [Variations](#ingredient-substitutions-variations)
Quick Stats: Prep Time: 30 minutes | Rise Time: 3 hours 30 minutes | Bake Time: 25 minutes | Yield: 1 large loaf | Skill Level: Medium
Pan de Cristal, which translates to "glass bread," is a highly hydrated Spanish bread famous for its incredibly light texture and delicate, crisp crust. Imagine a bread so thin-walled inside that it almost looks like glass—that's Pan de Cristal! It comes from Catalonia, Spain, and has become famous worldwide, especially as the ideal canvas for classic pan con tomate (bread with tomato).
Shattering Crust + Airy Inside: Experience the unique contrast of a delicate, crackly crust giving way to an unbelievably soft, open-holed interior.
Simple Ingredients: You only need a few basic pantry staples to create this masterpiece.
No Kneading Required: Forget the arm workout! This recipe uses gentle folds to build strength, making it surprisingly hands-off.
Best for Crunchy Sandwiches & Tomato Toast: Its light structure and crispness make it the perfect foundation for absorbing flavors without getting soggy.
Pan de Cristal stands out among types of bread for baking. While it shares some similarities with other wet doughs, it has its own unique character.
Pan de Cristal vs. Ciabatta: Both are wet doughs, but Pan de Cristal is even wetter, leading to a thinner crust and larger, more irregular holes. Ciabatta often has a chewier crumb.
Pan de Cristal vs. Baguette: Baguettes have a much lower hydration and are shaped into long, slender loaves with a tighter crumb. Pan de Cristal is all about extreme hydration and minimal handling.
Pan de Cristal vs. Focaccia: Focaccia is typically pan-baked and has a thicker, oilier crumb, often with toppings pressed into it. Pan de Cristal is lighter and traditionally baked free-form.
If you enjoy rustic, no-knead breads and want to explore high-hydration doughs, Pan de Cristal is your next baking adventure!
Ingredients
Directions
- Mix (expect batter): In a large bowl, combine the bread flour, warm water, instant yeast, and salt. Mix with a sturdy spatula or your hand until all the flour is hydrated and you have a shaggy, very wet batter. Don't worry about kneading!
- Checkpoint: Your dough will look like a thick, sticky batter, almost like pancake mix but a bit stiffer. It will be very sticky and ragged—this is perfectly normal.
- Rest (hydration + gluten starts): Cover the bowl with a damp towel or plastic wrap and let it rest for 20 minutes at room temperature. This brief rest allows the flour to fully hydrate and the gluten development to begin on its own.
- Checkpoint: After resting, the dough will still be very wet but should feel slightly less ragged, starting to come together a little more.
- Fold Series (build strength without kneading): Over the next 1 hour, you'll perform four sets of folds, with 20 minutes of rest in between each set. To do a fold: wet your hands slightly, grab a portion of the dough from one side, gently stretch it upwards, and fold it over the center. Rotate the bowl a quarter turn and repeat this process 3-4 times, effectively folding all sides into the center.
- After Fold 1 (20 min rest): Dough will start to show some elasticity, but still be very loose.
- After Fold 2 (20 min rest): You'll notice more tension and a smoother surface. Small bubbles might start to appear.
- After Fold 3 (20 min rest): The dough will feel significantly stronger, holding its shape better when stretched, and you'll see more visible bubbles.
- After Fold 4 (no rest, proceed to bulk ferment): The dough should be smooth, elastic, and full of air bubbles, indicating good gluten development.
- Bulk Ferment (until puffy, not just ‘x hours’): Cover the bowl again and let the dough bulk ferment at room temperature (around 70-75°F / 21-24°C) for 2 to 3 hours. The exact time depends on your kitchen temperature. We're looking for visual cues, not just the clock!
- Checkpoint: The dough should increase in volume by about 70-80%. If you transfer it to a straight-sided container, you can clearly see the rise. It will look significantly puffy, light, and full of trapped air.
- Divide + Shape (minimal handling, don’t degas): Gently flour your work surface generously. Carefully pour or scrape the dough out onto the floured surface, trying not to deflate the precious air bubbles. Flour the top of the dough lightly. Using a dough scraper, gently divide the dough into two equal pieces (or leave as one large loaf). Very gently stretch each piece into a roughly rectangular shape, about ¾ to 1 inch thick. Avoid pressing out the air!
- Checkpoint: The dough should look jiggly, delicate, and visibly full of trapped air bubbles. Handle it like a cloud! Transfer the shaped dough carefully to a piece of parchment paper.
- Final Rest: Let the shaped dough rest uncovered on the parchment paper for 15-20 minutes. This allows the surface to dry slightly, making it easier to handle and contributing to that super-crisp crust.Bake with Steam (safe, home-oven friendly): While the dough rests, preheat your oven to 475°F (245°C) with your baking stone/steel (or inverted sheet pan) inside for at least 30-45 minutes. If using, place a cast iron pan or oven-safe dish on the bottom rack during preheating.
- Carefully slide the parchment with the dough onto the hot stone/sheet pan. Immediately pour ½ cup of hot water into the preheated cast iron pan (use extreme caution, steam is hot!) and quickly close the oven door. This steam is crucial for a thin, crisp crust.
- Bake for 15 minutes with steam, then carefully open the door to vent the steam (remove the water pan if you can do so safely). Reduce the oven temperature to 450°F (230°C) and continue baking for another 10-15 minutes, or until the crust is a deep golden brown and sounds hollow when tapped.
- Optional “oven-dry” finish: For an even crunchier crust, turn off the oven and leave the bread inside with the door slightly ajar for an additional 5-10 minutes.
- Cool + Slice: Transfer the baked bread to a wire rack and cool completely for at least 1 hour before slicing.
- Why cooling matters: Slicing hot bread traps steam, making the crumb gummy.
- How to slice: Use a serrated bread knife with a gentle sawing motion to avoid smashing the delicate, crisp crust.
- What Success Looks LikeYou’ll know you’ve nailed your Pan de Cristal when:
- Crust: It’s thin, delicate, and crackles loudly when you touch it. It should be a deep golden brown, almost caramelized in spots.
- Crumb: The interior is unbelievably airy with huge, irregular holes throughout. It should be light and delicate, not dense or gummy.
- Aroma and Color: It smells wonderfully yeasty and slightly nutty, with a beautiful, creamy white interior.
You may also like


Hey there! I’m just someone who seriously loves good food and believes that cooking doesn’t have to be complicated to be amazing. Whether it’s a quick weeknight dinner or a cozy weekend meal, I’m all about sharing easy, tasty recipes that actually work.


