
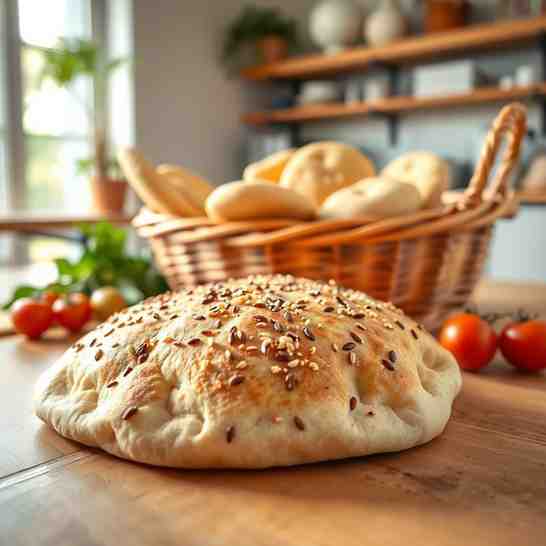
Easy Recipe to Make Bread at Home - Fluffy Cypriot Pita
Easy Recipe to Make Bread at Home - Fluffy Cypriot Pita
- Serves: 8 People
- Prepare Time: 20 minutes
- Cooking Time: 15 minutes
- Calories: -
- Difficulty: Easy
Ever craved that warm, pillowy pita pocket bread you get at your favorite Mediterranean spot? What if we told you that making incredible home baked bread recipe like Cypriot pita is not just possible, but surprisingly simple right in your own kitchen? Forget store-bought; nothing beats the aroma and taste of make fresh bread from scratch. This isn't just any recipe to make bread at home; it's a journey into the heart of Mediterranean tradition, bringing a taste of Cyprus straight to your table.
Cypriot pita, often a bit thicker and more robust than its Middle Eastern counterparts, is perfect for scooping up dips, stuffing with your favorite fillings, or just enjoying plain with a drizzle of olive oil. We're going to walk you through an easy, step-by-step cooking step by step guide to create light, airy, and beautifully puffed small pita bread that will impress everyone. So, roll up your sleeves, gather your ingredients for homemade bread, and let's get ready to enjoy the unparalleled satisfaction of creating your very own, authentic Cypriot pita!
Ingredients
Directions
- Prepare the Dough:
- In a large mixing bowl, combine the flour, instant yeast, sugar, and salt. Give them a quick whisk to ensure everything is evenly distributed. This dry mix sets the stage for your perfect dough.
- Next, pour in the warm water and olive oil. Using a wooden spoon or your hands, mix everything together until a shaggy, somewhat sticky dough forms. Don't worry if it looks a bit messy at first!
- Turn the dough out onto a lightly floured surface. Now comes the fun part: kneading! Knead the dough for 8-10 minutes. At first, it might stick, but as you knead, it will become smooth, elastic, and less sticky. You'll know it's ready when it springs back slowly when poked and passes the "windowpane test" (you can stretch a small piece thin enough to see light through it without tearing).
- Let It Rise:
- Lightly grease your mixing bowl with a little olive oil. Place the kneaded dough into the bowl, turning it once to coat all sides. This prevents it from drying out.
- Cover the bowl snugly with a damp kitchen towel or plastic wrap. Find a warm, draft-free spot in your kitchen (like inside a slightly warm, turned-off oven or near a sunny window). Let the dough rise for 1-2 hours, or until it has visibly doubled in size. This is where the magic of the yeast to make bread really happens, creating all those lovely air pockets!
- Shape the Pitas:
- Once your dough has doubled, gently punch it down to release the air. This makes it easier to work with.
- Turn the dough out onto a lightly floured surface and divide it into 8 equal pieces. A kitchen scale can help ensure even sizes.
- Roll each piece into a smooth ball, then flatten it slightly with your palm. Using a rolling pin, roll each ball into a flat circle, about 6-7 inches in diameter and roughly ⅛ to ¼ inch thick. Try to keep them as uniform as possible for even cooking. Place the shaped pitas on a parchment-lined baking sheet, making sure they don't overlap too much. Cover them again with a damp cloth and let them rest for another 10-15 minutes while you heat your pan. This short rest helps them puff better.
- Cook the Pitas:
- Heat a heavy-bottomed skillet, cast-iron pan, or even a pita bread oven (if you're lucky enough to have one!) over medium-high heat. You want it nice and hot, but not smoking.
- Carefully place one or two pita circles onto the hot, dry surface (no oil needed in the pan!). Cook for 1-2 minutes on the first side. You'll start to see bubbles forming on the surface.
- Flip the pita. Now, watch the magic happen! The pita should puff up like a balloon in another 1-2 minutes. This puffing creates that perfect pocket! If it doesn't fully puff, don't worry, it'll still be delicious. Cook the second side until it's golden brown and beautifully spotted.
- Remove the cooked pita from the pan and immediately place it in a clean kitchen towel or foil to keep it warm and soft while you cook the remaining pitas. Repeat with the rest of your dough.
- Serve:
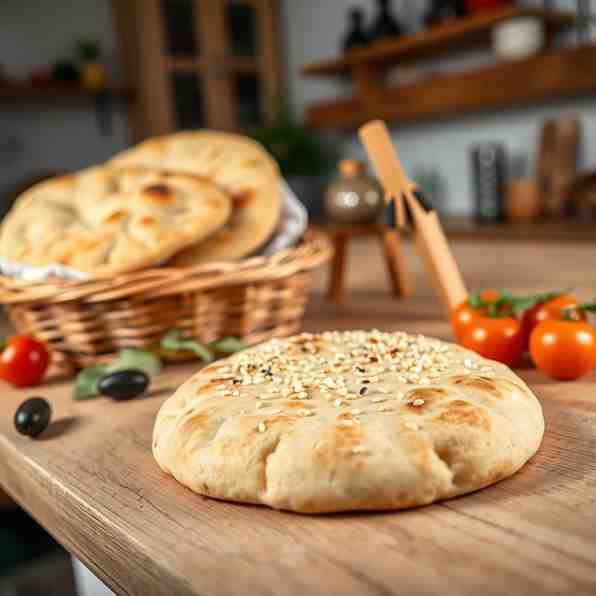
- Serve your homemade Cypriot pita warm, straight from the pan! They're fantastic with hummus, tzatziki, baba ghanoush, or stuffed with grilled chicken or falafel for amazing gyros pita bread. Enjoy the fruits of your labor!
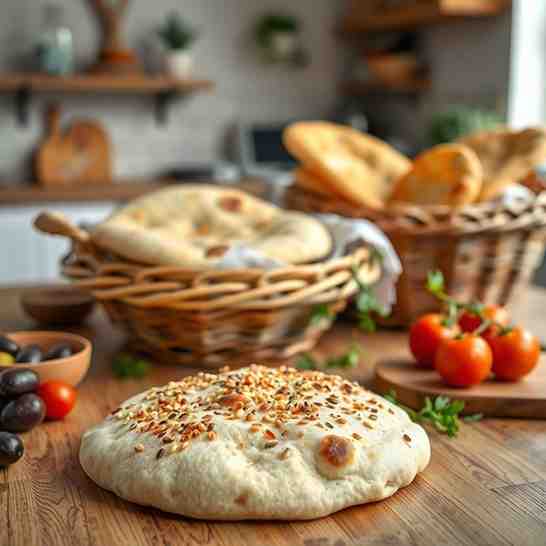
Easy Recipe to Make Bread at Home - Fluffy Cypriot Pita
- Serves: 8 People
- Prepare Time: 20 minutes
- Cooking Time: 15 minutes
- Calories: -
- Difficulty: Easy
Ever craved that warm, pillowy pita pocket bread you get at your favorite Mediterranean spot? What if we told you that making incredible home baked bread recipe like Cypriot pita is not just possible, but surprisingly simple right in your own kitchen? Forget store-bought; nothing beats the aroma and taste of make fresh bread from scratch. This isn't just any recipe to make bread at home; it's a journey into the heart of Mediterranean tradition, bringing a taste of Cyprus straight to your table.
Cypriot pita, often a bit thicker and more robust than its Middle Eastern counterparts, is perfect for scooping up dips, stuffing with your favorite fillings, or just enjoying plain with a drizzle of olive oil. We're going to walk you through an easy, step-by-step cooking step by step guide to create light, airy, and beautifully puffed small pita bread that will impress everyone. So, roll up your sleeves, gather your ingredients for homemade bread, and let's get ready to enjoy the unparalleled satisfaction of creating your very own, authentic Cypriot pita!
Ingredients
Directions
- Prepare the Dough:
- In a large mixing bowl, combine the flour, instant yeast, sugar, and salt. Give them a quick whisk to ensure everything is evenly distributed. This dry mix sets the stage for your perfect dough.
- Next, pour in the warm water and olive oil. Using a wooden spoon or your hands, mix everything together until a shaggy, somewhat sticky dough forms. Don't worry if it looks a bit messy at first!
- Turn the dough out onto a lightly floured surface. Now comes the fun part: kneading! Knead the dough for 8-10 minutes. At first, it might stick, but as you knead, it will become smooth, elastic, and less sticky. You'll know it's ready when it springs back slowly when poked and passes the "windowpane test" (you can stretch a small piece thin enough to see light through it without tearing).
- Let It Rise:
- Lightly grease your mixing bowl with a little olive oil. Place the kneaded dough into the bowl, turning it once to coat all sides. This prevents it from drying out.
- Cover the bowl snugly with a damp kitchen towel or plastic wrap. Find a warm, draft-free spot in your kitchen (like inside a slightly warm, turned-off oven or near a sunny window). Let the dough rise for 1-2 hours, or until it has visibly doubled in size. This is where the magic of the yeast to make bread really happens, creating all those lovely air pockets!
- Shape the Pitas:
- Once your dough has doubled, gently punch it down to release the air. This makes it easier to work with.
- Turn the dough out onto a lightly floured surface and divide it into 8 equal pieces. A kitchen scale can help ensure even sizes.
- Roll each piece into a smooth ball, then flatten it slightly with your palm. Using a rolling pin, roll each ball into a flat circle, about 6-7 inches in diameter and roughly ⅛ to ¼ inch thick. Try to keep them as uniform as possible for even cooking. Place the shaped pitas on a parchment-lined baking sheet, making sure they don't overlap too much. Cover them again with a damp cloth and let them rest for another 10-15 minutes while you heat your pan. This short rest helps them puff better.
- Cook the Pitas:
- Heat a heavy-bottomed skillet, cast-iron pan, or even a pita bread oven (if you're lucky enough to have one!) over medium-high heat. You want it nice and hot, but not smoking.
- Carefully place one or two pita circles onto the hot, dry surface (no oil needed in the pan!). Cook for 1-2 minutes on the first side. You'll start to see bubbles forming on the surface.
- Flip the pita. Now, watch the magic happen! The pita should puff up like a balloon in another 1-2 minutes. This puffing creates that perfect pocket! If it doesn't fully puff, don't worry, it'll still be delicious. Cook the second side until it's golden brown and beautifully spotted.
- Remove the cooked pita from the pan and immediately place it in a clean kitchen towel or foil to keep it warm and soft while you cook the remaining pitas. Repeat with the rest of your dough.
- Serve:
- Serve your homemade Cypriot pita warm, straight from the pan! They're fantastic with hummus, tzatziki, baba ghanoush, or stuffed with grilled chicken or falafel for amazing gyros pita bread. Enjoy the fruits of your labor!
You may also like


Hey there! I’m just someone who seriously loves good food and believes that cooking doesn’t have to be complicated to be amazing. Whether it’s a quick weeknight dinner or a cozy weekend meal, I’m all about sharing easy, tasty recipes that actually work.


