
Bake Red Velvet Cake & Cream Cheese Frosting
Bake Red Velvet Cake & Cream Cheese Frosting
- Serves: 12 People
- Prepare Time: 45 minutes
- Cooking Time: 30 minutes
- Calories: -
- Difficulty: Medium
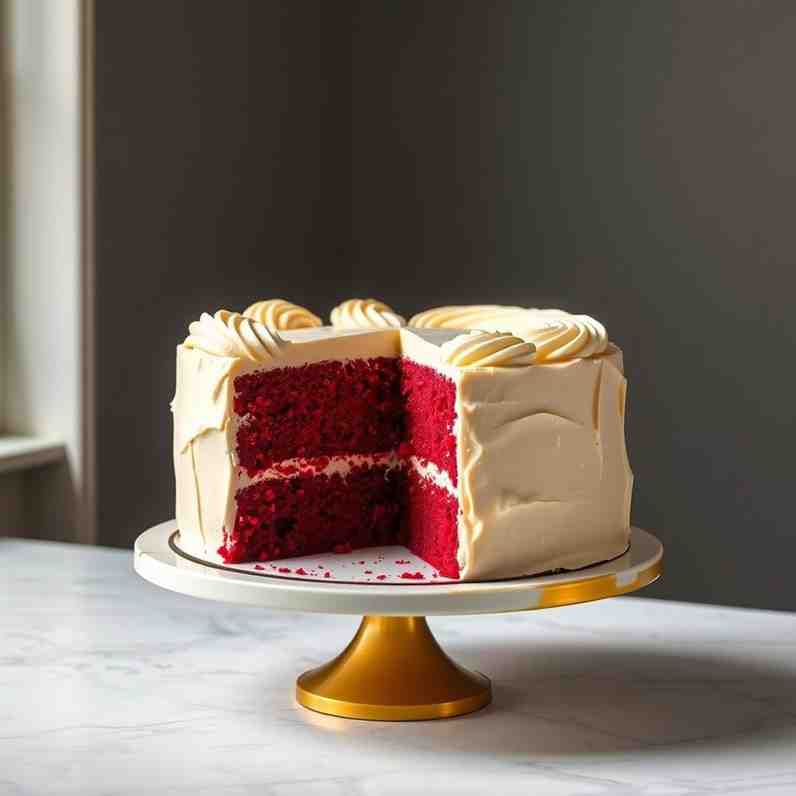
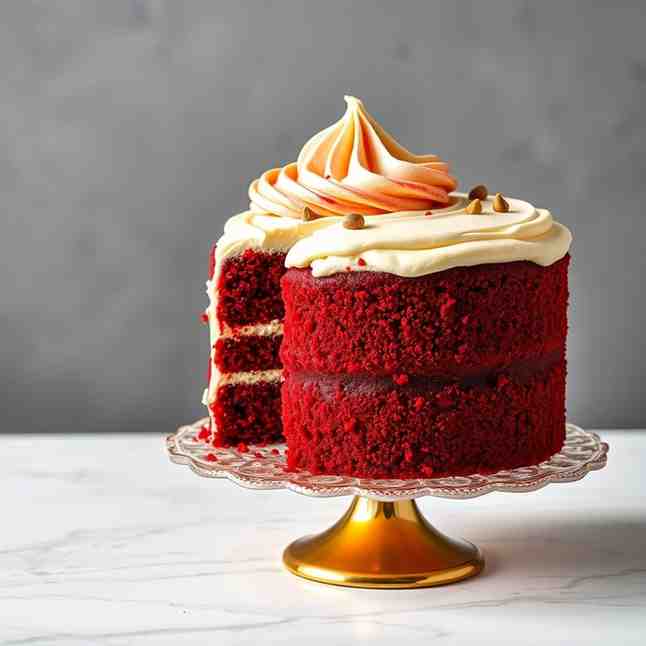
Get ready to bake some love this Valentine's Day! When you hear "red velvet," you might just picture a vanilla cake dyed red, but it's so much more than that. A truly classic red velvet cake cream cheese masterpiece has a distinct, subtle cocoa flavor, a hint of tang, and a super soft, tender crumb that lives up to its "velvet" name. It's a flavor profile that's uniquely its own, not quite chocolate, not quite vanilla, but perfectly balanced and utterly irresistible.
Here, you're going to learn how to create the ultimate red velvet and cream cheese cake that will steal hearts. We're talking classic, moist layers with a deep, vibrant red color, topped with a smooth, tangy cream cheese frosting that balances the cake beautifully. We'll give you all the secrets for that perfect velvet texture, a rich color without any bitter aftertaste, and even some quick, romantic finishing touches. Plus, we'll guide you on how to make this showstopper ahead of time, so you can enjoy a stress-free, love-filled celebration. Whether you're a seasoned baker or just starting out, this best red velvet cake recipe will become your go-to for special occasions!
Ingredients
Directions
- Prep Your Pans & Oven: Preheat your oven to 350°F (175°C). Grease and flour two 8-inch round cake pans. For easy release, cut two circles of parchment paper to fit the bottom of each pan, place them in, and grease/flour the parchment too. This prevents sticking and makes flipping a breeze.
- Mix Dry Ingredients: In a medium bowl, whisk together the all-purpose flour, baking soda, salt, and cocoa powder. The cocoa in real red velvet cake is mild, giving just a whisper of chocolate that beautifully enhances the red color and flavor profile, rather than dominating it like a chocolate cake. Set aside.
- Cream Fat & Sugar: In a large bowl with an electric mixer (stand mixer or hand-held), cream together the softened butter and granulated sugar on medium-high speed until the mixture is light, fluffy, and pale yellow, about 3-5 minutes. This step incorporates air, contributing to that signature "velvet" crumb.
- Add Eggs & Flavoring: Beat in the eggs one at a time, mixing well after each addition. Scrape down the sides of the bowl as needed. Stir in the vanilla extract.
- Color Paste Step (Optional but Recommended): For the best, deepest red color payoff, especially with gel coloring, make a paste first. In a small bowl, combine the red gel food coloring with 1-2 tablespoons of the cocoa powder from the dry ingredients (if you haven't added it yet, or use a small extra amount). Mix until a thick paste forms. This helps distribute the color evenly and prevents a streaky cake. Add this paste to the wet ingredients in the mixer and beat until fully incorporated.
- Alternate Dry & Buttermilk: With the mixer on low speed, gradually add the dry ingredients to the wet ingredients in three additions, alternating with the buttermilk in two additions, beginning and ending with the dry ingredients. Important: Do not overmix! Mix just until combined after each addition. Overmixing develops too much gluten, which can lead to a tough, dry cake instead of a soft, tender, "velvet" one. The buttermilk and vinegar react with the baking soda to create lift and a slight tang, crucial for the flavor and texture.
- Add Oil & Vinegar: Gently fold in the vegetable oil and distilled white vinegar until just combined. The oil adds extra moisture, ensuring a truly moist cake, while the vinegar contributes to the tang and helps activate the baking soda for a good rise.
- Bake & Doneness Cues: Divide the batter evenly between the prepared cake pans. Bake for 25-30 minutes, or until a wooden skewer or toothpick inserted into the center comes out with only a few moist crumbs, not wet batter. Avoid opening the oven door too early, as this can cause the cake to sink.
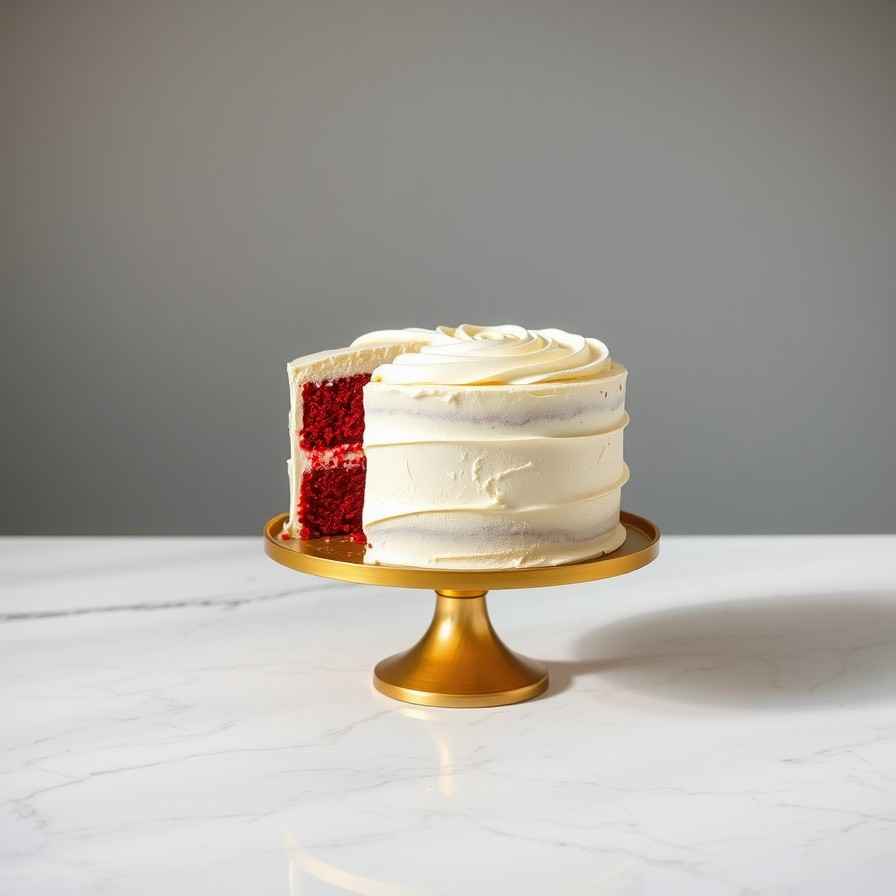
- Cool Correctly: Let the cakes cool in their pans on a wire rack for 10-15 minutes. Then, invert them onto the wire rack, remove the pans and parchment paper, and let them cool completely to room temperature before frosting. Frosting a warm cake will cause your beautiful cream cheese frosting to melt and slide right off!
- Cream Cheese Frosting (Smooth, Thick, Not Runny)
- Beat Cream Cheese & Butter: In a large bowl with an electric mixer, beat the softened full-fat brick-style cream cheese and softened unsalted butter on medium speed until smooth and creamy, about 2-3 minutes. Use brick-style cream cheese, not the spreadable tub kind, for best stability. Overbeating at this stage can incorporate too much air, making the frosting runny.
- Add Vanilla & Salt: Beat in the vanilla extract and a pinch of salt.
- Gradually Add Powdered Sugar: With the mixer on low speed, gradually add the sifted powdered sugar, one cup at a time, until fully incorporated and the frosting is smooth and thick. Increase speed to medium-high and beat for just 1 minute more to ensure everything is well combined and fluffy, but again, do not overbeat. Overbeating can cause the frosting to become too thin due to excess air.
- Chill Window for Piping/Clean Edges: If your frosting seems a little soft, or if you plan to pipe intricate designs, cover the bowl and chill the frosting in the refrigerator for 15-30 minutes. This will firm it up, making it easier to work with for clean edges and stable piping.
- Assemble & Decorate
- Leveling (if needed): Once the cake layers are completely cool, use a serrated knife to carefully level the tops if they have domed. This creates flat surfaces for stable stacking.
- Stacking & Crumb Coat: Place one cake layer on your serving plate or cake stand. Spread about ¾ cup of frosting evenly over the top. Place the second cake layer on top. Apply a thin layer of frosting all over the cake – this is your "crumb coat." It traps any loose crumbs, ensuring your final layer of frosting is perfectly smooth. Chill the cake in the refrigerator for 15-20 minutes to set the crumb coat.
- Final Coat: Once the crumb coat is set, apply the remaining frosting to the top and sides of the cake, using an offset spatula to create smooth, even layers.
- Valentine Finish: Now for the fun part! Decorate your red velvet and cream cheese cake with simple, romantic touches. See our "Valentine’s Day Decorating Ideas" section below for quick, bakery-level tips.
Bake Red Velvet Cake & Cream Cheese Frosting
- Serves: 12 People
- Prepare Time: 45 minutes
- Cooking Time: 30 minutes
- Calories: -
- Difficulty: Medium
Get ready to bake some love this Valentine's Day! When you hear "red velvet," you might just picture a vanilla cake dyed red, but it's so much more than that. A truly classic red velvet cake cream cheese masterpiece has a distinct, subtle cocoa flavor, a hint of tang, and a super soft, tender crumb that lives up to its "velvet" name. It's a flavor profile that's uniquely its own, not quite chocolate, not quite vanilla, but perfectly balanced and utterly irresistible.
Here, you're going to learn how to create the ultimate red velvet and cream cheese cake that will steal hearts. We're talking classic, moist layers with a deep, vibrant red color, topped with a smooth, tangy cream cheese frosting that balances the cake beautifully. We'll give you all the secrets for that perfect velvet texture, a rich color without any bitter aftertaste, and even some quick, romantic finishing touches. Plus, we'll guide you on how to make this showstopper ahead of time, so you can enjoy a stress-free, love-filled celebration. Whether you're a seasoned baker or just starting out, this best red velvet cake recipe will become your go-to for special occasions!
Ingredients
Directions
- Prep Your Pans & Oven: Preheat your oven to 350°F (175°C). Grease and flour two 8-inch round cake pans. For easy release, cut two circles of parchment paper to fit the bottom of each pan, place them in, and grease/flour the parchment too. This prevents sticking and makes flipping a breeze.
- Mix Dry Ingredients: In a medium bowl, whisk together the all-purpose flour, baking soda, salt, and cocoa powder. The cocoa in real red velvet cake is mild, giving just a whisper of chocolate that beautifully enhances the red color and flavor profile, rather than dominating it like a chocolate cake. Set aside.
- Cream Fat & Sugar: In a large bowl with an electric mixer (stand mixer or hand-held), cream together the softened butter and granulated sugar on medium-high speed until the mixture is light, fluffy, and pale yellow, about 3-5 minutes. This step incorporates air, contributing to that signature "velvet" crumb.
- Add Eggs & Flavoring: Beat in the eggs one at a time, mixing well after each addition. Scrape down the sides of the bowl as needed. Stir in the vanilla extract.
- Color Paste Step (Optional but Recommended): For the best, deepest red color payoff, especially with gel coloring, make a paste first. In a small bowl, combine the red gel food coloring with 1-2 tablespoons of the cocoa powder from the dry ingredients (if you haven't added it yet, or use a small extra amount). Mix until a thick paste forms. This helps distribute the color evenly and prevents a streaky cake. Add this paste to the wet ingredients in the mixer and beat until fully incorporated.
- Alternate Dry & Buttermilk: With the mixer on low speed, gradually add the dry ingredients to the wet ingredients in three additions, alternating with the buttermilk in two additions, beginning and ending with the dry ingredients. Important: Do not overmix! Mix just until combined after each addition. Overmixing develops too much gluten, which can lead to a tough, dry cake instead of a soft, tender, "velvet" one. The buttermilk and vinegar react with the baking soda to create lift and a slight tang, crucial for the flavor and texture.
- Add Oil & Vinegar: Gently fold in the vegetable oil and distilled white vinegar until just combined. The oil adds extra moisture, ensuring a truly moist cake, while the vinegar contributes to the tang and helps activate the baking soda for a good rise.
- Bake & Doneness Cues: Divide the batter evenly between the prepared cake pans. Bake for 25-30 minutes, or until a wooden skewer or toothpick inserted into the center comes out with only a few moist crumbs, not wet batter. Avoid opening the oven door too early, as this can cause the cake to sink.
- Cool Correctly: Let the cakes cool in their pans on a wire rack for 10-15 minutes. Then, invert them onto the wire rack, remove the pans and parchment paper, and let them cool completely to room temperature before frosting. Frosting a warm cake will cause your beautiful cream cheese frosting to melt and slide right off!
- Cream Cheese Frosting (Smooth, Thick, Not Runny)
- Beat Cream Cheese & Butter: In a large bowl with an electric mixer, beat the softened full-fat brick-style cream cheese and softened unsalted butter on medium speed until smooth and creamy, about 2-3 minutes. Use brick-style cream cheese, not the spreadable tub kind, for best stability. Overbeating at this stage can incorporate too much air, making the frosting runny.
- Add Vanilla & Salt: Beat in the vanilla extract and a pinch of salt.
- Gradually Add Powdered Sugar: With the mixer on low speed, gradually add the sifted powdered sugar, one cup at a time, until fully incorporated and the frosting is smooth and thick. Increase speed to medium-high and beat for just 1 minute more to ensure everything is well combined and fluffy, but again, do not overbeat. Overbeating can cause the frosting to become too thin due to excess air.
- Chill Window for Piping/Clean Edges: If your frosting seems a little soft, or if you plan to pipe intricate designs, cover the bowl and chill the frosting in the refrigerator for 15-30 minutes. This will firm it up, making it easier to work with for clean edges and stable piping.
- Assemble & Decorate
- Leveling (if needed): Once the cake layers are completely cool, use a serrated knife to carefully level the tops if they have domed. This creates flat surfaces for stable stacking.
- Stacking & Crumb Coat: Place one cake layer on your serving plate or cake stand. Spread about ¾ cup of frosting evenly over the top. Place the second cake layer on top. Apply a thin layer of frosting all over the cake – this is your "crumb coat." It traps any loose crumbs, ensuring your final layer of frosting is perfectly smooth. Chill the cake in the refrigerator for 15-20 minutes to set the crumb coat.
- Final Coat: Once the crumb coat is set, apply the remaining frosting to the top and sides of the cake, using an offset spatula to create smooth, even layers.
- Valentine Finish: Now for the fun part! Decorate your red velvet and cream cheese cake with simple, romantic touches. See our "Valentine’s Day Decorating Ideas" section below for quick, bakery-level tips.
You may also like


Hey there! I’m just someone who seriously loves good food and believes that cooking doesn’t have to be complicated to be amazing. Whether it’s a quick weeknight dinner or a cozy weekend meal, I’m all about sharing easy, tasty recipes that actually work.


