
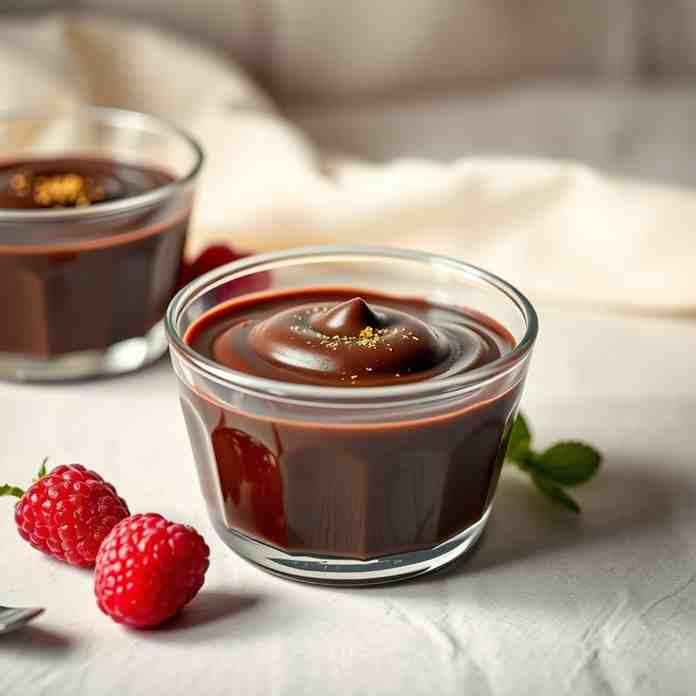
Silky Dark Chocolate Pudding - Best Dark Chocolate Dessert Recipes
Silky Dark Chocolate Pudding - Best Dark Chocolate Dessert Recipes

- Serves: 6 People
- Prepare Time: 15 minutes
- Cooking Time: 15 minutes
- Calories: -
- Difficulty: Easy
Get ready to experience the magic of truly homemade chocolate pudding! Forget those box mixes – whipping up a batch from scratch is surprisingly fast, incredibly rewarding, and delivers an intensely rich, real chocolate flavor that simply can't be beaten. If you've ever been curious about Sanguinaccio Dolce, that luscious Italian sweet chocolate pudding, then you're in for a treat; this recipe belongs to the same delicious family of silky dark chocolate dessert recipes. This isn't just any chocolate pudding recipe; it's designed to give you a perfectly smooth, spoonable dessert with a deep, satisfying dark chocolate taste. We'll guide you through making a pudding that's thick and creamy, distinguishing it from thinner custards or airy mousses, ensuring you know exactly what to expect from your perfect dark chocolate dessert.
This recipe is a loving nod to Sanguinaccio Dolce, a traditional Neapolitan-style chocolate pudding or custard dessert. While the classic version sometimes includes a hint of pig's blood (don't worry, ours absolutely doesn't!), its defining characteristics are its profound dark chocolate and cocoa notes, often brightened with a touch of cinnamon or citrus. Our version captures that same luxurious dark chocolate depth, offering optional orange zest or cinnamon add-ins so you can enjoy that authentic flavor profile without any adventurous ingredients. It's truly one of the best dark chocolate recipes you'll ever try.
Ingredients
Directions
- Equipment You'll Need:
- Medium saucepan (heavy-bottom if possible)
- Whisk
- Rubber spatula
- Fine-mesh strainer (strongly recommended for ultra-silky results)
- Instant-read thermometer (optional, but makes it foolproof)
- Prep + "Silky Texture Protocol": In a medium bowl, sift together the granulated sugar, cocoa powder, cornstarch, and salt. Sifting is your first step to an ultra-silky pudding, preventing lumps later on. If using egg yolks, separate them into a small, separate bowl and set aside. Chop your dark chocolate into small, even pieces and have the butter and vanilla ready.
- Make the Cocoa Base: Add the sifted sugar, cocoa, cornstarch, and salt mixture to your medium saucepan. Gradually whisk in about 1 cup of the cold whole milk until a smooth paste forms, then slowly whisk in the remaining milk until fully combined. This gradual addition helps prevent lumps from forming.
- Heat with the Right Visual Cues: Place the saucepan over medium heat. Whisk constantly but gently, scraping the bottom and sides of the pot. As the mixture heats, it will start to thicken. Watch for the "first bubbles" – small bubbles forming around the edges. Continue whisking until it reaches a "gentle boil," where bubbles break the surface in the center of the pot.
- Tempering (if using yolks) in Plain English: Once your cocoa base has reached a gentle boil, remove about 1/2 cup of the hot mixture and slowly drizzle it into the separated egg yolks while whisking the yolks constantly. This gently warms the yolks without scrambling them. Once tempered, slowly pour the warmed yolk mixture back into the saucepan with the remaining hot cocoa base, whisking continuously.
- Cook to Proper Thickness (Doneness Checklist): Return the saucepan to medium heat (if using yolks). Continue to whisk gently but constantly.
- What it should look like: The pudding will visibly thicken, coating the back of a spoon. When you draw your finger across the spoon, it should leave a clear path.
- How long it should bubble: Once it reaches a gentle boil again (with or without yolks), continue to cook and whisk for a tight range of 1-2 minutes to ensure the cornstarch is fully activated and cooked, eliminating any starchy taste.
- Stop before overcooking: Overcooking can break down the starch, leading to a thinner pudding, or even scorch the bottom. If using a thermometer, it should reach 195-200°F (90-93°C).
- Finish for Real Chocolate Flavor: Immediately remove the saucepan from the heat. Stir in the chopped dark chocolate, butter, and vanilla extract until everything is fully melted and smooth. The residual heat will melt the chocolate beautifully, giving you that rich, glossy finish.
- Strain for Restaurant-Smooth Pudding: For an absolutely flawless, restaurant-quality smooth pudding, pour the hot pudding through a fine-mesh strainer set over a clean bowl. Use a rubber spatula to push it through, discarding any tiny lumps or bits of cooked egg (if applicable). This step is optional but strongly recommended for that ultra-silky texture.
- Chill (or Serve Warm) + Skin Options: You can serve this pudding warm, but it's truly best when chilled.
- No-Skin Method: To prevent a "skin" from forming on top, press a piece of plastic wrap directly onto the surface of the pudding, ensuring no air is trapped between the pudding and the wrap.
- Skin-On Method: If you enjoy the slightly chewy skin (some people do!), simply cover the bowl loosely with plastic wrap or a lid. Chill for at least 4 hours, or preferably overnight, until fully set and cold.
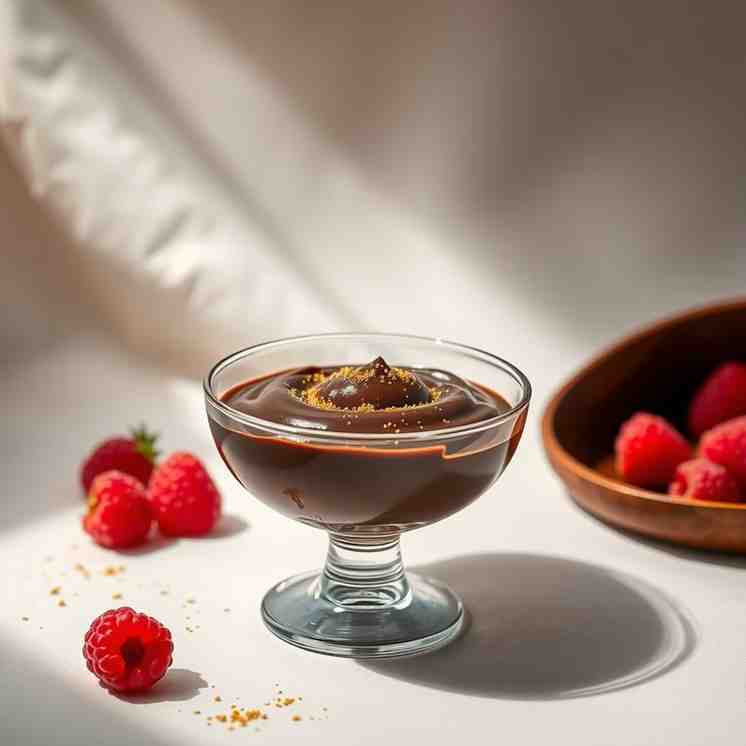
Silky Dark Chocolate Pudding - Best Dark Chocolate Dessert Recipes
- Serves: 6 People
- Prepare Time: 15 minutes
- Cooking Time: 15 minutes
- Calories: -
- Difficulty: Easy
Get ready to experience the magic of truly homemade chocolate pudding! Forget those box mixes – whipping up a batch from scratch is surprisingly fast, incredibly rewarding, and delivers an intensely rich, real chocolate flavor that simply can't be beaten. If you've ever been curious about Sanguinaccio Dolce, that luscious Italian sweet chocolate pudding, then you're in for a treat; this recipe belongs to the same delicious family of silky dark chocolate dessert recipes. This isn't just any chocolate pudding recipe; it's designed to give you a perfectly smooth, spoonable dessert with a deep, satisfying dark chocolate taste. We'll guide you through making a pudding that's thick and creamy, distinguishing it from thinner custards or airy mousses, ensuring you know exactly what to expect from your perfect dark chocolate dessert.
This recipe is a loving nod to Sanguinaccio Dolce, a traditional Neapolitan-style chocolate pudding or custard dessert. While the classic version sometimes includes a hint of pig's blood (don't worry, ours absolutely doesn't!), its defining characteristics are its profound dark chocolate and cocoa notes, often brightened with a touch of cinnamon or citrus. Our version captures that same luxurious dark chocolate depth, offering optional orange zest or cinnamon add-ins so you can enjoy that authentic flavor profile without any adventurous ingredients. It's truly one of the best dark chocolate recipes you'll ever try.
Ingredients
Directions
- Equipment You'll Need:
- Medium saucepan (heavy-bottom if possible)
- Whisk
- Rubber spatula
- Fine-mesh strainer (strongly recommended for ultra-silky results)
- Instant-read thermometer (optional, but makes it foolproof)
- Prep + "Silky Texture Protocol": In a medium bowl, sift together the granulated sugar, cocoa powder, cornstarch, and salt. Sifting is your first step to an ultra-silky pudding, preventing lumps later on. If using egg yolks, separate them into a small, separate bowl and set aside. Chop your dark chocolate into small, even pieces and have the butter and vanilla ready.
- Make the Cocoa Base: Add the sifted sugar, cocoa, cornstarch, and salt mixture to your medium saucepan. Gradually whisk in about 1 cup of the cold whole milk until a smooth paste forms, then slowly whisk in the remaining milk until fully combined. This gradual addition helps prevent lumps from forming.
- Heat with the Right Visual Cues: Place the saucepan over medium heat. Whisk constantly but gently, scraping the bottom and sides of the pot. As the mixture heats, it will start to thicken. Watch for the "first bubbles" – small bubbles forming around the edges. Continue whisking until it reaches a "gentle boil," where bubbles break the surface in the center of the pot.
- Tempering (if using yolks) in Plain English: Once your cocoa base has reached a gentle boil, remove about 1/2 cup of the hot mixture and slowly drizzle it into the separated egg yolks while whisking the yolks constantly. This gently warms the yolks without scrambling them. Once tempered, slowly pour the warmed yolk mixture back into the saucepan with the remaining hot cocoa base, whisking continuously.
- Cook to Proper Thickness (Doneness Checklist): Return the saucepan to medium heat (if using yolks). Continue to whisk gently but constantly.
- What it should look like: The pudding will visibly thicken, coating the back of a spoon. When you draw your finger across the spoon, it should leave a clear path.
- How long it should bubble: Once it reaches a gentle boil again (with or without yolks), continue to cook and whisk for a tight range of 1-2 minutes to ensure the cornstarch is fully activated and cooked, eliminating any starchy taste.
- Stop before overcooking: Overcooking can break down the starch, leading to a thinner pudding, or even scorch the bottom. If using a thermometer, it should reach 195-200°F (90-93°C).
- Finish for Real Chocolate Flavor: Immediately remove the saucepan from the heat. Stir in the chopped dark chocolate, butter, and vanilla extract until everything is fully melted and smooth. The residual heat will melt the chocolate beautifully, giving you that rich, glossy finish.
- Strain for Restaurant-Smooth Pudding: For an absolutely flawless, restaurant-quality smooth pudding, pour the hot pudding through a fine-mesh strainer set over a clean bowl. Use a rubber spatula to push it through, discarding any tiny lumps or bits of cooked egg (if applicable). This step is optional but strongly recommended for that ultra-silky texture.
- Chill (or Serve Warm) + Skin Options: You can serve this pudding warm, but it's truly best when chilled.
- No-Skin Method: To prevent a "skin" from forming on top, press a piece of plastic wrap directly onto the surface of the pudding, ensuring no air is trapped between the pudding and the wrap.
- Skin-On Method: If you enjoy the slightly chewy skin (some people do!), simply cover the bowl loosely with plastic wrap or a lid. Chill for at least 4 hours, or preferably overnight, until fully set and cold.
You may also like


Hey there! I’m just someone who seriously loves good food and believes that cooking doesn’t have to be complicated to be amazing. Whether it’s a quick weeknight dinner or a cozy weekend meal, I’m all about sharing easy, tasty recipes that actually work.


