
Simple Hegaziya Cake - Your Easy Alexandria Dessert
Simple Hegaziya Cake - Your Easy Alexandria Dessert
- Serves: 12 People
- Prepare Time: 30 minutes
- Cooking Time: 40-50 minut
- Calories: -
- Difficulty: Easy
Welcome, dessert lovers! Get ready to discover a true hidden gem from the bustling kitchens of Alexandria, Egypt: Hegaziya (pronounced He-gah-zee-yah), sometimes spelled Hijaziya (حجازية اسكندراني). This isn't just any simple cake recipe; it's a symphony of crumbly-tender semolina layers, a warm embrace of cinnamon-spiced nuts, all finished with a sweet, glistening syrup. If you're looking for a baking recipe cake that’s unique, utterly delicious, and surprisingly straightforward, you've found your next obsession.
Forget complicated techniques – this homemade cake recipe is designed for everyone, from kitchen newbies to seasoned bakers. It's the perfect baked goods recipe for family gatherings, a cozy tea time, or simply when you crave something sweet and satisfying. We'll walk you through every step of this cake preparation recipe to ensure your Hegaziya turns out perfectly every time.
One pan wonder.
Beginner-friendly perfection.
Make-ahead & freezer-friendly (details below!).
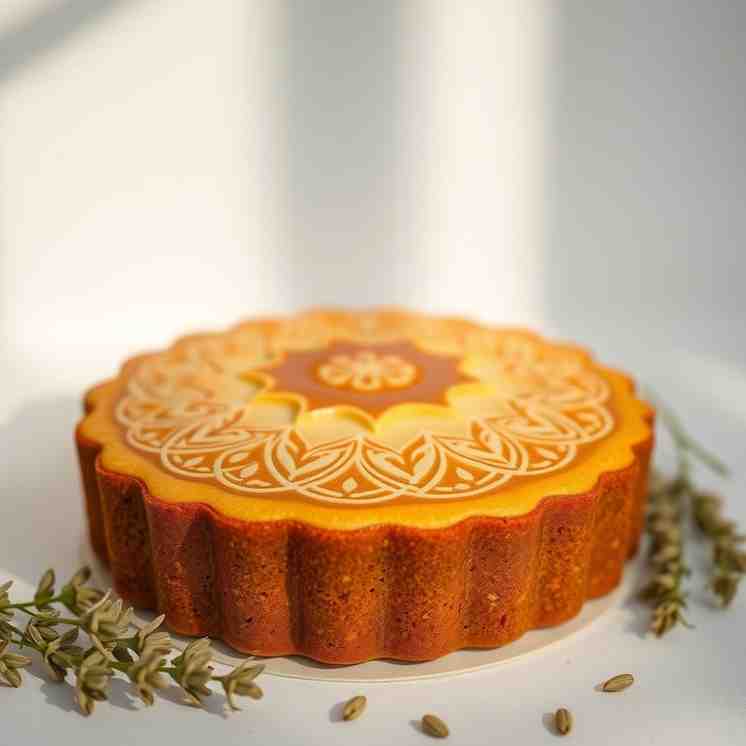
Hegaziya is a beloved Alexandrian dessert, a layered semolina cake that stands out from other Middle Eastern sweets. Imagine two tender, crumbly layers of semolina dough, embracing a rich, sweet filling of crushed nuts, sugar, and aromatic cinnamon. It’s often confused with Basbousa, another popular semolina cake, but Hegaziya is distinct. While Basbousa is typically a single, dense semolina cake soaked in syrup, Hegaziya boasts a unique layered structure with a delightful nutty core, offering a different texture and flavor experience. It's traditionally served as a dessert, often alongside a strong cup of tea or coffee, making it a wonderful treat for any occasion.
Ready to dive into making this incredible simple cake recipe? Before you start, let's gather your ingredients for the cake and tools, and get a quick setup done. This recipe is designed to be straightforward, ensuring you can create a beautiful Hegaziya at home.
Semolina: This is the star! Look for fine or medium-ground semolina. Fine semolina will give a more delicate, uniform texture, while medium will result in a slightly coarser, more rustic crumb. Both work beautifully for this cake home made recipe.
All-Purpose Flour: We combine flour with semolina to give the dough a bit more structure and tenderness, balancing the unique texture of the semolina.
Fat (Ghee vs. Butter): Ghee (clarified butter) is traditional and offers an unparalleled rich, nutty flavor and a tender crumb. If you don't have ghee, unsalted butter is a fantastic substitute and still yields a delicious result. This is a great cake recipe using butter if ghee isn't available.
Yeast: Unlike many other semolina sweets, Hegaziya uses a touch of yeast. This isn't for a big rise like bread, but rather to give the dough a slightly lighter, more tender texture, preventing it from feeling too dense or like shortbread.
Filling Basics: The classic filling is a simple yet potent mix of nuts (usually walnuts or hazelnuts), sugar, and a generous amount of cinnamon. A little semolina or shredded coconut is sometimes added to the filling to absorb moisture and prevent it from becoming too wet.
Syrup Basics: A simple syrup for cake is essential here. It's a basic sugar-water syrup, but a squeeze of lemon juice is key! The acid brightens the flavor, preventing the syrup from tasting cloyingly sweet or flat, making your baking with sugar truly shine.
You don't need fancy equipment for this bake cake recipes adventure!
9x13 inch baking pan: This is our standard recommendation for a good-sized cake. A round pan of similar capacity (like a 10-inch springform) can also work.
Large Mixing Bowl: For combining your dough and filling.
Kitchen Scale (Recommended): While cup measurements are provided, a scale ensures accuracy, especially with flour and semolina, leading to consistent results.
Bench Scraper or Spoon: Great for mixing, dividing dough, and pressing layers.
Sharp Knife: For scoring the top of the cake before baking, which helps create those beautiful, clean slices.
Preheat Oven: Set your oven to 350°F (175°C).
Pan Prep: Lightly grease your 9x13 inch baking pan with a little butter or ghee.
Measure Ingredients: Measure out all your ingredients first – this makes the process smooth and enjoyable. If using a scale, measure by weight for best results.
Quick Beginner Cake Checklist: Don't pack your flour when measuring; ensure your oven rack is in the middle position for even baking; and remember, doneness cues are often visual (golden brown) and tactile (gentle spring-back). This cake preparation in oven will be a breeze!
Ingredients
Directions
- Make the Syrup
- In a small saucepan, combine the sugar, water, and lemon juice.
- Bring to a boil over medium-high heat, stirring until the sugar dissolves.
- Reduce heat to low and simmer gently for 5-7 minutes. The syrup should be slightly thickened but still pourable, like a thin honey.
- Remove from heat and stir in the vanilla extract, if using.
- Set aside to cool completely. You'll want the syrup to be cool when pouring it over the warm cake, so it absorbs beautifully.
- Mix & Rest the Dough
- In a large mixing bowl, combine the semolina, all-purpose flour, sugar, instant dry yeast, and salt. Whisk well to ensure everything is evenly distributed.
- Pour the melted and slightly cooled butter (or ghee) over the dry ingredients. Use your fingertips to rub the fat into the semolina and flour mixture until it resembles wet sand and all the dry ingredients are coated. This is crucial for a tender texture.
- Gradually add the warm water, mixing until a soft, pliable dough forms. Don't over-knead; just mix until combined. The dough should feel soft and slightly sticky, but not wet.
- Cover the bowl with a clean kitchen towel or plastic wrap and let the dough rest in a warm place for 30 minutes. This allows the semolina to hydrate and the yeast to activate slightly, giving the dough its unique texture. "Ready" will look like a slightly puffy, softer dough.
- Mix the Filling
- While the dough rests, prepare the filling. In a medium bowl, combine the chopped nuts, sugar, 2 tablespoons of semolina (if using), and ground cinnamon.
- Add 1 tablespoon of water and mix well until the mixture has the consistency of damp sand. It should hold together slightly when squeezed, but not be clumpy or wet. This dampness helps prevent the filling from leaking or burning during baking.
- Assemble the Hegaziya
- Divide the rested dough into two equal portions.
- Take one portion and press it evenly into the bottom of your prepared 9x13 inch baking pan. Use your fingertips or the back of a spoon to create an even layer, about ¼ to ½ inch thick. Make sure it reaches all the way to the edges.
- Evenly sprinkle the prepared nut filling over the bottom dough layer, leaving a small border (about ¼ inch) around the edges. This helps seal in the filling.
- For the top layer, you can either gently pat out the second portion of dough between two sheets of parchment paper and then invert it over the filling, or you can crumble small pieces of dough evenly over the filling and then gently press them together to form a seamless top layer. The goal is an even, consistent top layer without pressing too hard and disturbing the filling.
- Using a sharp knife, score a diamond or square pattern on the top of the cake, cutting about halfway through the dough. This creates beautiful individual slices and helps the syrup penetrate. Don't cut all the way through to the bottom.
- Bake
- Place the pan in the preheated oven (350°F / 175°C) and bake for 40-50 minutes, or until the top is beautifully golden brown and the edges are slightly darker.
- To check for doneness, the cake should look firm and golden. A gentle press on the center should feel slightly springy.
- Syrup Finish
- Immediately upon removing the warm cake from the oven, slowly and evenly pour about half of the cooled syrup over the entire surface. The warm cake will readily absorb the cool syrup.
- Let the cake sit and absorb the syrup for at least 30 minutes. You can pour the remaining syrup over the cake just before serving, or serve it on the side for those who prefer extra sweetness.
- Allow the Hegaziya to cool completely in the pan before slicing (at least 2-3 hours, or even better, overnight). This cooling time is crucial for the cake to set properly and prevent it from crumbling when cut.
Simple Hegaziya Cake - Your Easy Alexandria Dessert
- Serves: 12 People
- Prepare Time: 30 minutes
- Cooking Time: 40-50 minut
- Calories: -
- Difficulty: Easy
Welcome, dessert lovers! Get ready to discover a true hidden gem from the bustling kitchens of Alexandria, Egypt: Hegaziya (pronounced He-gah-zee-yah), sometimes spelled Hijaziya (حجازية اسكندراني). This isn't just any simple cake recipe; it's a symphony of crumbly-tender semolina layers, a warm embrace of cinnamon-spiced nuts, all finished with a sweet, glistening syrup. If you're looking for a baking recipe cake that’s unique, utterly delicious, and surprisingly straightforward, you've found your next obsession.
Forget complicated techniques – this homemade cake recipe is designed for everyone, from kitchen newbies to seasoned bakers. It's the perfect baked goods recipe for family gatherings, a cozy tea time, or simply when you crave something sweet and satisfying. We'll walk you through every step of this cake preparation recipe to ensure your Hegaziya turns out perfectly every time.
One pan wonder.
Beginner-friendly perfection.
Make-ahead & freezer-friendly (details below!).
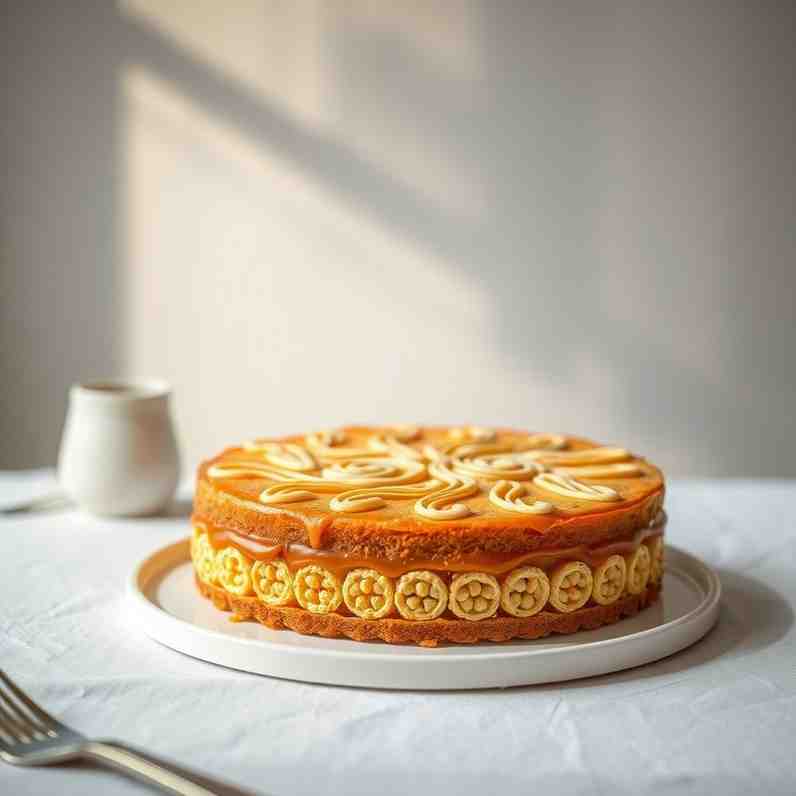
Hegaziya is a beloved Alexandrian dessert, a layered semolina cake that stands out from other Middle Eastern sweets. Imagine two tender, crumbly layers of semolina dough, embracing a rich, sweet filling of crushed nuts, sugar, and aromatic cinnamon. It’s often confused with Basbousa, another popular semolina cake, but Hegaziya is distinct. While Basbousa is typically a single, dense semolina cake soaked in syrup, Hegaziya boasts a unique layered structure with a delightful nutty core, offering a different texture and flavor experience. It's traditionally served as a dessert, often alongside a strong cup of tea or coffee, making it a wonderful treat for any occasion.
Ready to dive into making this incredible simple cake recipe? Before you start, let's gather your ingredients for the cake and tools, and get a quick setup done. This recipe is designed to be straightforward, ensuring you can create a beautiful Hegaziya at home.
Semolina: This is the star! Look for fine or medium-ground semolina. Fine semolina will give a more delicate, uniform texture, while medium will result in a slightly coarser, more rustic crumb. Both work beautifully for this cake home made recipe.
All-Purpose Flour: We combine flour with semolina to give the dough a bit more structure and tenderness, balancing the unique texture of the semolina.
Fat (Ghee vs. Butter): Ghee (clarified butter) is traditional and offers an unparalleled rich, nutty flavor and a tender crumb. If you don't have ghee, unsalted butter is a fantastic substitute and still yields a delicious result. This is a great cake recipe using butter if ghee isn't available.
Yeast: Unlike many other semolina sweets, Hegaziya uses a touch of yeast. This isn't for a big rise like bread, but rather to give the dough a slightly lighter, more tender texture, preventing it from feeling too dense or like shortbread.
Filling Basics: The classic filling is a simple yet potent mix of nuts (usually walnuts or hazelnuts), sugar, and a generous amount of cinnamon. A little semolina or shredded coconut is sometimes added to the filling to absorb moisture and prevent it from becoming too wet.
Syrup Basics: A simple syrup for cake is essential here. It's a basic sugar-water syrup, but a squeeze of lemon juice is key! The acid brightens the flavor, preventing the syrup from tasting cloyingly sweet or flat, making your baking with sugar truly shine.
You don't need fancy equipment for this bake cake recipes adventure!
9x13 inch baking pan: This is our standard recommendation for a good-sized cake. A round pan of similar capacity (like a 10-inch springform) can also work.
Large Mixing Bowl: For combining your dough and filling.
Kitchen Scale (Recommended): While cup measurements are provided, a scale ensures accuracy, especially with flour and semolina, leading to consistent results.
Bench Scraper or Spoon: Great for mixing, dividing dough, and pressing layers.
Sharp Knife: For scoring the top of the cake before baking, which helps create those beautiful, clean slices.
Preheat Oven: Set your oven to 350°F (175°C).
Pan Prep: Lightly grease your 9x13 inch baking pan with a little butter or ghee.
Measure Ingredients: Measure out all your ingredients first – this makes the process smooth and enjoyable. If using a scale, measure by weight for best results.
Quick Beginner Cake Checklist: Don't pack your flour when measuring; ensure your oven rack is in the middle position for even baking; and remember, doneness cues are often visual (golden brown) and tactile (gentle spring-back). This cake preparation in oven will be a breeze!
Ingredients
Directions
- Make the Syrup
- In a small saucepan, combine the sugar, water, and lemon juice.
- Bring to a boil over medium-high heat, stirring until the sugar dissolves.
- Reduce heat to low and simmer gently for 5-7 minutes. The syrup should be slightly thickened but still pourable, like a thin honey.
- Remove from heat and stir in the vanilla extract, if using.
- Set aside to cool completely. You'll want the syrup to be cool when pouring it over the warm cake, so it absorbs beautifully.
- Mix & Rest the Dough
- In a large mixing bowl, combine the semolina, all-purpose flour, sugar, instant dry yeast, and salt. Whisk well to ensure everything is evenly distributed.
- Pour the melted and slightly cooled butter (or ghee) over the dry ingredients. Use your fingertips to rub the fat into the semolina and flour mixture until it resembles wet sand and all the dry ingredients are coated. This is crucial for a tender texture.
- Gradually add the warm water, mixing until a soft, pliable dough forms. Don't over-knead; just mix until combined. The dough should feel soft and slightly sticky, but not wet.
- Cover the bowl with a clean kitchen towel or plastic wrap and let the dough rest in a warm place for 30 minutes. This allows the semolina to hydrate and the yeast to activate slightly, giving the dough its unique texture. "Ready" will look like a slightly puffy, softer dough.
- Mix the Filling
- While the dough rests, prepare the filling. In a medium bowl, combine the chopped nuts, sugar, 2 tablespoons of semolina (if using), and ground cinnamon.
- Add 1 tablespoon of water and mix well until the mixture has the consistency of damp sand. It should hold together slightly when squeezed, but not be clumpy or wet. This dampness helps prevent the filling from leaking or burning during baking.
- Assemble the Hegaziya
- Divide the rested dough into two equal portions.
- Take one portion and press it evenly into the bottom of your prepared 9x13 inch baking pan. Use your fingertips or the back of a spoon to create an even layer, about ¼ to ½ inch thick. Make sure it reaches all the way to the edges.
- Evenly sprinkle the prepared nut filling over the bottom dough layer, leaving a small border (about ¼ inch) around the edges. This helps seal in the filling.
- For the top layer, you can either gently pat out the second portion of dough between two sheets of parchment paper and then invert it over the filling, or you can crumble small pieces of dough evenly over the filling and then gently press them together to form a seamless top layer. The goal is an even, consistent top layer without pressing too hard and disturbing the filling.
- Using a sharp knife, score a diamond or square pattern on the top of the cake, cutting about halfway through the dough. This creates beautiful individual slices and helps the syrup penetrate. Don't cut all the way through to the bottom.
- Bake
- Place the pan in the preheated oven (350°F / 175°C) and bake for 40-50 minutes, or until the top is beautifully golden brown and the edges are slightly darker.
- To check for doneness, the cake should look firm and golden. A gentle press on the center should feel slightly springy.
- Syrup Finish
- Immediately upon removing the warm cake from the oven, slowly and evenly pour about half of the cooled syrup over the entire surface. The warm cake will readily absorb the cool syrup.
- Let the cake sit and absorb the syrup for at least 30 minutes. You can pour the remaining syrup over the cake just before serving, or serve it on the side for those who prefer extra sweetness.
- Allow the Hegaziya to cool completely in the pan before slicing (at least 2-3 hours, or even better, overnight). This cooling time is crucial for the cake to set properly and prevent it from crumbling when cut.
You may also like


Hey there! I’m just someone who seriously loves good food and believes that cooking doesn’t have to be complicated to be amazing. Whether it’s a quick weeknight dinner or a cozy weekend meal, I’m all about sharing easy, tasty recipes that actually work.


