
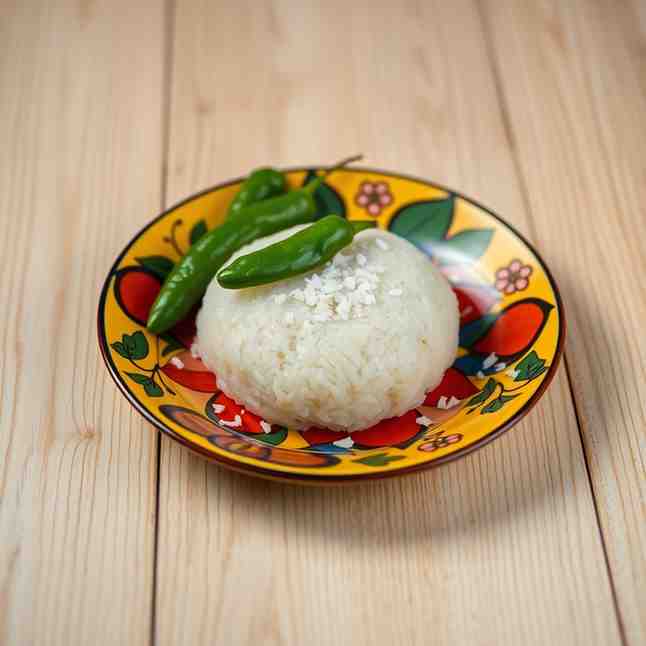
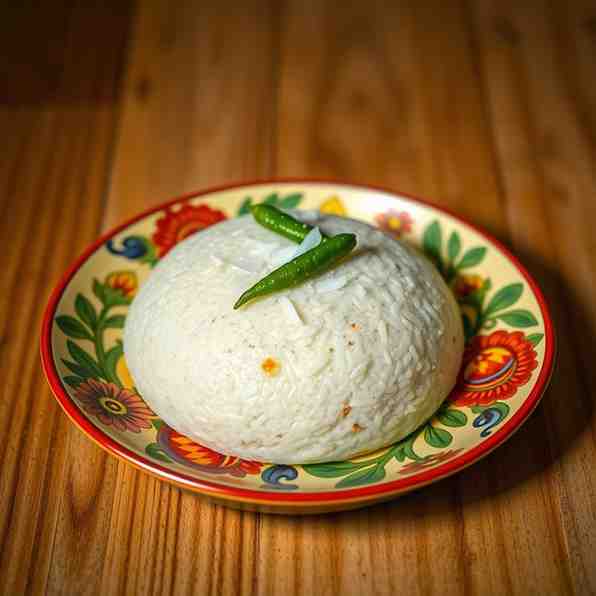
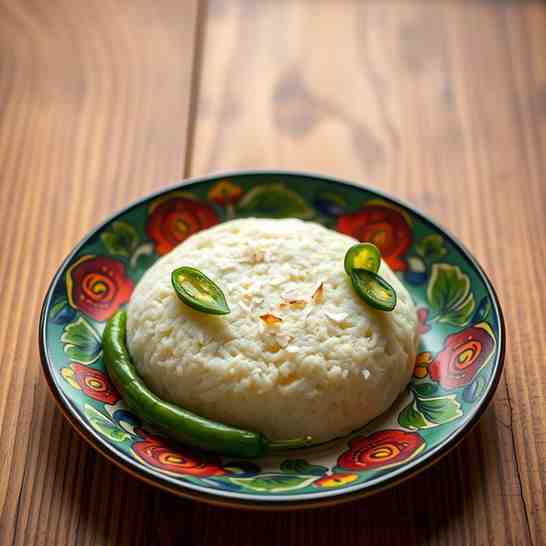
Sri Lankan Pittu - Easy Gluten-Free Steamed Rice Flour Recipe
Sri Lankan Pittu - Easy Gluten-Free Steamed Rice Flour Recipe
- Serves: 1 People
- Prepare Time: 15 minutes
- Cooking Time: 10 minutes
- Calories: -
- Difficulty: Easy
Welcome to the delightful world of Sri Lankan Pittu, a wonderfully gluten-free rice dish that’s both comforting and incredibly versatile! If you're searching for a simple meal with rice or a unique dish for one, you've landed in the right spot. Pittu, often described as steamed rice flour and coconut cylinders, is a staple in Sri Lankan cuisine, cherished for its unique texture and ability to pair with a variety of flavorful curries.
This isn't just any rice flour recipe; it's designed to be straightforward, even if you're a beginner. We'll walk you through making this authentic dish, focusing on the perfect crumb and how to achieve it without fuss. You might have heard of "Puttu," and while very similar, our Sri Lankan Pittu often has a slightly different preparation and texture, emphasizing a lighter, fluffier result. While Puttu is more common in Southern India, Pittu is its beloved Sri Lankan cousin. Both are steamed rice and coconut preparations, but the specific grind of rice flour and the steaming method can vary subtly by region. Rest assured, this easy, gluten-free, one-serving recipe will guide you to a perfect batch every time.
In just about 25 minutes, you'll have a warm, fragrant serving of Pittu, ready to be enjoyed with your favorite coconut milk curry or a quick sambol. It's naturally gluten-free, making it an excellent choice for those with dietary restrictions. Let's get steaming!
Ingredients
Directions
- Lightly Toast the Rice Flour (Optional but Recommended): Place the rice flour in a dry, non-stick pan over medium-low heat. Toast gently for 3-5 minutes, stirring constantly, until it's just warmed through and slightly aromatic. Be careful not to brown it. This step helps prevent stickiness and enhances the flour's flavor. Transfer to a large mixing bowl.
- Salt & Hydrate Gradually: Add the salt to the warm rice flour and mix well. Gradually add the ¼ cup of warm water, a tablespoon at a time, while continuously rubbing the flour between your palms. The goal is to moisten the flour evenly, breaking up any lumps.
- Perform the Crumb Test: This is the most crucial step! Continue adding small amounts of water (½ teaspoon at a time) and rubbing the flour until it feels like "damp sand." When you squeeze a handful, it should hold its shape like a loose ball, but then crumble easily when gently poked. If it's too wet, it will form a solid dough; if too dry, it won't hold shape at all.
- Mix with Coconut: Once the flour mixture passes the crumb test, add the grated coconut. Gently mix with your fingertips until the coconut is evenly distributed throughout the flour, ensuring the mixture remains light and crumbly.
- Prepare Your Steamer:
- Using a Pittu Maker: If you have a traditional pittu maker (a cylindrical steamer), fill the base with water and bring it to a boil. Lightly grease the inside of the cylinder.
- Without a Pittu Maker (Workaround): You can use a regular steamer basket or idli maker. Line the steamer basket with a damp muslin cloth or banana leaf. You can also loosely pack the mixture into small, heat-proof cups or ramekins.
- Pack Loosely: Gently spoon the pittu mixture into your pittu maker cylinder or prepared steamer basket/cups.
- Do NOT compress it. Packing it too tightly will result in dense, hard pittu. Leave it loose and airy for the best texture.
- Steam Until Done: Place the pittu cylinder (or steamer basket/cups) over the boiling water. Steam for 7-10 minutes. You'll know it's ready when you see steam escaping from the top of the pittu maker, the aroma of cooked rice flour and coconut is pronounced, and the texture appears set.
- Rest Briefly & Unmold: Carefully remove the pittu from the steamer. Let it rest for 1-2 minutes. If using a pittu maker, use the plunger to gently push out the steamed pittu onto a plate. If using cups, invert them carefully.
- Serve Immediately: Enjoy your fresh, fluffy Sri Lankan Pittu with your favorite curry or sambol!
- Optional: Quick Homemade Coconut Milk for Cooking (Mini-Guide)Making your own coconut milk is easy and adds incredible freshness to your curries!
- Ingredients: 1 cup fresh or frozen grated coconut, 1 cup very hot (not boiling) water.
- Blend & Strain: Combine the coconut and hot water in a blender. Blend on high for 2-3 minutes until creamy. Pour the mixture through a fine-mesh sieve or cheesecloth-lined colander, pressing firmly to extract all the liquid. This is your thick coconut milk. For a thinner milk, you can repeat the process with the leftover pulp and another ½ cup of hot water.
- Storage Timeline: Store homemade coconut milk in an airtight container in the refrigerator for up to 3-4 days.
- How to Use with Pittu: Drizzle fresh coconut milk over your pittu before serving, or use it as a base for a delicious curry to serve alongside.
You may also like


Hey there! I’m just someone who seriously loves good food and believes that cooking doesn’t have to be complicated to be amazing. Whether it’s a quick weeknight dinner or a cozy weekend meal, I’m all about sharing easy, tasty recipes that actually work.


