
Sweet Fruit Pierogi Recipes - Dumplings & Fillings
Sweet Fruit Pierogi Recipes - Dumplings & Fillings


- Serves: 6 People
- Prepare Time: 45 minutes
- Cooking Time: 15 minutes
- Calories: -
- Difficulty: Medium
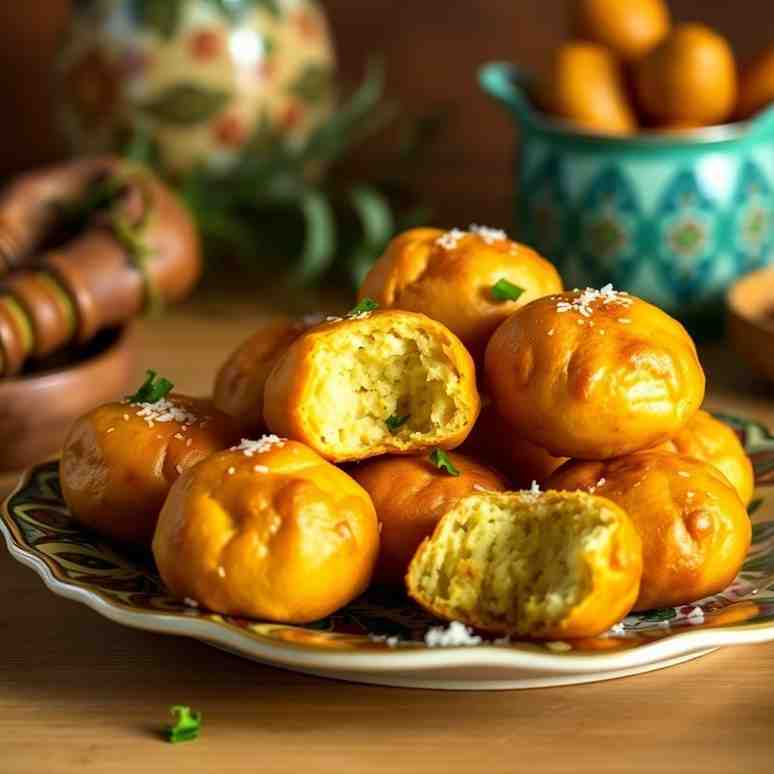
Welcome to the wonderful world of pierogi! While many think of these delightful Polish dumplings as savory, stuffed with ``potatoes and meat`` or cheese, today we're diving into a truly special treat: fruit-filled pierogi, also known as pierogi na słodko. These sweet, tender pockets of dough bursting with juicy fruit are a beloved comfort food, a testament to the versatility of traditional Polish ``recipes``.
What makes fruit-filled pierogi so special? Beyond their delicious taste, they hold a unique place in Polish culinary culture, often served as a main course for lunch or a delightful dessert. They embody the simple joy of seasonal eating, transforming fresh bounty into something truly memorable. For centuries, Polish families have perfected the art of these sweet dumplings, passing down ``recipes`` that balance a soft, pliable dough with vibrant fruit fillings.
When it comes to choosing your fruit, the possibilities are delicious! Classic choices include plump blueberries, tart cherries, sweet apples, and juicy plums. The key is to select fruits that offer a wonderful balance of sweetness and tartness, preventing your pierogi from becoming overly sugary. This careful selection ensures each bite is a harmonious blend of flavors, making these fruit pierogi a truly irresistible dish for both beginners and experienced bakers alike.
Ingredients
Directions
- Prepare the Fruit Filling:
- In a medium bowl, combine the pitted cherries and finely diced apple.
- Add the granulated sugar, cornstarch (or tapioca starch), optional lemon zest, and cinnamon. Gently toss everything together until the fruit is evenly coated. The sugar will start to macerate the fruit, drawing out some juices, which the starch will later help to thicken. Set aside while you make the dough.
- Make the Dough:
- In a large mixing bowl, whisk together the flour and salt.
- In a separate small bowl, whisk the egg with the warm water (or milk) and melted butter (or oil).
- Pour the wet ingredients into the dry ingredients. Mix with a wooden spoon or your hands until a shaggy dough forms.
- Turn the dough out onto a lightly floured surface and knead for about 5-7 minutes. The dough should become smooth, elastic, and no longer sticky. If it's too dry, add a tiny bit more warm water, a teaspoon at a time. If it's too sticky, add a little more flour.
- Form the dough into a ball, lightly grease it with a tiny bit of oil, cover it with plastic wrap or a damp towel, and let it rest at room temperature for at least 30 minutes. This resting period is crucial for the dough's elasticity, making it easier to roll and preventing tearing.
- Roll & Cut Dough:
- Divide the rested dough into two or three portions to make it more manageable. Keep the unused portions covered.
- On a lightly floured surface, roll one portion of dough out thinly, to about 1/8-inch (3mm) thickness. Aim for an even thickness to ensure uniform cooking.
- Using a round pierogi cutter, cookie cutter, or the rim of a glass (about 2.5-3 inches / 6-7.5 cm in diameter), cut out circles of dough. Gather the scraps, knead them gently, and re-roll once or twice.
- Assemble Pierogi:
- Take one dough circle and place about 1 teaspoon of the fruit filling in the center. Be careful not to overfill, as this can make sealing difficult and lead to bursting during cooking.
- Fold the dough over the filling to create a half-moon shape.
- Firmly press the edges together to seal, ensuring no air pockets are trapped inside. For a decorative and extra secure seal, crimp the edges with a fork. Place the assembled pierogi on a lightly floured baking sheet or parchment paper, making sure they don't touch each other. Repeat with the remaining dough and filling.
- Cook (Boil then Optional Pan-Fry):
- Bring a large pot of salted water to a rolling boil.
- Carefully drop the pierogi into the boiling water, a few at a time, to avoid overcrowding the pot. They will sink at first.
- Once they float to the surface (usually after 2-3 minutes), let them cook for another 1-2 minutes until the dough is tender. A visual cue is when they look plump and slightly translucent.
- Using a slotted spoon, remove the cooked pierogi from the water and drain them well.
- Optional Pan-Fry: For extra flavor and a lovely texture, melt 1-2 tablespoons of butter in a large non-stick skillet over medium heat. Add the boiled pierogi and pan-fry for 2-3 minutes per side until golden brown and slightly crispy. This step adds an incredible depth of flavor!
Sweet Fruit Pierogi Recipes - Dumplings & Fillings

- Serves: 6 People
- Prepare Time: 45 minutes
- Cooking Time: 15 minutes
- Calories: -
- Difficulty: Medium
Welcome to the wonderful world of pierogi! While many think of these delightful Polish dumplings as savory, stuffed with ``potatoes and meat`` or cheese, today we're diving into a truly special treat: fruit-filled pierogi, also known as pierogi na słodko. These sweet, tender pockets of dough bursting with juicy fruit are a beloved comfort food, a testament to the versatility of traditional Polish ``recipes``.
What makes fruit-filled pierogi so special? Beyond their delicious taste, they hold a unique place in Polish culinary culture, often served as a main course for lunch or a delightful dessert. They embody the simple joy of seasonal eating, transforming fresh bounty into something truly memorable. For centuries, Polish families have perfected the art of these sweet dumplings, passing down ``recipes`` that balance a soft, pliable dough with vibrant fruit fillings.
When it comes to choosing your fruit, the possibilities are delicious! Classic choices include plump blueberries, tart cherries, sweet apples, and juicy plums. The key is to select fruits that offer a wonderful balance of sweetness and tartness, preventing your pierogi from becoming overly sugary. This careful selection ensures each bite is a harmonious blend of flavors, making these fruit pierogi a truly irresistible dish for both beginners and experienced bakers alike.
Ingredients
Directions
- Prepare the Fruit Filling:
- In a medium bowl, combine the pitted cherries and finely diced apple.
- Add the granulated sugar, cornstarch (or tapioca starch), optional lemon zest, and cinnamon. Gently toss everything together until the fruit is evenly coated. The sugar will start to macerate the fruit, drawing out some juices, which the starch will later help to thicken. Set aside while you make the dough.
- Make the Dough:
- In a large mixing bowl, whisk together the flour and salt.
- In a separate small bowl, whisk the egg with the warm water (or milk) and melted butter (or oil).
- Pour the wet ingredients into the dry ingredients. Mix with a wooden spoon or your hands until a shaggy dough forms.
- Turn the dough out onto a lightly floured surface and knead for about 5-7 minutes. The dough should become smooth, elastic, and no longer sticky. If it's too dry, add a tiny bit more warm water, a teaspoon at a time. If it's too sticky, add a little more flour.
- Form the dough into a ball, lightly grease it with a tiny bit of oil, cover it with plastic wrap or a damp towel, and let it rest at room temperature for at least 30 minutes. This resting period is crucial for the dough's elasticity, making it easier to roll and preventing tearing.
- Roll & Cut Dough:
- Divide the rested dough into two or three portions to make it more manageable. Keep the unused portions covered.
- On a lightly floured surface, roll one portion of dough out thinly, to about 1/8-inch (3mm) thickness. Aim for an even thickness to ensure uniform cooking.
- Using a round pierogi cutter, cookie cutter, or the rim of a glass (about 2.5-3 inches / 6-7.5 cm in diameter), cut out circles of dough. Gather the scraps, knead them gently, and re-roll once or twice.
- Assemble Pierogi:
- Take one dough circle and place about 1 teaspoon of the fruit filling in the center. Be careful not to overfill, as this can make sealing difficult and lead to bursting during cooking.
- Fold the dough over the filling to create a half-moon shape.
- Firmly press the edges together to seal, ensuring no air pockets are trapped inside. For a decorative and extra secure seal, crimp the edges with a fork. Place the assembled pierogi on a lightly floured baking sheet or parchment paper, making sure they don't touch each other. Repeat with the remaining dough and filling.
- Cook (Boil then Optional Pan-Fry):
- Bring a large pot of salted water to a rolling boil.
- Carefully drop the pierogi into the boiling water, a few at a time, to avoid overcrowding the pot. They will sink at first.
- Once they float to the surface (usually after 2-3 minutes), let them cook for another 1-2 minutes until the dough is tender. A visual cue is when they look plump and slightly translucent.
- Using a slotted spoon, remove the cooked pierogi from the water and drain them well.
- Optional Pan-Fry: For extra flavor and a lovely texture, melt 1-2 tablespoons of butter in a large non-stick skillet over medium heat. Add the boiled pierogi and pan-fry for 2-3 minutes per side until golden brown and slightly crispy. This step adds an incredible depth of flavor!
You may also like


Hey there! I’m just someone who seriously loves good food and believes that cooking doesn’t have to be complicated to be amazing. Whether it’s a quick weeknight dinner or a cozy weekend meal, I’m all about sharing easy, tasty recipes that actually work.


