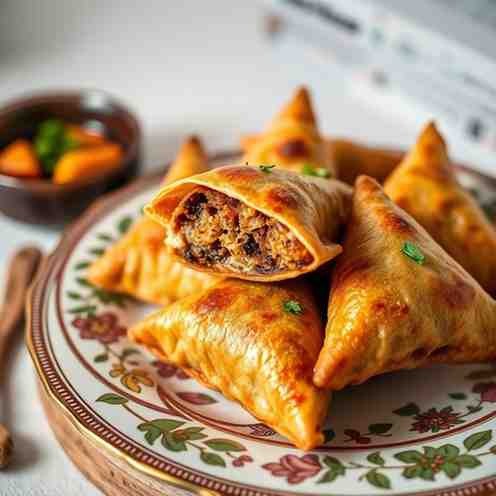
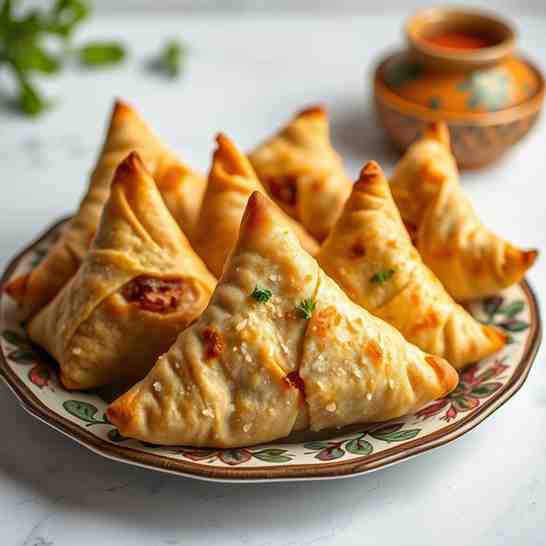
Crispy Homemade Samosas - FlakySamosa Pastry
Crispy Homemade Samosas - FlakySamosa Pastry
- Serves: 4 People
- Prepare Time: 1 hour 30 m
- Cooking Time: 30 minutes
- Calories: -
- Difficulty: Medium
Craving that perfect, crispy, and utterly delicious samosa? You've landed in the right spot! Forget greasy, bland, or soggy versions – we're diving deep into how to make homemade potato & pea samosas that are truly restaurant-quality. This isn't just any samosa recipe; it's your definitive guide to mastering the art of the flaky samosa pastry and a perfectly spiced, comforting filling. We'll walk you through every step, ensuring your samosas come out crisp, golden, and packed with flavor, whether you're a seasoned chef or just starting your Indian cooking adventure. Get ready to impress everyone with these irresistible, authentic treats!
Here’s what you’re getting: Classic Aloo Matar Samosas (potato and pea) with real, flaky pastry and a filling that’s bold but never overpowering.
Equipment: Heavy pot/Dutch oven, thermometer (optional but recommended), spider/slotted spoon, sheet pan.
1. Fat rubbed in right: This is crucial for that signature flaky samosa pastry.
2. Stiff dough + rest: A firm dough that gets proper rest will be easier to work with and fry beautifully.
3. Low-and-slow fry then crisp finish: The secret to thorough cooking without bubbles and achieving that ultimate golden crispness.
Flaky layers: The pastry should have distinct, delicate layers.
Crisp shell without bubbles: A smooth, golden exterior that shatters when bitten.
Well-seasoned filling: A flavorful potato and pea mixture that’s never bland.
Sealed edges: No leaks during frying, keeping all that deliciousness inside!
Ingredients
Directions
- Cook and Season the Potato-Pea Filling
- Boil the Potatoes: Place the cubed potatoes in a pot and cover with cold water by about an inch. Add a pinch of salt. Bring to a boil, then reduce heat and simmer until the potatoes are fork-tender but not waterlogged or falling apart (about 10-15 minutes). Drain well and set aside.
- Bloom the Spices: In a large heavy-bottomed pan or Dutch oven, heat 2 tablespoons of neutral oil over medium heat. Once hot, add the cumin seeds and ajwain seeds (if using). Let them sizzle for 15-30 seconds until fragrant.
- Sauté Aromatics: Add the chopped onion and cook until softened and translucent, about 5-7 minutes. Stir in the grated ginger and chopped green chilies, cooking for another minute until fragrant.
- Add Ground Spices: Reduce the heat to low. Stir in the turmeric powder, coriander powder, garam masala, and hing (if using). Cook for 30 seconds, stirring constantly, to toast the spices and release their aromas.
- Combine Filling: Add the boiled potatoes and thawed peas to the pan. Gently mash some of the potatoes with the back of a spoon to create a chunky texture, leaving some larger pieces intact. Mix everything well to ensure the potatoes and peas are evenly coated with the spices.
- Finish Seasoning: Stir in the amchur powder (if using) and fresh cilantro. Season generously with salt to taste.
- Cool Completely: This step is crucial! Transfer the filling to a shallow dish or baking sheet and let it cool completely to room temperature. A warm filling will make your dough sticky and prone to tearing when shaping, and can also lead to soggy samosas. You can even make this filling a day ahead and store it in the fridge.
- Make the Samosa Dough (Flaky "Breadcrumb" Method)
- Combine Dry Ingredients: In a large mixing bowl, whisk together the all-purpose flour, salt, and ajwain seeds (if using).
- Rub in the Fat: Pour the melted ghee or oil into the flour mixture. Using your fingertips, rub the fat into the flour until the mixture resembles coarse breadcrumbs. The key is to work it until it holds its shape when you squeeze a handful – this indicates the fat is properly distributed, creating those flaky layers later.
- Add Water Gradually: Gradually add the ice-cold water, a tablespoon at a time, mixing with your hands until a stiff, firm dough forms. You might not need all the water, or you might need a tiny bit more. The dough should be firm, not sticky, and not too soft. Over-hydrated dough will be hard to work with and won't yield crispy samosas.
- Rest the Dough: Cover the dough with a damp cloth or plastic wrap and let it rest for at least 30 minutes (or up to 2 hours) at room temperature. This allows the gluten to relax, making the dough easier to roll.
- Brief Knead: After resting, knead the dough briefly for 1-2 minutes until smooth.
- Roll, Shape, and Fill (One Folding Method)
- Prepare Work Surface: Lightly flour your work surface. Keep the remaining dough and rolled-out wrappers covered with a damp cloth to prevent them from drying out.
- Divide Dough: Divide the dough into 8 equal portions. Roll each portion into a smooth ball.
- Roll the Dough: Take one dough ball and roll it into an oval shape, about 6-7 inches long and 4-5 inches wide. The thickness should be uniform, like a thin chapati or tortilla (a simple ruler-free cue: when you gently lift it, it should feel pliable but not tear easily, and you should be able to faintly see your hand through it).
- Cut and Form Cone: Cut the oval in half lengthwise, creating two semi-circles. Take one semi-circle and moisten the straight edge with a little water slurry (1 tsp flour + 1 tsp water, mixed). Bring the two ends of the straight edge together, overlapping slightly, to form a cone. Pinch the seam firmly to seal it completely.
- Portion Filling: Hold the cone in one hand and carefully spoon about 1-2 tablespoons of the cooled potato-pea filling into it. Don't overfill, as this makes sealing difficult and can cause bursting during frying. (Exact guidance: a standard cookie scoop or a well-rounded tablespoon works perfectly).
- Seal Top Edge: Moisten the inside edge of the open cone with water. Bring the edges together, creating a pleat or fold on one side, and press firmly to seal the top. Ensure all edges are tightly sealed to prevent oil from entering or filling from escaping during frying. Repeat with the remaining dough and filling.
- Fry for Crisp, Bubble-Free Samosas
- Heat Oil: In your heavy pot or Dutch oven, heat enough neutral oil for deep frying (at least 2-3 inches deep) over medium-low heat. The ideal temperature for the first stage of frying is around 280-300°F (138-149°C).
- No-Thermometer Test: Drop a tiny piece of dough into the oil. It should slowly rise to the surface with small, gentle bubbles, not immediately sizzle aggressively.
- First Fry (Low & Slow): Carefully lower 3-4 samosas into the oil (don't overcrowd the pan). Fry them at this moderate-low temperature for 10-12 minutes, turning occasionally, until they are light golden brown and have cooked through without blistering. This low temperature ensures the samosa pastry cooks evenly from the inside out and prevents bubbles.
- Second Fry (Crisp Finish): Once light golden, increase the heat to medium-high, bringing the oil temperature up to 350-375°F (175-190°C). Continue frying for another 3-5 minutes, turning frequently, until the samosas are deep golden brown and wonderfully crisp. This higher temperature provides that perfect, shatteringly crisp exterior.
- Drain and Rest: Using a spider or slotted spoon, carefully remove the samosas from the oil. Place them on a wire rack set over a baking sheet to drain any excess oil. Do not place them directly on paper towels only, as this can trap steam and make them soggy.
- Serve: Let them cool for a few minutes before serving. Enjoy your perfectly crispy, homemade samosas
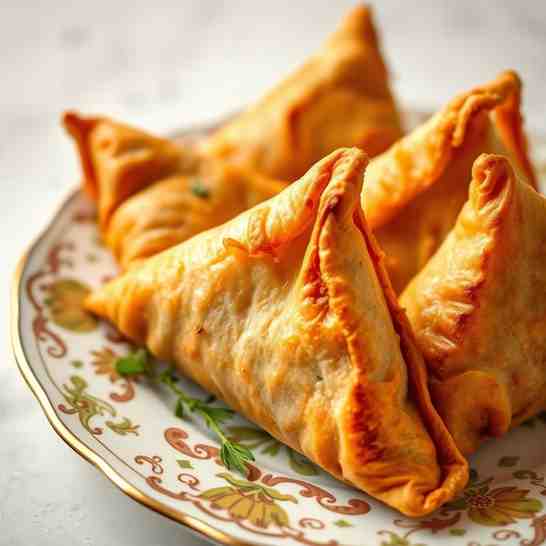
You may also like


Hey there! I’m just someone who seriously loves good food and believes that cooking doesn’t have to be complicated to be amazing. Whether it’s a quick weeknight dinner or a cozy weekend meal, I’m all about sharing easy, tasty recipes that actually work.