Lobster Tail Pastry - Sfogliatella Ricce
Lobster Tail Pastry - Sfogliatella Ricce
- Serves: 12 People
- Prepare Time: 3 hours (ac
- Cooking Time: 20-25 minut
- Calories: -
- Difficulty: Hard
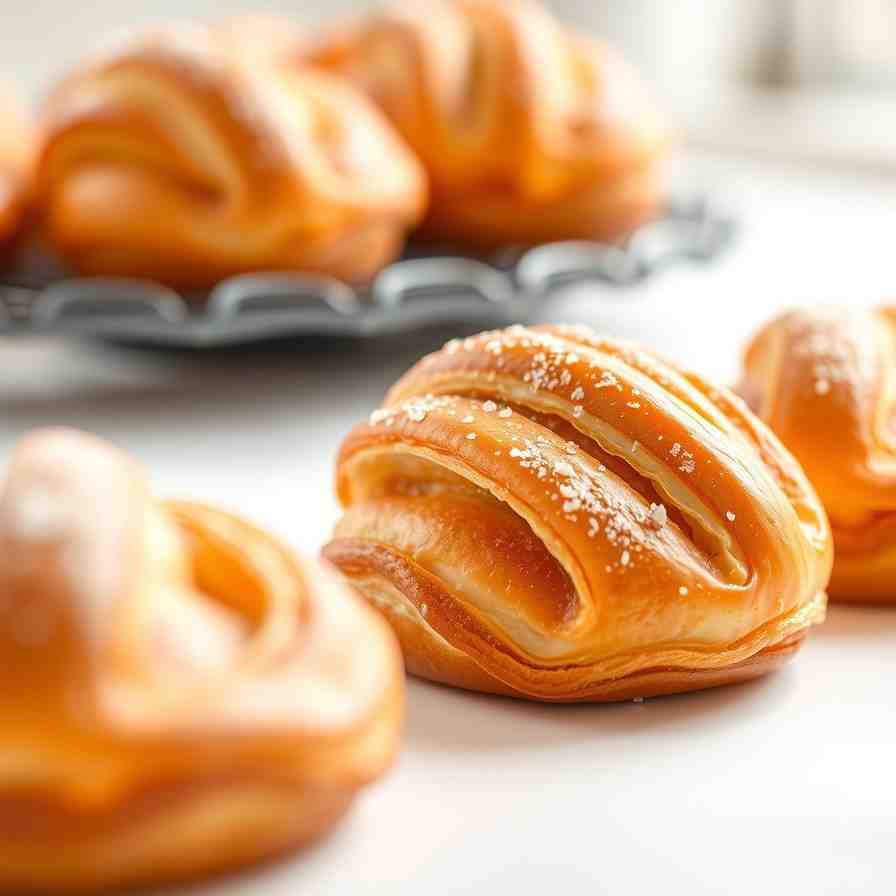
Craving a taste of Naples? Get ready to embark on a truly rewarding baking journey with authentic Sfogliatella Ricce, often lovingly called "lobster tail pastry" for its distinctive shape and many crispy layers. This isn't just any Italian pastry; it's a culinary masterpiece, a symbol of Neapolitan tradition, featuring a delicate, shell-shaped exterior that shatters with every bite, revealing a creamy, aromatic ricotta filling.
Let's be upfront: making authentic Italian cooking like sfogliatella is a baking project. It requires patience, a pasta machine, and some chilling time for the dough to develop its magic. But don't let that intimidate you! We're here to guide you through one clear, foolproof method, complete with crucial checkpoints and troubleshooting tips, ensuring your homemade Neapolitan pastries are nothing short of spectacular. Prepare to impress yourself and everyone lucky enough to try these incredible treats!
Ingredients
Directions
- Drain the Ricotta (Don’t Skip!)This is a non-negotiable step for a perfectly thick, non-watery filling.
- Line a fine-mesh sieve with a double layer of cheesecloth.
- Spoon the whole milk ricotta into the cheesecloth.
- Gather the edges of the cheesecloth and tie them, then place the sieve over a bowl.
- Refrigerate and let it drain overnight (at least 8-12 hours). The longer it drains, the thicker it gets.
- Checkpoint: Your drained ricotta should be thick, almost like a soft cheese, with no visible liquid. This ensures your filling won't make your pastries soggy or leak.
- Make the Semolina-Ricotta Filling
- In a small saucepan, combine the water (or milk) and granulated sugar. Bring to a gentle simmer over medium heat, stirring until the sugar dissolves.
- Slowly whisk in the semolina, stirring constantly to prevent lumps.
- Continue cooking, stirring frequently, until the mixture thickens considerably into a paste, about 5-7 minutes. It should be very thick and pull away from the sides of the pan.
- Remove from heat and transfer the semolina paste to a shallow dish. Cover directly with plastic wrap to prevent a skin from forming and let it cool completely to room temperature. This can take a couple of hours or you can chill it.
- Once cooled, transfer the semolina paste to a large bowl. Add the drained ricotta, egg yolks, vanilla extract, citrus zest, candied peel (if using), and cinnamon.
- Mix everything thoroughly until well combined and smooth. A rubber spatula or a sturdy spoon works best.
- Checkpoint: The filling should be very thick and cohesive, like a firm paste, not runny or pourable. It should hold its shape when scooped.
- Make the Dough (Stiff Like Pasta)This dough is intentionally stiff, which is key for those incredible layers.
- In a large bowl or the bowl of a stand mixer fitted with a dough hook, combine the bread flour, semolina flour, salt, and honey.
- Gradually add the water, starting with 150ml. Mix on low speed (or by hand) until a shaggy dough forms.
- If the dough is too dry and crumbly, add the remaining water a teaspoon at a time until it just comes together. It should be very stiff.
- Increase the mixer speed to medium-low and knead for 10-15 minutes, or knead vigorously by hand on a lightly floured surface for 15-20 minutes. The dough will be tough at first but will become smoother and more elastic with kneading.
- Form the dough into a ball, wrap it tightly in plastic wrap, and refrigerate for at least 2 hours, or preferably overnight. This rest allows the gluten to relax and makes rolling easier.
- Checkpoint: After resting, the dough should be smooth, firm, and elastic. When you press it, it should spring back slowly.
- Roll the Dough Sheets Thin (Pasta Machine)This is where the magic begins! A pasta machine is truly essential here.
- Divide the dough into 3-4 manageable pieces. Keep the pieces you're not working with covered to prevent them from drying out.
- Flatten one piece of dough into a rectangle. Lightly dust with flour if sticky, but try to use as little as possible.
- Pass the dough through the widest setting of your pasta machine. Fold it in half, then pass it through again. Repeat this 3-4 times until the dough is smooth and forms a consistent rectangle.
- Now, without folding, progressively roll the dough through thinner settings, one notch at a time, until you reach the second-to-last or last setting (typically setting 6 or 7 on most machines). The goal is a sheet that is very thin, almost translucent, and long.
- As you roll, the dough will lengthen significantly. Support it with your hands to prevent tearing. Avoid excessive flouring, as this can hinder the layers from sticking later.
- Checkpoint: The dough sheet should be thin enough to bend easily without immediately tearing, but not so fragile that it falls apart. You should be able to see your hand faintly through it. (This is where a step photo showing the thickness would be invaluable).
- Laminate + Build the Cylinder (The Signature Move)This creates the characteristic layers.
- In a small bowl, melt the butter and combine it with the lard/shortening. This is your laminating grease.
- Lay your first thin dough sheet on a clean, lightly greased work surface.
- Brush the entire surface of the dough sheet very lightly and evenly with the melted lard/butter mixture. Don't drench it, just a thin, even coat.
- Starting from one of the short ends, begin to roll the dough sheet very tightly into a cylinder. As you roll, gently stretch the dough widthwise with your free hand. This stretching creates tension and helps build those many, many layers.
- When you reach the end of the first sheet, overlap it slightly with the beginning of your next greased sheet, pressing gently to seal. Continue rolling and stretching, adding subsequent sheets until all your dough is rolled into one long, tight cylinder.
- Trim the ends of the cylinder to make them neat.
- Wrap the entire cylinder tightly in plastic wrap and refrigerate for at least 4 hours, or preferably overnight. This chilling is crucial for the layers to set and for the dough to firm up, making it easier to slice and shape.
- Checkpoint: The cylinder should look tight, even, and compact, with no visible air pockets or loose spots. (A step photo of the greased sheet being rolled, and a cross-section of the finished cylinder, would be very helpful).
- Slice + Shape the ShellsThis step requires a delicate touch.
- Remove the chilled dough cylinder from the fridge. Using a sharp, thin knife, trim about ¼ inch off each end.
- Slice the cylinder into rounds, about ½ inch thick. You should get 12-15 pieces.
- Place a sliced round cut-side up on your work surface. Dip your thumb (or a small, blunt object) in a little oil, then gently press into the center of the spiral.
- Using your thumbs and forefingers, gently but firmly work the dough outwards from the center, fanning out the layers to form a cone or seashell shape. The goal is to create a pocket for the filling while keeping the layers attached at the base. Be careful not to tear the dough. The layers should "open" like a seashell. (A step photo showing the fanning motion and the resulting shell shape is essential here).
- Repeat with the remaining slices. Keep shaped shells covered with plastic wrap to prevent drying.
- Checkpoint: The layers should "open" gracefully like a seashell, creating a cone, but remain fully attached at the back.
- Fill (Thick Filling, Don’t Overstuff)
- Preheat your oven to 400°F (200°C).
- Line a large rimmed baking sheet with parchment paper. This is key for even baking and catching any potential drips.
- Using a pastry bag (or two small spoons), pipe or spoon a generous amount of the thick ricotta filling into the center of each sfogliatella cone.
- Don't overstuff! Leave a small margin at the opening. Gently press the edges of the cone together slightly to enclose the filling, but don't seal it completely like a dumpling. The filling should sit snugly in the cone. (A step photo of a correctly filled vs. overfilled sfogliatella would be invaluable).
- Checkpoint: The filling should sit firmly within the cone without sliding out. The pastry should look plump but not bursting.
- Bake for Crisp Layers (and avoid a smoky oven)
- Arrange the filled sfogliatelle on the prepared rimmed baking sheet, leaving at least 1-2 inches between them for air circulation. Do not overcrowd the pan.
- Bake for 20-25 minutes, or until deeply golden brown and the layers have visibly puffed and separated. The color is important for crispness.
- IMPORTANT CALLOUT: Rimmed Pan & Smoke Prevention! Using a rimmed baking sheet lined with parchment paper is CRITICAL. The lard and butter can sometimes leak out during baking, especially if the layers aren't perfectly sealed or if too much grease was used. A rimmed pan will catch these drips, preventing them from falling to the bottom of your oven and causing smoke. If you see excessive smoking, your oven might be too hot, or you might have used too much grease. Reduce the temperature slightly and ensure your pan is adequately catching any runoff.
- Checkpoint: The pastries should be a deep golden color, feel light and crisp to the touch, and the individual layers should be clearly visible and separated.
- Finish + Serve
- Carefully transfer the baked sfogliatelle to a wire rack to cool slightly.
- Dust generously with powdered sugar while still warm.
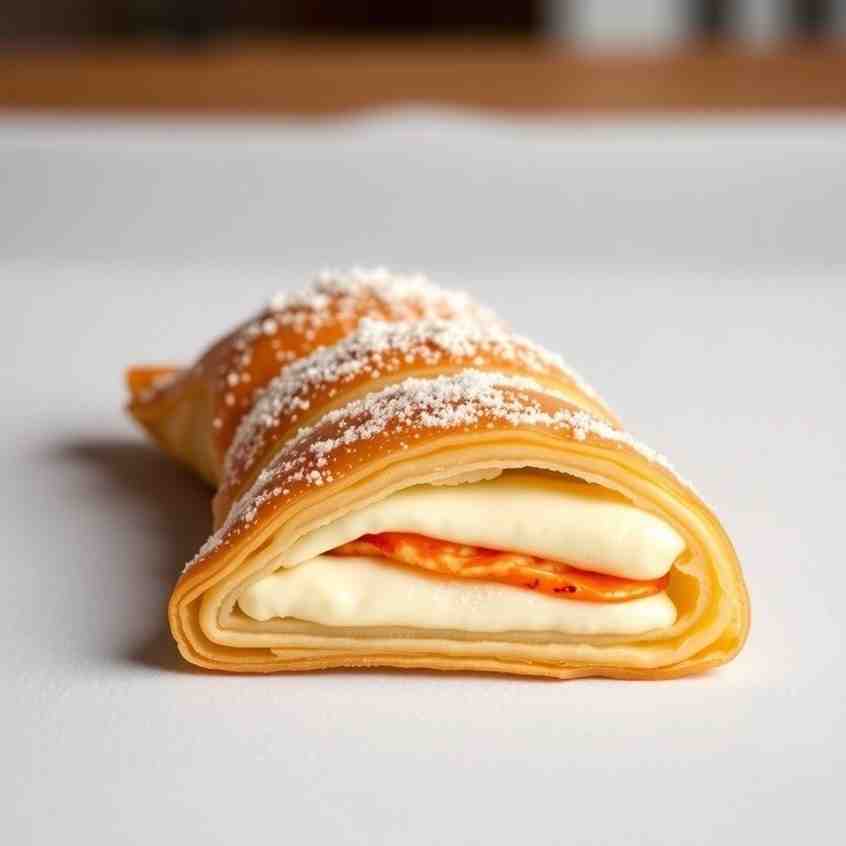
- Sfogliatelle are best served warm, shortly after baking, when their layers are at their crispiest. The contrast of the warm, crisp shell and the creamy, aromatic filling is divine.
- Serving Note: While delicious warm, they retain some crispness at room temperature for a few hours.
Lobster Tail Pastry - Sfogliatella Ricce

- Serves: 12 People
- Prepare Time: 3 hours (ac
- Cooking Time: 20-25 minut
- Calories: -
- Difficulty: Hard
Craving a taste of Naples? Get ready to embark on a truly rewarding baking journey with authentic Sfogliatella Ricce, often lovingly called "lobster tail pastry" for its distinctive shape and many crispy layers. This isn't just any Italian pastry; it's a culinary masterpiece, a symbol of Neapolitan tradition, featuring a delicate, shell-shaped exterior that shatters with every bite, revealing a creamy, aromatic ricotta filling.
Let's be upfront: making authentic Italian cooking like sfogliatella is a baking project. It requires patience, a pasta machine, and some chilling time for the dough to develop its magic. But don't let that intimidate you! We're here to guide you through one clear, foolproof method, complete with crucial checkpoints and troubleshooting tips, ensuring your homemade Neapolitan pastries are nothing short of spectacular. Prepare to impress yourself and everyone lucky enough to try these incredible treats!
Ingredients
Directions
- Drain the Ricotta (Don’t Skip!)This is a non-negotiable step for a perfectly thick, non-watery filling.
- Line a fine-mesh sieve with a double layer of cheesecloth.
- Spoon the whole milk ricotta into the cheesecloth.
- Gather the edges of the cheesecloth and tie them, then place the sieve over a bowl.
- Refrigerate and let it drain overnight (at least 8-12 hours). The longer it drains, the thicker it gets.
- Checkpoint: Your drained ricotta should be thick, almost like a soft cheese, with no visible liquid. This ensures your filling won't make your pastries soggy or leak.
- Make the Semolina-Ricotta Filling
- In a small saucepan, combine the water (or milk) and granulated sugar. Bring to a gentle simmer over medium heat, stirring until the sugar dissolves.
- Slowly whisk in the semolina, stirring constantly to prevent lumps.
- Continue cooking, stirring frequently, until the mixture thickens considerably into a paste, about 5-7 minutes. It should be very thick and pull away from the sides of the pan.
- Remove from heat and transfer the semolina paste to a shallow dish. Cover directly with plastic wrap to prevent a skin from forming and let it cool completely to room temperature. This can take a couple of hours or you can chill it.
- Once cooled, transfer the semolina paste to a large bowl. Add the drained ricotta, egg yolks, vanilla extract, citrus zest, candied peel (if using), and cinnamon.
- Mix everything thoroughly until well combined and smooth. A rubber spatula or a sturdy spoon works best.
- Checkpoint: The filling should be very thick and cohesive, like a firm paste, not runny or pourable. It should hold its shape when scooped.
- Make the Dough (Stiff Like Pasta)This dough is intentionally stiff, which is key for those incredible layers.
- In a large bowl or the bowl of a stand mixer fitted with a dough hook, combine the bread flour, semolina flour, salt, and honey.
- Gradually add the water, starting with 150ml. Mix on low speed (or by hand) until a shaggy dough forms.
- If the dough is too dry and crumbly, add the remaining water a teaspoon at a time until it just comes together. It should be very stiff.
- Increase the mixer speed to medium-low and knead for 10-15 minutes, or knead vigorously by hand on a lightly floured surface for 15-20 minutes. The dough will be tough at first but will become smoother and more elastic with kneading.
- Form the dough into a ball, wrap it tightly in plastic wrap, and refrigerate for at least 2 hours, or preferably overnight. This rest allows the gluten to relax and makes rolling easier.
- Checkpoint: After resting, the dough should be smooth, firm, and elastic. When you press it, it should spring back slowly.
- Roll the Dough Sheets Thin (Pasta Machine)This is where the magic begins! A pasta machine is truly essential here.
- Divide the dough into 3-4 manageable pieces. Keep the pieces you're not working with covered to prevent them from drying out.
- Flatten one piece of dough into a rectangle. Lightly dust with flour if sticky, but try to use as little as possible.
- Pass the dough through the widest setting of your pasta machine. Fold it in half, then pass it through again. Repeat this 3-4 times until the dough is smooth and forms a consistent rectangle.
- Now, without folding, progressively roll the dough through thinner settings, one notch at a time, until you reach the second-to-last or last setting (typically setting 6 or 7 on most machines). The goal is a sheet that is very thin, almost translucent, and long.
- As you roll, the dough will lengthen significantly. Support it with your hands to prevent tearing. Avoid excessive flouring, as this can hinder the layers from sticking later.
- Checkpoint: The dough sheet should be thin enough to bend easily without immediately tearing, but not so fragile that it falls apart. You should be able to see your hand faintly through it. (This is where a step photo showing the thickness would be invaluable).
- Laminate + Build the Cylinder (The Signature Move)This creates the characteristic layers.
- In a small bowl, melt the butter and combine it with the lard/shortening. This is your laminating grease.
- Lay your first thin dough sheet on a clean, lightly greased work surface.
- Brush the entire surface of the dough sheet very lightly and evenly with the melted lard/butter mixture. Don't drench it, just a thin, even coat.
- Starting from one of the short ends, begin to roll the dough sheet very tightly into a cylinder. As you roll, gently stretch the dough widthwise with your free hand. This stretching creates tension and helps build those many, many layers.
- When you reach the end of the first sheet, overlap it slightly with the beginning of your next greased sheet, pressing gently to seal. Continue rolling and stretching, adding subsequent sheets until all your dough is rolled into one long, tight cylinder.
- Trim the ends of the cylinder to make them neat.
- Wrap the entire cylinder tightly in plastic wrap and refrigerate for at least 4 hours, or preferably overnight. This chilling is crucial for the layers to set and for the dough to firm up, making it easier to slice and shape.
- Checkpoint: The cylinder should look tight, even, and compact, with no visible air pockets or loose spots. (A step photo of the greased sheet being rolled, and a cross-section of the finished cylinder, would be very helpful).
- Slice + Shape the ShellsThis step requires a delicate touch.
- Remove the chilled dough cylinder from the fridge. Using a sharp, thin knife, trim about ¼ inch off each end.
- Slice the cylinder into rounds, about ½ inch thick. You should get 12-15 pieces.
- Place a sliced round cut-side up on your work surface. Dip your thumb (or a small, blunt object) in a little oil, then gently press into the center of the spiral.
- Using your thumbs and forefingers, gently but firmly work the dough outwards from the center, fanning out the layers to form a cone or seashell shape. The goal is to create a pocket for the filling while keeping the layers attached at the base. Be careful not to tear the dough. The layers should "open" like a seashell. (A step photo showing the fanning motion and the resulting shell shape is essential here).
- Repeat with the remaining slices. Keep shaped shells covered with plastic wrap to prevent drying.
- Checkpoint: The layers should "open" gracefully like a seashell, creating a cone, but remain fully attached at the back.
- Fill (Thick Filling, Don’t Overstuff)
- Preheat your oven to 400°F (200°C).
- Line a large rimmed baking sheet with parchment paper. This is key for even baking and catching any potential drips.
- Using a pastry bag (or two small spoons), pipe or spoon a generous amount of the thick ricotta filling into the center of each sfogliatella cone.
- Don't overstuff! Leave a small margin at the opening. Gently press the edges of the cone together slightly to enclose the filling, but don't seal it completely like a dumpling. The filling should sit snugly in the cone. (A step photo of a correctly filled vs. overfilled sfogliatella would be invaluable).
- Checkpoint: The filling should sit firmly within the cone without sliding out. The pastry should look plump but not bursting.
- Bake for Crisp Layers (and avoid a smoky oven)
- Arrange the filled sfogliatelle on the prepared rimmed baking sheet, leaving at least 1-2 inches between them for air circulation. Do not overcrowd the pan.
- Bake for 20-25 minutes, or until deeply golden brown and the layers have visibly puffed and separated. The color is important for crispness.
- IMPORTANT CALLOUT: Rimmed Pan & Smoke Prevention! Using a rimmed baking sheet lined with parchment paper is CRITICAL. The lard and butter can sometimes leak out during baking, especially if the layers aren't perfectly sealed or if too much grease was used. A rimmed pan will catch these drips, preventing them from falling to the bottom of your oven and causing smoke. If you see excessive smoking, your oven might be too hot, or you might have used too much grease. Reduce the temperature slightly and ensure your pan is adequately catching any runoff.
- Checkpoint: The pastries should be a deep golden color, feel light and crisp to the touch, and the individual layers should be clearly visible and separated.
- Finish + Serve
- Carefully transfer the baked sfogliatelle to a wire rack to cool slightly.
- Dust generously with powdered sugar while still warm.
- Sfogliatelle are best served warm, shortly after baking, when their layers are at their crispiest. The contrast of the warm, crisp shell and the creamy, aromatic filling is divine.
- Serving Note: While delicious warm, they retain some crispness at room temperature for a few hours.
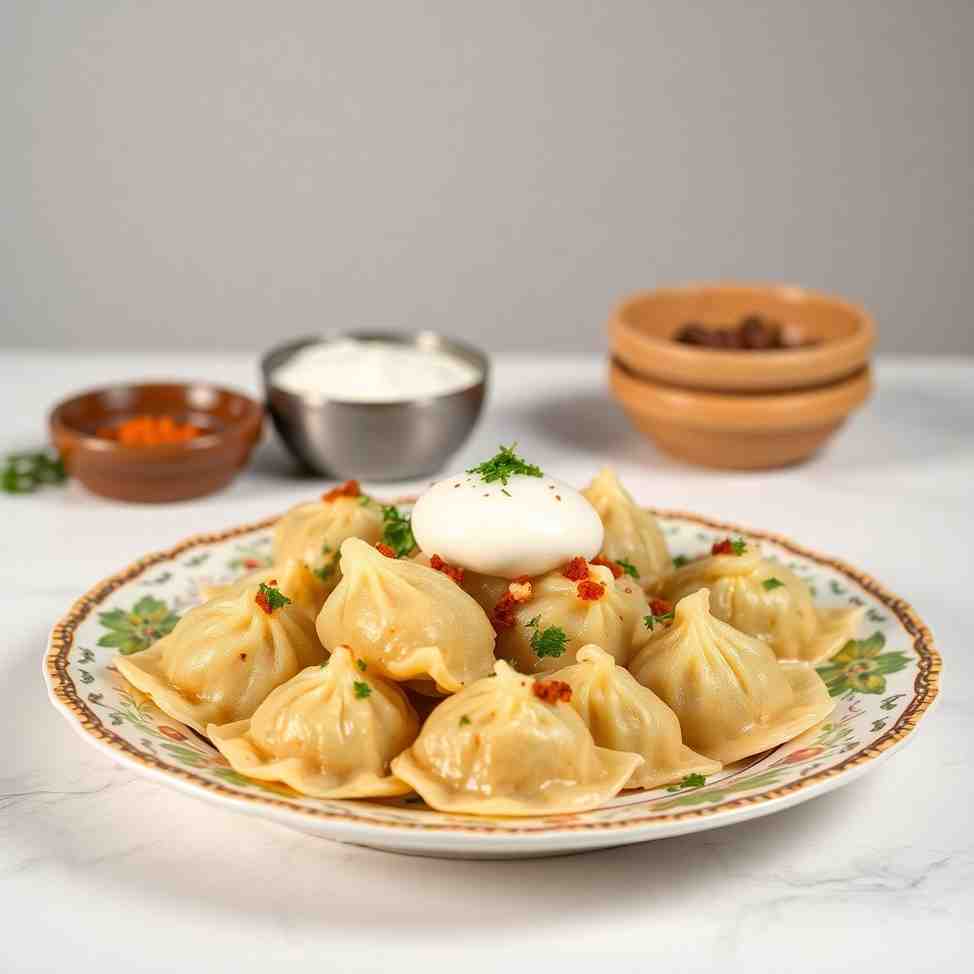
You may also like


Hey there! I’m just someone who seriously loves good food and believes that cooking doesn’t have to be complicated to be amazing. Whether it’s a quick weeknight dinner or a cozy weekend meal, I’m all about sharing easy, tasty recipes that actually work.