Bake Estonian Leib - Sourdough Rye Bread Recipe
Bake Estonian Leib - Sourdough Rye Bread Recipe
- Serves: 12 People
- Prepare Time: 45 minutes
- Cooking Time: 75 minutes
- Calories: -
- Difficulty: Medium
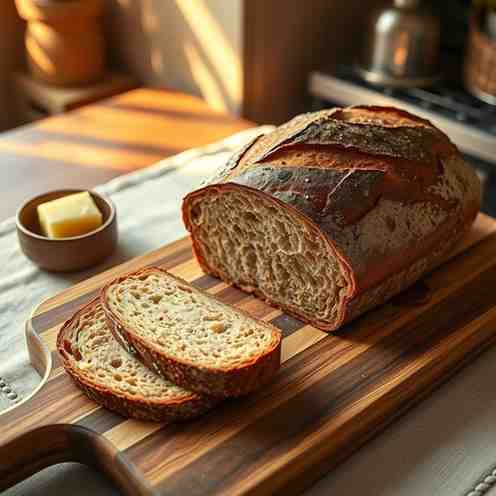
Welcome to the wonderful world of Estonian Leib, a traditional dark rye bread that's a staple in Estonian homes. If you've ever wanted to bake a truly unique, flavorful loaf that stands apart from your typical wheat sourdough, you're in the right place. This isn't your airy, open-crumb sourdough boule; Leib offers a denser, more satisfying texture, a distinct tangy flavor, and incredible sliceability perfect for everything from butter to smoked fish. It's a journey into dark rye bread that’s deeply rewarding.
Good news for all bakers! If you already have a sourdough starter, you're well on your way to enjoying this incredible black rye bread. And if you don't, don't worry! We'll show you exactly how to get a rye flour sourdough starter going or convert an existing one, without turning it into a whole separate project. Get ready to embark on a culinary adventure and master baking your own bread with this authentic recipe to make bread that's truly special.
Estonian Leib, often simply called "black bread" or "dark rye bread" by Americans, is more than just a loaf; it's a cornerstone of Estonian cuisine and culture. What makes it so special? Expect a notably darker color, a delightful tang from the rye flour sourdough starter, and a dense, moist crumb that's incredibly satisfying when sliced thin. Unlike wheat breads, Leib's structure comes from the rye, resulting in a bread that holds its shape beautifully and offers a unique chewy texture. It's a bread that truly nourishes and satisfies.
Before we dive into the delicious details, let's make sure you have the right tools for the job. You don't need much, but a few key items will make your baking experience much smoother:
Loaf Pan: This is essential for Leib. Rye dough doesn't develop the strong gluten network that wheat dough does, so it needs the support of a pan to rise and hold its shape during baking. A standard 9x5-inch (23x13 cm) loaf pan works perfectly.
Kitchen Scale: Strongly recommended! Baking, especially with sourdough and rye, benefits immensely from precise measurements. Grams are your best friend here for consistent results.
Steam Setup: To achieve a beautiful crust, you'll want some steam in your oven. A simple method is to place a pan of hot water on the bottom rack of your oven, or use a covered pan (like a Dutch oven or a pan with a lid) for the initial baking phase.
Baking sourdough, especially rye, is a journey, not a sprint. This timeline will give you an idea of the rhythm of making Estonian Leib. Remember, these times are approximate and will shift based on your kitchen's temperature—warmer kitchens speed things up, cooler kitchens slow them down.
Day 1 (Morning/Afternoon):
Feed your starter (or begin conversion/build process).
Prepare the preferment/sponge.
Day 1 (Evening/Overnight):
Preferment ferments at room temperature.
Day 2 (Morning):
Mix the final dough.
Bulk fermentation begins.
Day 2 (Afternoon):
Shape the dough and place it in the loaf pan for final proofing.
Day 2 (Evening):
Bake the bread.
CRUCIAL: Cool completely for several hours, ideally overnight.
Ingredients
Directions
- Feed the Starter (or Prep It for Leib Timing):
- If you have an established rye starter: Feed it 4-12 hours before you plan to make your preferment. It should be bubbly, active, and have roughly doubled in size.
- If converting a wheat starter: Follow the feeding schedule described in the "Rye Sourdough Starter" section above until it's active and rye-dominant.
- If building from scratch: Ensure your new rye starter is consistently active (bubbly, doubling within 8-12 hours after feeding) before proceeding.
- Make the Leib Preferment / Sponge (Overnight Fermentation):
- In a large mixing bowl, combine the active rye sourdough starter, 100g dark rye flour, and 100g warm water.
- Mix thoroughly with a spoon or your hands until well combined and no dry spots remain. It will be a thick, sticky paste.
- Cover the bowl loosely with plastic wrap or a damp towel and let it ferment at room temperature (68-75°F / 20-24°C) for 12-16 hours, or until it looks bubbly on the surface and smells pleasantly tangy and fermented. It might not double dramatically, but it should show clear signs of activity.
- Mix the Final Dough (Rye Handling Rules):
- To the preferment in the bowl, add the remaining 200g dark rye flour, 50g whole rye flour, salt, molasses (or syrup), and 150g warm water. If using optional add-ins, incorporate them now.
- Mix everything together thoroughly.
- Crucially, rye dough will not develop a "windowpane" like wheat dough. It will be very sticky and dense. Mix until all ingredients are fully incorporated and you have a uniform, very thick, sticky batter-like dough. You can use your hands, a sturdy spoon, or a stand mixer with a dough hook. Resist the urge to add more flour.
- Bulk Fermentation:
- Cover the bowl again and let the dough bulk ferment at room temperature for 2-4 hours.
- What "done" looks like for rye: The dough will visibly expand somewhat, become slightly lighter, and show a few bubbles on the surface. It will not double in size like wheat dough. It should feel slightly softer and smell more fermented.
- Pan Shaping & Proof:
- Lightly grease your loaf pan (9x5-inch) with butter or oil, then dust generously with rye flour or line it completely with parchment paper (this is highly recommended to prevent sticking).
- With wet hands (this helps immensely with sticky rye dough), gently transfer the dough into the prepared loaf pan.
- Smooth the top of the dough with wet hands or a wet spatula. You can dock the top with a fork a few times to prevent large air pockets, or score it with a sharp knife if you wish for a decorative pattern.
- Cover the pan loosely with plastic wrap or a damp towel and let it proof at room temperature for 1-3 hours. The dough should visibly puff up, filling the pan a bit more, and feel soft to the touch. It will not double significantly.
- Bake with Steam:
- Preheat your oven to 450°F (230°C) with a baking stone or steel if you have one, and a shallow pan of water on the bottom rack (for steam), or preheat your covered baking vessel (e.g., Dutch oven) if using that method.
- Once preheated, carefully place the loaf pan into the oven. If using the open pan with water method, immediately reduce the temperature to 400°F (200°C).
- Bake for 30 minutes with steam (or covered if using a Dutch oven).
- After 30 minutes, remove the steam pan (or lid) and continue baking for another 45-50 minutes, or until the crust is a deep brown and the internal temperature reaches 200-210°F (93-99°C) with an instant-read thermometer.
- Cool Completely (Non-Negotiable for Rye):
- This is the MOST IMPORTANT step for rye bread. Immediately after baking, remove the loaf from the pan and place it on a wire rack to cool.
- DO NOT slice into the bread until it has cooled completely for at least 4-8 hours, ideally overnight. Rye flour contains pentosans, which need time to fully gelatinize and set. Slicing early will result in a gummy, sticky, and unpleasant texture. Patience is key for a perfect Leib!
Bake Estonian Leib - Sourdough Rye Bread Recipe
- Serves: 12 People
- Prepare Time: 45 minutes
- Cooking Time: 75 minutes
- Calories: -
- Difficulty: Medium
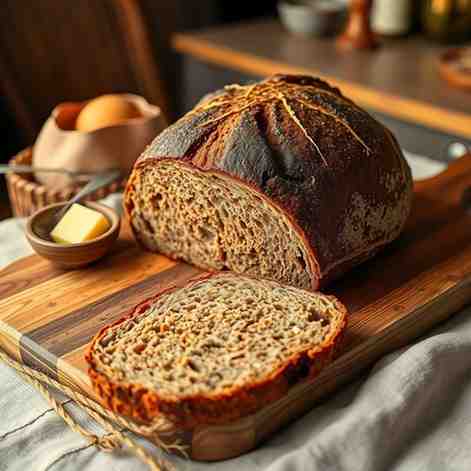
Welcome to the wonderful world of Estonian Leib, a traditional dark rye bread that's a staple in Estonian homes. If you've ever wanted to bake a truly unique, flavorful loaf that stands apart from your typical wheat sourdough, you're in the right place. This isn't your airy, open-crumb sourdough boule; Leib offers a denser, more satisfying texture, a distinct tangy flavor, and incredible sliceability perfect for everything from butter to smoked fish. It's a journey into dark rye bread that’s deeply rewarding.
Good news for all bakers! If you already have a sourdough starter, you're well on your way to enjoying this incredible black rye bread. And if you don't, don't worry! We'll show you exactly how to get a rye flour sourdough starter going or convert an existing one, without turning it into a whole separate project. Get ready to embark on a culinary adventure and master baking your own bread with this authentic recipe to make bread that's truly special.
Estonian Leib, often simply called "black bread" or "dark rye bread" by Americans, is more than just a loaf; it's a cornerstone of Estonian cuisine and culture. What makes it so special? Expect a notably darker color, a delightful tang from the rye flour sourdough starter, and a dense, moist crumb that's incredibly satisfying when sliced thin. Unlike wheat breads, Leib's structure comes from the rye, resulting in a bread that holds its shape beautifully and offers a unique chewy texture. It's a bread that truly nourishes and satisfies.
Before we dive into the delicious details, let's make sure you have the right tools for the job. You don't need much, but a few key items will make your baking experience much smoother:
Loaf Pan: This is essential for Leib. Rye dough doesn't develop the strong gluten network that wheat dough does, so it needs the support of a pan to rise and hold its shape during baking. A standard 9x5-inch (23x13 cm) loaf pan works perfectly.
Kitchen Scale: Strongly recommended! Baking, especially with sourdough and rye, benefits immensely from precise measurements. Grams are your best friend here for consistent results.
Steam Setup: To achieve a beautiful crust, you'll want some steam in your oven. A simple method is to place a pan of hot water on the bottom rack of your oven, or use a covered pan (like a Dutch oven or a pan with a lid) for the initial baking phase.
Baking sourdough, especially rye, is a journey, not a sprint. This timeline will give you an idea of the rhythm of making Estonian Leib. Remember, these times are approximate and will shift based on your kitchen's temperature—warmer kitchens speed things up, cooler kitchens slow them down.
Day 1 (Morning/Afternoon):
Feed your starter (or begin conversion/build process).
Prepare the preferment/sponge.
Day 1 (Evening/Overnight):
Preferment ferments at room temperature.
Day 2 (Morning):
Mix the final dough.
Bulk fermentation begins.
Day 2 (Afternoon):
Shape the dough and place it in the loaf pan for final proofing.
Day 2 (Evening):
Bake the bread.
CRUCIAL: Cool completely for several hours, ideally overnight.
Ingredients
Directions
- Feed the Starter (or Prep It for Leib Timing):
- If you have an established rye starter: Feed it 4-12 hours before you plan to make your preferment. It should be bubbly, active, and have roughly doubled in size.
- If converting a wheat starter: Follow the feeding schedule described in the "Rye Sourdough Starter" section above until it's active and rye-dominant.
- If building from scratch: Ensure your new rye starter is consistently active (bubbly, doubling within 8-12 hours after feeding) before proceeding.
- Make the Leib Preferment / Sponge (Overnight Fermentation):
- In a large mixing bowl, combine the active rye sourdough starter, 100g dark rye flour, and 100g warm water.
- Mix thoroughly with a spoon or your hands until well combined and no dry spots remain. It will be a thick, sticky paste.
- Cover the bowl loosely with plastic wrap or a damp towel and let it ferment at room temperature (68-75°F / 20-24°C) for 12-16 hours, or until it looks bubbly on the surface and smells pleasantly tangy and fermented. It might not double dramatically, but it should show clear signs of activity.
- Mix the Final Dough (Rye Handling Rules):
- To the preferment in the bowl, add the remaining 200g dark rye flour, 50g whole rye flour, salt, molasses (or syrup), and 150g warm water. If using optional add-ins, incorporate them now.
- Mix everything together thoroughly.
- Crucially, rye dough will not develop a "windowpane" like wheat dough. It will be very sticky and dense. Mix until all ingredients are fully incorporated and you have a uniform, very thick, sticky batter-like dough. You can use your hands, a sturdy spoon, or a stand mixer with a dough hook. Resist the urge to add more flour.
- Bulk Fermentation:
- Cover the bowl again and let the dough bulk ferment at room temperature for 2-4 hours.
- What "done" looks like for rye: The dough will visibly expand somewhat, become slightly lighter, and show a few bubbles on the surface. It will not double in size like wheat dough. It should feel slightly softer and smell more fermented.
- Pan Shaping & Proof:
- Lightly grease your loaf pan (9x5-inch) with butter or oil, then dust generously with rye flour or line it completely with parchment paper (this is highly recommended to prevent sticking).
- With wet hands (this helps immensely with sticky rye dough), gently transfer the dough into the prepared loaf pan.
- Smooth the top of the dough with wet hands or a wet spatula. You can dock the top with a fork a few times to prevent large air pockets, or score it with a sharp knife if you wish for a decorative pattern.
- Cover the pan loosely with plastic wrap or a damp towel and let it proof at room temperature for 1-3 hours. The dough should visibly puff up, filling the pan a bit more, and feel soft to the touch. It will not double significantly.
- Bake with Steam:
- Preheat your oven to 450°F (230°C) with a baking stone or steel if you have one, and a shallow pan of water on the bottom rack (for steam), or preheat your covered baking vessel (e.g., Dutch oven) if using that method.
- Once preheated, carefully place the loaf pan into the oven. If using the open pan with water method, immediately reduce the temperature to 400°F (200°C).
- Bake for 30 minutes with steam (or covered if using a Dutch oven).
- After 30 minutes, remove the steam pan (or lid) and continue baking for another 45-50 minutes, or until the crust is a deep brown and the internal temperature reaches 200-210°F (93-99°C) with an instant-read thermometer.
- Cool Completely (Non-Negotiable for Rye):
- This is the MOST IMPORTANT step for rye bread. Immediately after baking, remove the loaf from the pan and place it on a wire rack to cool.
- DO NOT slice into the bread until it has cooled completely for at least 4-8 hours, ideally overnight. Rye flour contains pentosans, which need time to fully gelatinize and set. Slicing early will result in a gummy, sticky, and unpleasant texture. Patience is key for a perfect Leib!
You may also like


Hey there! I’m just someone who seriously loves good food and believes that cooking doesn’t have to be complicated to be amazing. Whether it’s a quick weeknight dinner or a cozy weekend meal, I’m all about sharing easy, tasty recipes that actually work.